


25
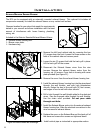
Installation
THERMOSTAT INSTALLATION:
If the unit has been placed in the HI / LOW mode, the unit will be taken to a low or idle setting when the
thermostat is not calling for heat. When the thermostat calls for heat, the unit will go to the setting that
is displayed on the control board Heat Indicator. If the heating load is not great enough when the stove
is on low, the high limit switch will turn the stove off and the switch will have to be manually reset. To
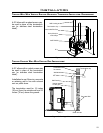
reset the high limit switch, remove the right cabinet side. The switch is found behind the control panel.
Avoid setting off the high limit switch.
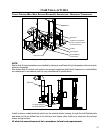
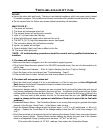
OPTIONAL SLIDER/DAMPER INSTALLATION:
A) HI / LOW:
When the jumper is placed
on only one of the J9 pins,
then the control board is in a
HI / LOW mode of thermostat
operation (factory setting).
B) ON / OFF:
If both pins of J9 are jumped
(covered), the control board
is in an ON / OFF mode of
thermostat operation.
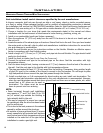
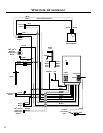
Remove jumper wire and install
thermostat wires here
Figure 26: Circuit Board.
This control board can be placed into two
different modes: When the jumper J9 is
not jumped then the control board is in a
HI / LOW mode operation. If the control
board is placed with J9 jumped then the
control board is in a ON / OFF mode of
operation. In the ON /OFF thermostat
mode, the unit will shut OFF when the
thermostat is not calling for heat. When
the thermostat calls for heat, the unit will
go through an ignition sequence once
again and relight.
1. Install the wall thermostat in a location
that is not to close too the unit but will
effectively heat the desired area.
2. Install a 12 or 24 Volt Thermostat using
an 18 x 2 gauge wire from the unit to
the thermostat.
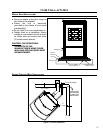
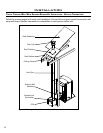
Slider damper
rod and knob
7
/16" Nut
7
/16" Clinching Nut
Slider damper plate
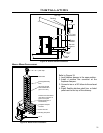
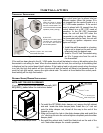
1. To install the OPTIONAL slider damper rod, remove the left cabinet
side and locate the slider damper plate. Install the
7
/16” inch nut
onto the slider damper rod, thread all the way to the end of the
threads on rod.
2. Slide rod through the hole in the slider damper plate and install the
7
/16” clinching nut onto the rod and tighten completely onto the slider
damper plate.
3. Re-install the cabinet side. Install the black knob on the end of the
rod. Check slider damper for smooth operation.
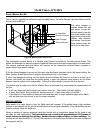
Slider/
Damper
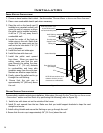
Knob
NOTE: NOT FOR USE IN GERMANY
If you wish to adjust the slider damper externally (NOT
REQUIRED), please follow the instructions below.
Figure 27: Slider/Damper Assembly.
Figure 28: Slider/Damper Knob.