


21
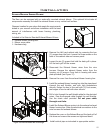
Installation
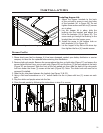
1
2
3
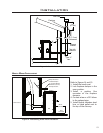
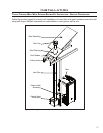
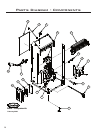
Figure 30: Installing Hopper Lid.
Installing Hopper Lid:
1. Attach the hopper brackets to the back
of the unit with a screw in each top holes
of the brackets (#1 in Figure 30). Do not
tighten these screws until all six (6) screws
are in place.
2. Lay the hopper lid in place, slide the
bushing into the bracket, and attach the
lid to the brackets (#2 in Figure 30). The
screw must go through the bushing in the
bracket then into the hopper cover.
3. Install the screw in the bottom hole on
both brackets (#3 in Figure 30).
4. Let the hopper lid lay at on the stove top
then tighten the four (4) bracket screws.
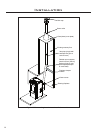
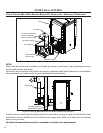
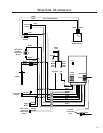
OPTIONAL FAN KIT:
1. Please check your fan for damage, if it has been damaged, contact your dealer, distributor or courier
company to have the fan replaced before starting this installation.
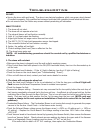
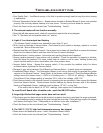
2. Remove both cab panels. Remove the screws above the door on both sides (Figure 27) and ensure the
screws behind the ash box, one on each side (Figure 28) and the three (3) on each panels at the back
(Figure 30) are loosened. Slide the front of the cab panels out then slide the back of the cab panels
out from under the three (3) screws at the back (Figure 29). Note: The slider knob will need to be
removed if installed.
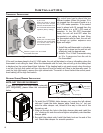
3. Slide the fan into place between the bracket (see Figure 31 & 32).
4. Using a at head screwdriver or a ” socket fasten the fan in place with two (2) screws on each
side.
5. Plug the white and purple wires into the fan.
6. Close the cab panels by following the instructions in step 2 in reverse.
Figure 31: Behind the right c
ab panels.
Figure 32: Behind the left cab panels.