


Page | 33
• Loosen the five (5) 5/16” self-drilling screws which hold the exhaust blower
to the exhaust blower tube. The lower screws are most easily accessed
through the circular cutouts in the stove body. A 12” socket extension will
likely be necessary to reach all of the screws.
• Lift the exhaust blower up and out of the stove. The gasket which seals the
exhaust blower to the exhaust blower tube is fragile, so take extra care when
removing the blower. Even when being careful, though, it is easy to tear this
fragile gasket, and since an airtight seal is crucial here, it is best to replace
this gasket (Part # - PU-CBG) every time the exhaust blower is removed.
• With the exhaust blower removed, use a utility vacuum to remove any ash
accumulation in the exhaust blower tube.
• Use a soft paint brush and carefully remove any ash accumulation from the
inside of the exhaust blower, and from the exhaust blower fan blade.
• Inspect the exhaust blower motor for dust accumulation and carefully
remove it, ensuring that all air cooling holes into the motor are open and free
of dust deposits.
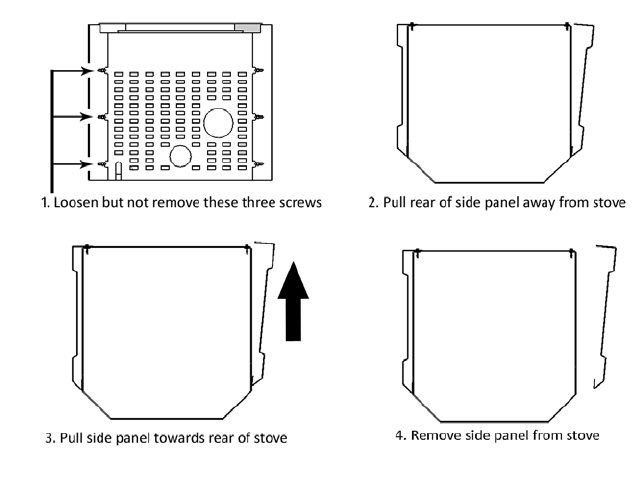
• Install the blower and side panel in the reverse order as described above.
Remember to check the condition of the exhaust blower gasket AND
remember to reconnect the thermal sensor to the top of the exhaust blower
outlet before reinstalling the side panel.