Page 12 R-2688
1. Spark electrode does not produce spark.
a. Spark electrode broken - replace.
b. Ignitor wire may not be attached to spark electrode -
attach.
c. Ignitor wire damaged - replace.
d. Piezo ignitor defective - replace.
2. Spark electrode produces spark but pilot does not light.
a. No gas to heater - turn on gas.
b. PILOT position not properly aligned - turn gas control
knob to PILOT position and depress.
c. Pilot is blocked from spider web or dirt - clean pilot, see
Page 11.
3. Pilot flame does not stay "ON" when control knob is
released.
a. Control knob in PILOT position not completely
depressed or held in long enough.
b. INTERLOCK latching device is operative - see "Lighting
Instructions," Page 10, Step 10.
c. Thermocouple not tightened into gas control - tighten
thermocouple.
d. Pilot flame not surrounding thermocouple - clean pilot,
see Page 11. Inlet gas pressure too low, contact gas
supplier.
e. Thermocouple defective - replace.
f. Gas control defective - replace.
4. Main burner does not ignite.
a. Main burner orifice is blocked - clean, see "Appliance
Maintenance," above. Inlet gas pressure too low, contact
gas supplier.
5. Heater keeps shutting "OFF" during normal operation.
a. Pilot is blocked - clean pilot, see Page 11.
b. Inlet gas pressure too low, contact gas supplier
APPLIANCE MAINTENANCE
To Remove Main Burner
1. Disconnect pilot assembly from main burner.
2. Disconnect outlet tubing from orifice fitting.
3. Disconnect orifice fitting from main burner.
4. Remove #8 x 1/4" (6mm) screw from burner mounting bracket.
5. Remove main burner from combustion chamber.
6. Check for gas leaks at all gas connections after main burner
has been replaced into combustion chamber.
To Adjust Orifice Fitting
1. Disconnect outlet tubing from orifice fitting.
2. Screw orifice fitting toward or away from main burner.
3. Connect outlet tubing onto orifice fitting.
4. Check for gas leaks.
To Remove Main Burner Orifice
1. Grasp the orifice fitting with a 5/8" (16mm) open end wrench.
2. Use 3/8" (10mm) open end wrench to remove main burner
orifice from orifice fitting, turn counterclockwise.
3. Check for gas leaks after main burner orifice has been re-
placed into orifice fitting.
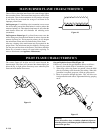
Piezo Pilot Ignitor Instructions
Depressing the ignitor button completely causes a spark to occur
at the pilot.
To light the pilot, it is important that the electrode be 1/8" (3mm)
from the pilot. The spark must occur at the point the pilot flame
hits the thermocouple.
On a new installation with air in the gas line, it is suggested that
a match be used. The match will light the pilot faster than the
piezo under this condition.
THERMOSTAT OPERATION
To ignite main burner, rotate gas control knob counterclockwise
toward HI setting. To shut down main burner, rotate gas control
knob clockwise toward LO setting.
The gas control modulates from a minimum input of 14,000 BTU
/HR (4.1KW/H) (LO setting) to a maximum input of 25,000
BTU/HR (7.3KW/H) (HI setting). The hydraulic thermostat bulb
which is located at the casing assembly bottom adjusts the main
burner flame between minimum input and maximum input.
Note: When the hydraulic thermostat bulb is "satisfied" the main
burner flame will shut "OFF" with the pilot flame remaining
"ON".
The LO and HI setting has temperature range of approximately
55°F (12.78°C) to 90°F (32.22°C), respectively. This is the
temperature at the hydraulic thermostat bulb not the room tem-
perature. The owner is advised to determine the particular heat
setting that is desired for comfort, as heating requirements are
different for every owner.
Attention: If the owner does not want the main burner to ignite
and turns the gas control knob to the Lo setting, the main burner
will still ignite if the temperature at the hydraulic thermostat bulb
drops to 55°F (12.78°C) .
If no heat is desired, turn the gas control knob to the PILOT
position.
TROUBLESHOOTING
SYMPTOMS - POSSIBLE CAUSES AND CORRECTIONS


