


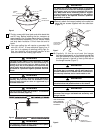
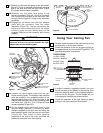
7
To avoid possible fire or shock, make sure that the
electrical wires are not pinched between the light
fixture assembly and the mounting plate.
WARNING
!
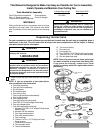
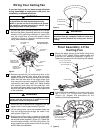
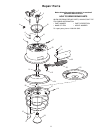
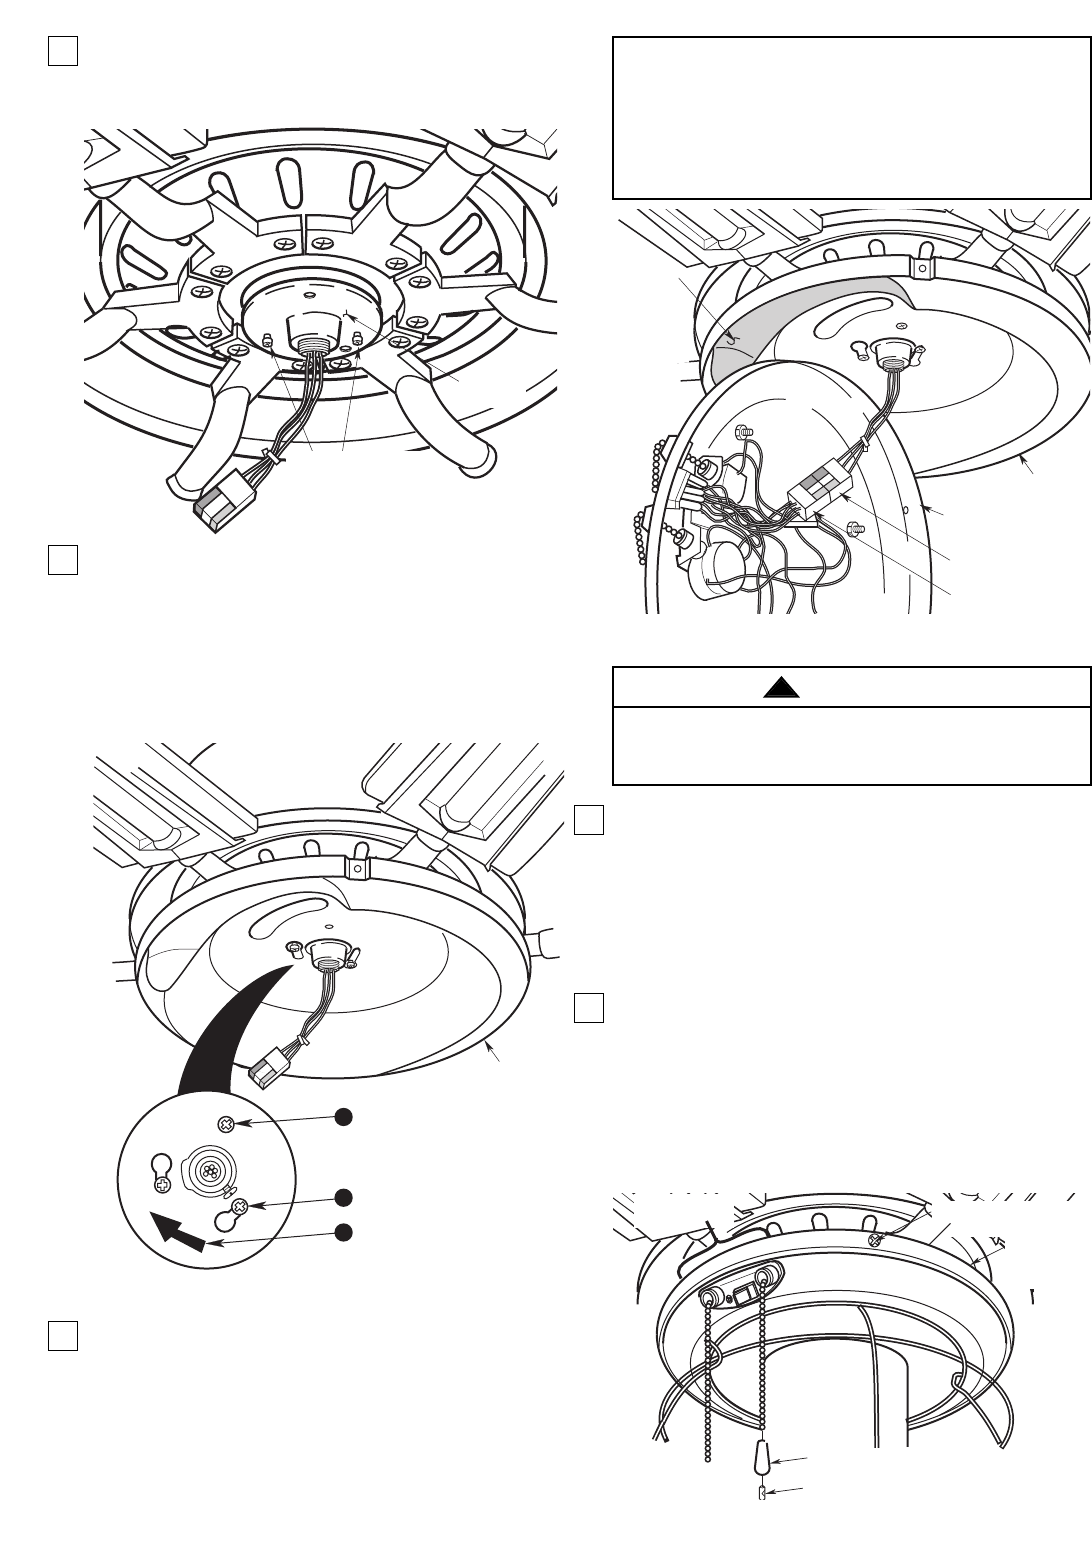
3. Partially install two 3/16-24 x 1/4” Phillips round
head screws in two of the tapped holes in the
coupling adapter (Figure 13). Leave two or three
threads untightened.
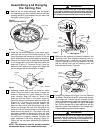
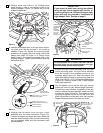
4. Position the keyhole slots in the light fixture mount-
ing plate over the two screws in the coupling
adapter (Figure 14). Rotate the mounting plate
clockwise to engage the slots under the screw
heads, then install a 3/16-24 x 1/4” Phillips round
head screw in the remaining tapped hole in the
coupling adapter. Tighten the two screws securing
the keyhole slots.
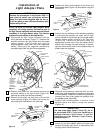
5. Engage the connector from the light fixture
assembly with the motor connector (Figure 15).
The two connectors are keyed and color-coded and
must be mated correctly (color-to-color) before they
can be engaged. Make sure the connector latch
closes properly.
COUPLING
ADAPTER
3/16-24 x 1/4" PHILLIPS
ROUND HEAD SCREWS (2)
Figure 13
LIGHT FIXTURE
MOUNTING PLATE
LIGHT FIXTURE
ASSEMBLY
MOTOR CONNECTOR
LIGHT FIXTURE
CONNECTOR
RECESSED
PORTION OF
MOUNTING
PLATE
PROVIDES
CLEARANCE
FOR LIGHT
FIXTURE
SWITCHES
Figure 15
LIGHT FIXTURE
MOUNTING PLATE
INSTALL 3/16-24 x 1/4" PHILLIPS
ROUND HEAD SCREW
TIGHTEN TWO 3/16-24 x 1/4"
PHILLIPS ROUND HEAD SCREWS
ROTATE MOUNTING
PLATE CLOCKWISE
2
3
1
Figure 14
6. Position the light fixture assembly over the light
fixture mounting plate. The light fixture switches
must be located in the recessed portion of the
mounting plate (Figure 15). Align the holes in the
light fixture with the holes in the mounting plate and
install four 5/32-32 x 5/16” Phillips flat head screws
(Figure 16). Carefully screw in the 75-watt halogen
flood lamp (supplied).
7. Cut the speed control switch and light control
switch pull chains to your desired length (optional).
Connect the wood pendant (supplied) to one pull
chain by sliding the wood pendant (small hole first)
onto the pull chain (Figure 16). Then attach a chain
coupling (supplied) to the end of the chain and
allow the pendant to slide down over the coupling.
Repeat this procedure for the other pull chain.
5/32-32 x 5/16" PHILLIPS
FLAT HEAD SCREW (4)
LIGHT FIXTURE
SWITCHES
LIGHT
FIXTURE
ASSEMBLY
WOOD PENDANT
CHAIN COUPLING
Figure 16
IMPORTANT
If you intend to install your ceiling fan without
using the light fixture supplied with the fan, or
if you are going to use a different Emerson light
fixture with your fan, proceed to “Installation of
Light Adapter Plate” Section on page 8.