


8
If there are frequent nuisance/false alarms it may be neces-
sary to re-locate the device away from the source of the
fumes.
If you installed the smoke alarms as received and did not pro-
gram them, you may be receiving an alarm signal from a
neighbouring system. This can be easy rectified by house
coding your alarms (see section 6.3).
Pressing the test & hush button on the smoke alarm sensing
fire (i.e. with the red light flashing rapidly) will silence the
alarm for 10 minutes. (Pressing the hush button on the option-
al Ei 410 Remote Control acts in the same way).
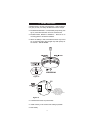
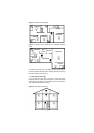
5. INSTALLING YOUR SMOKE ALARMS
1. Select a location complying with the above advice.
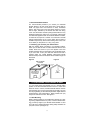
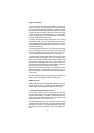
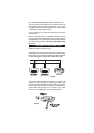
2. Remove the mounting plate from the Smoke Alarm by
releasing the tamperproof catch with a small screwdriver as
shown in figure 1a and sliding the alarm from the mounting
plate.
3. Place the base on the ceiling/wall exactly where you want
to mount the unit. With a pencil, mark the location of the two
screw holes.
4. Taking care to avoid any electrical wiring in the ceiling, drill
holes through the centres of the marked locations. Push the
plastic screw anchors provided into the drilled holes. Screw in
firmly.
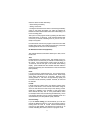
5. Connect the battery to the battery snaps as shown in figure
1b (models Ei405 & Ei405C only).
6. Carefully line up the unit on the base and slide on. (This
connects the batteries in the Ei 405C, TY, TYC units.
Install all the other alarms similarly.
6. LOOKING AFTER YOUR SMOKE ALARMS
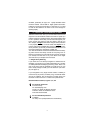
6.1 Manually Testing your Smoke Alarm
It is recommended that you test your Smoke Alarm at least
weekly to be sure the unit is working. It will also help you and
your family to become familiar with the sound of the Alarm.
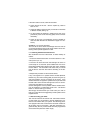
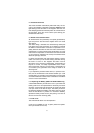
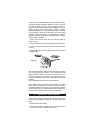
When you press the test button it
simulates the effect of smoke during
a real fire. So, there is no need to
test the Alarm with smoke.
Press and hold the Test Button until
the alarm sounds (Figure 7). The
alarm will stop sounding shortly
after the button is released.
Figure 7