Installation
7
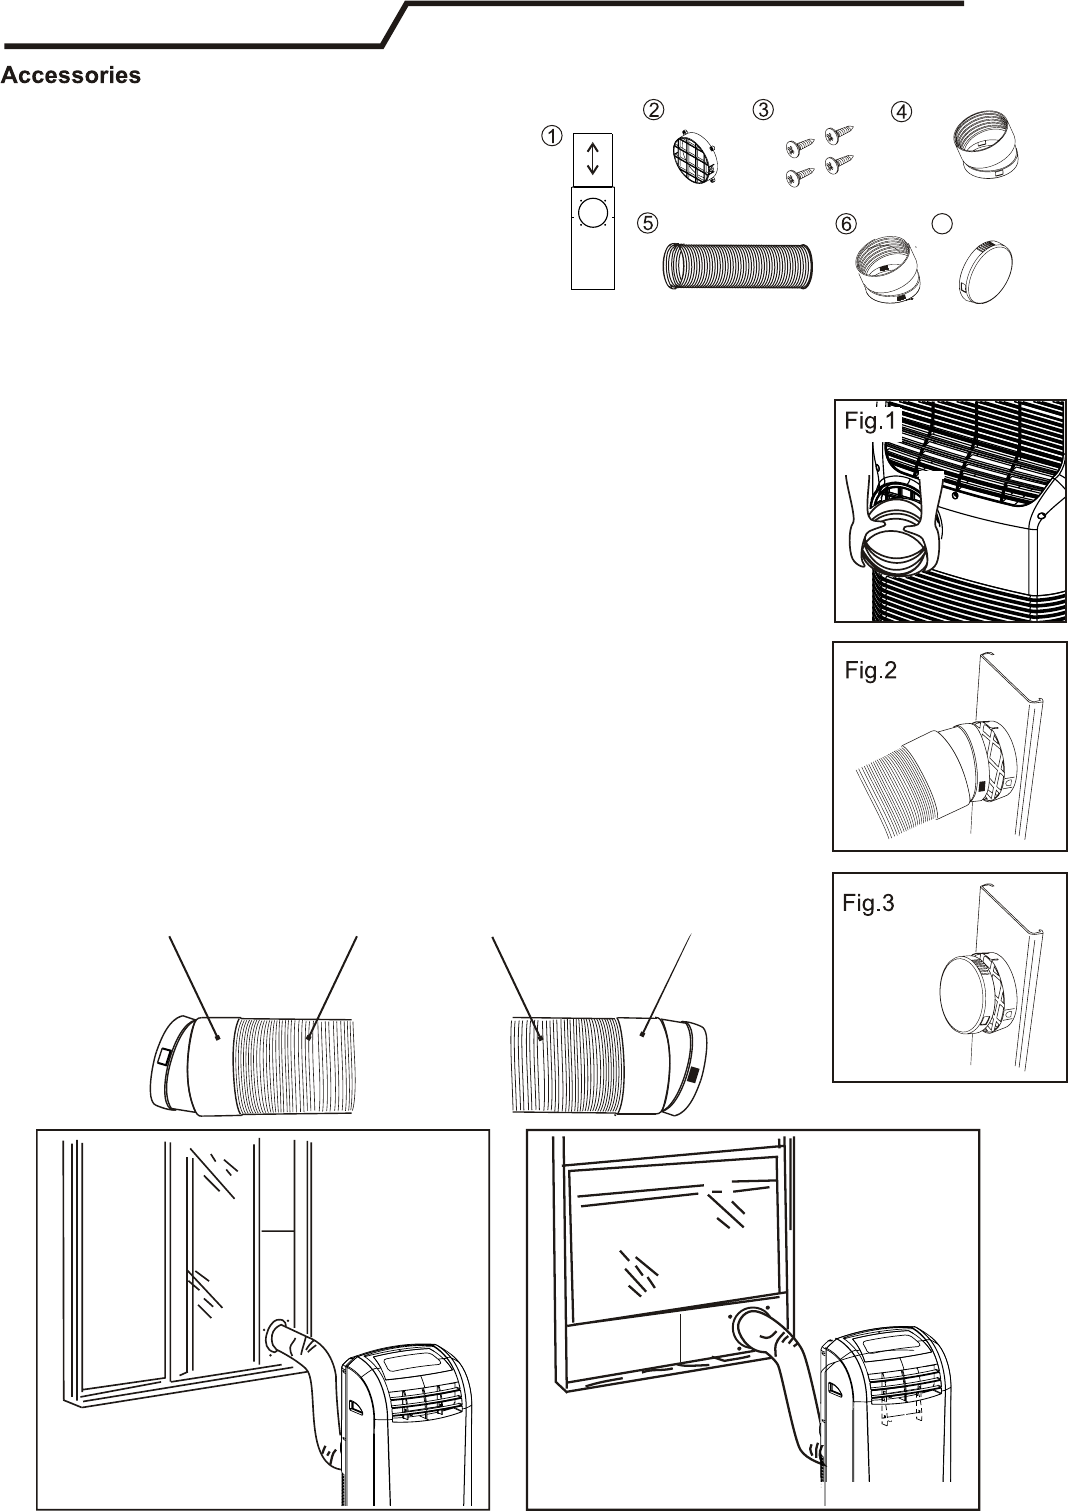
Duct Connector Exhaust Hose Window Kit Connector
1. Plastic window kit.............................2 pieces
2. Grated adapter.................................1 piece
3. Screws..............................................4 pieces
4. Duct connector .................................1 piece
5. Exhaust hose....................................1 piece
6. Window kit connector........................1 piece
7. Vent cap............................................1 piece
2. Place the grated adapter(2) into the large hole on the flush side of the plastic window kit(1). Line up
the 4 holes in the grated adaptor(2) with the pilot holes in the plastic window kit and fasten them
togethe with a screw driver.
3. Install the plastic window kit(1) into your window. If necessary, use duct tape to better secure the window kit.
4. On the air conditioner, connect the duct connector(4) (the connector with the smaller slots) into the unit
by aligning the tabs inside the unit with the slots and snapping them together. (See Fig. 1).
Note: Once inserted, duct connectors cannot be removed.
5. Attach the window kit connector(6) (the connector with the larger slots) onto the exhaust hose(5) by
stretching the hose completely out and turning the window kit connector(6) clockwise, screwing it
into the exhaust hose(5).
6. Screw on the exhaust hose(5) to the duct connector(4) by turning it clockwise.
7. Move the air conditioner towards the window. Align the slots on the window kit connector(6) to the tabs
on the grated adapter(2) and snap them together. (See Fig. 2)
8. To remove the window kit connector(6) from the grated adaptor(2), push in the tabs on the grated
adaptor(2) and pull the window kit connector(6) away from the grated adaptor(2)
9. To remove the window kit connector(6) and duct connector from the exhaust hose, twist the
connections counterclockwise. To remove the grated adaptor(2) unscrew the 4 screws(3).
10. The vent cap(7) may be installed on the grated adapter(2) (by aligning the slots with tabs and snapping
them together) when the air conditioner is not in use. (See Fig. 3)
1. Loosen the screws on the plastic window kit(1) and adjust the sliding kit to the width or height
of your window. Then tighten the screws to secure your adjustments to the window kit.
(See below images for setup examples)


