REV.1/25/05 Page 7 of 9 Part #17810
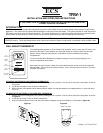
The microprocessor that controls the security code matching procedure is controlled by a timing function. If you are unsuccessful in
matching the security code on the first attempt, wait 1-2 minutes before trying again – this delay allows the microprocessor to reset its
timer circuitry – and try up to two or three more times.
THERMO FUNCTION
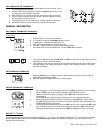
When the transmitter is in the THERMO mode, it should be kept away from direct sources of heat such as fireplaces, incandescent
lighting, and direct sunlight. Leaving the transmitter in direct sunlight, for example, will cause its heat-sensing diode to read the room
temperature higher than it actually is; if in THERMO mode, it may not turn on the appliance even if the ambient ROOM temperature is
below the SET temperature.
BATTERY LIFE
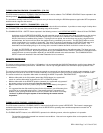
Life expectancy of alkaline batteries in the ECS TRW-1 should be at least 12 months. Check and replace all batteries annually. When
the Wall Transmitter no longer operates or the remote receiver does not function at all, the batteries should be checked. It is important
that the remote receiver batteries are fully charged, providing a combined output voltage of at least 5.3 volts. The length of the wire
between the remote receiver and the gas valve directly affects the operating performance of the remote system. The longer the wire,
the more battery power is required to deliver signals between the remote receiver and the gas valve. The Wall Transmitter should
operate with as little as 2.4 volts of battery power, measuring at each of the 3 volt button cell batteries.
TROUBLE SHOOTING
Should you encounter problems with your fireplace system, the problem may be with the fireplace itself or it could be with the ECS
remote control. Review the fireplace manufacturer’s operation manual to make sure all connections are properly made. Then check
the operation of the ECS remote in the following manner:
1. Make sure receiver batteries are installed properly. If one battery is installed backward, receiver will not operate in remote mode.
Be sure battery output is 5.3 volts or more. (Slide switch is independent of battery condition.)
2. Be sure the wall transmitter’s batteries are properly installed and that the battery output is 2.4 volts each or more.
3. The wall transmitter has (2) 3 volt button cell batteries (1) button cell operates the LCD screen and the other button cell operates
sending the RF signal. If the button cell battery that controls sending the RF signal is low or defective the LCD screen may work but
the RF signal may not be sending (Check each button cell battery)
4. Check to make sure the transmitter is communicating with the receiver.
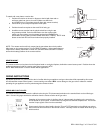
• If the receiver beeps when the ON
button is depressed on the wall transmitter they are communicating.
• If the receiver does not beep when the ON
button is depressed on the wall transmitter, you will need to teach the receiver the
code of the transmitter. This is done by holding the LEARN
button down on the receiver (NOTE: The black slide Button covers
the LEARN access hole when installed), and at the same time depress the ON button on the wall transmitter. A change in the
beeping pattern, at the receiver indicates the transmitter’s code has been programmed into the receiver.
5. Make sure the wall transmitter is within the 15’-20’ range of the receiver.
6. Positioning of the receiver is important. If the receiver is “enclosed” in a metal surround, the operation of the receiver may be
affected as noted below. Reposition the receiver to improve operating range. It is suggested that a heat shield be installed to
protect the receiver from extreme heat. If the receiver is “enclosed”
in a metal surround, this can:
• Cause the RF signal to get lost and not communicate with the receiver.
• Cause the working distance to be shorter than normal.
NOTE
: A receiver located in an area, where the ambient temperature inside the case exceeds 130
0
F, will cause THERMO-
SAFETY feature to cut in, requiring you to reposition the receiver to stop the warning beeps, and to “reset” the receiver’s operation.
7. Due to handling and shipping of the unit, handling or dropping of the wall transmitter by the customer, and heat conditions to the
receiver, some units may need an occasional frequency adjustment. This adjustment is made to improve the communication and
operating distance between the transmitter and the receiver. See RECEIVER ADJUSTMENT.
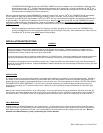
RECEIVER ADJUSTMENT – RECOMMENDED ADJUSTMENT
NOTE: The black slide button covers the ADJ access hole when installed.
A. To adjust at the receiver, use a small slotted screwdriver. Turn the adjustment screw counter-clockwise
about 5 degrees or a maximum of 1/8 turn. This should correct the distance problem.
B. If that does not correct the problem, return adjustment screw to original position and then turn adjustment
screw clockwise.
This adjustment is like tuning your radio. If you keep turning the adjustment screw, in either direction, you will go past the proper setting
(tuning).


