


6
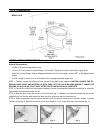
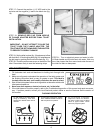
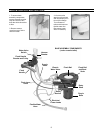
STEP 17: Connect the positive (+) 12 VDC lead to the
red wire and the negative (-) lead to the black wire (g.
18).
Fig. 18
STEP 18: REMOVE RED CAP FROM MIDDLE
OF FLANGE ADAPTER BEFORE FINAL TOILET
INSTALLATION.
IMPORTANT – DO NOT ATTEMPT TO SLIDE THE
TOILET OVER THE FLANGE ADAPTER. THE
TOILET MUST BE SET DOWN OVER THE ADAPTER
TO PREVENT POSSIBLE DAMAGE.
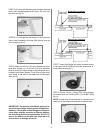
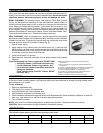
STEP 19: Set the toilet in place (g. 19) and secure to oor
with the #14x2-1/2 inch long lag bolts (g. 20). Install decora-
tive bolt caps by pushing them onto bolt heads (g. 21).
STEP 20: Place the rear access cover on the back of the
toilet. Press down rmly to seat the fastening strips.
Fig. 21
Fig. 19 Fig. 20
STEP 21: Turn on electrical power and water to toilet.
Lift ush handle and ll toilet bowl with water. Wait one
hour, then inspect the oor around and under the rear of
the toilet for leaks or dampness.
TOILET OPERATION
1. Fill freshwater tank and add deodorant to holding tank through toilet
bowl.
2. Make sure all guests understand the operation of the toilet system and
the ushing instruction label is easy for guests to read. This label is
located under the seat, and is easily read when the seat is raised.
3. Shut off the toilet system before servicing and do not leave the vehicle with
toilet system breaker on.
4. Never use drain openers, alcohol, solvents, etc. in the toilet.
5. If the toilet does not function properly, refer to the Troubleshooting section of this manual and repair as neces-
sary. If problem persists, contact your local SeaLand product dealer or see the Customer Service section of
this manual.
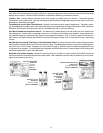
1. To add water to the toilet before
using (if necessary), raise flush
handle until desired water level is
reached.
2. To ush toilet, press ush handle
down. Release handle to let ush
ball snap back into position.
3. Do not dispose of sanitary
napkins or other non-dissolv-
ing items in toilet, such as facial
tissue or paper towels. These
items can plug the system.
FLUSHING OPERATION