


12
3 Maintenance
3 Maintenance
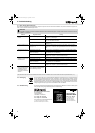
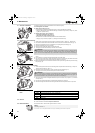
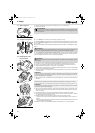
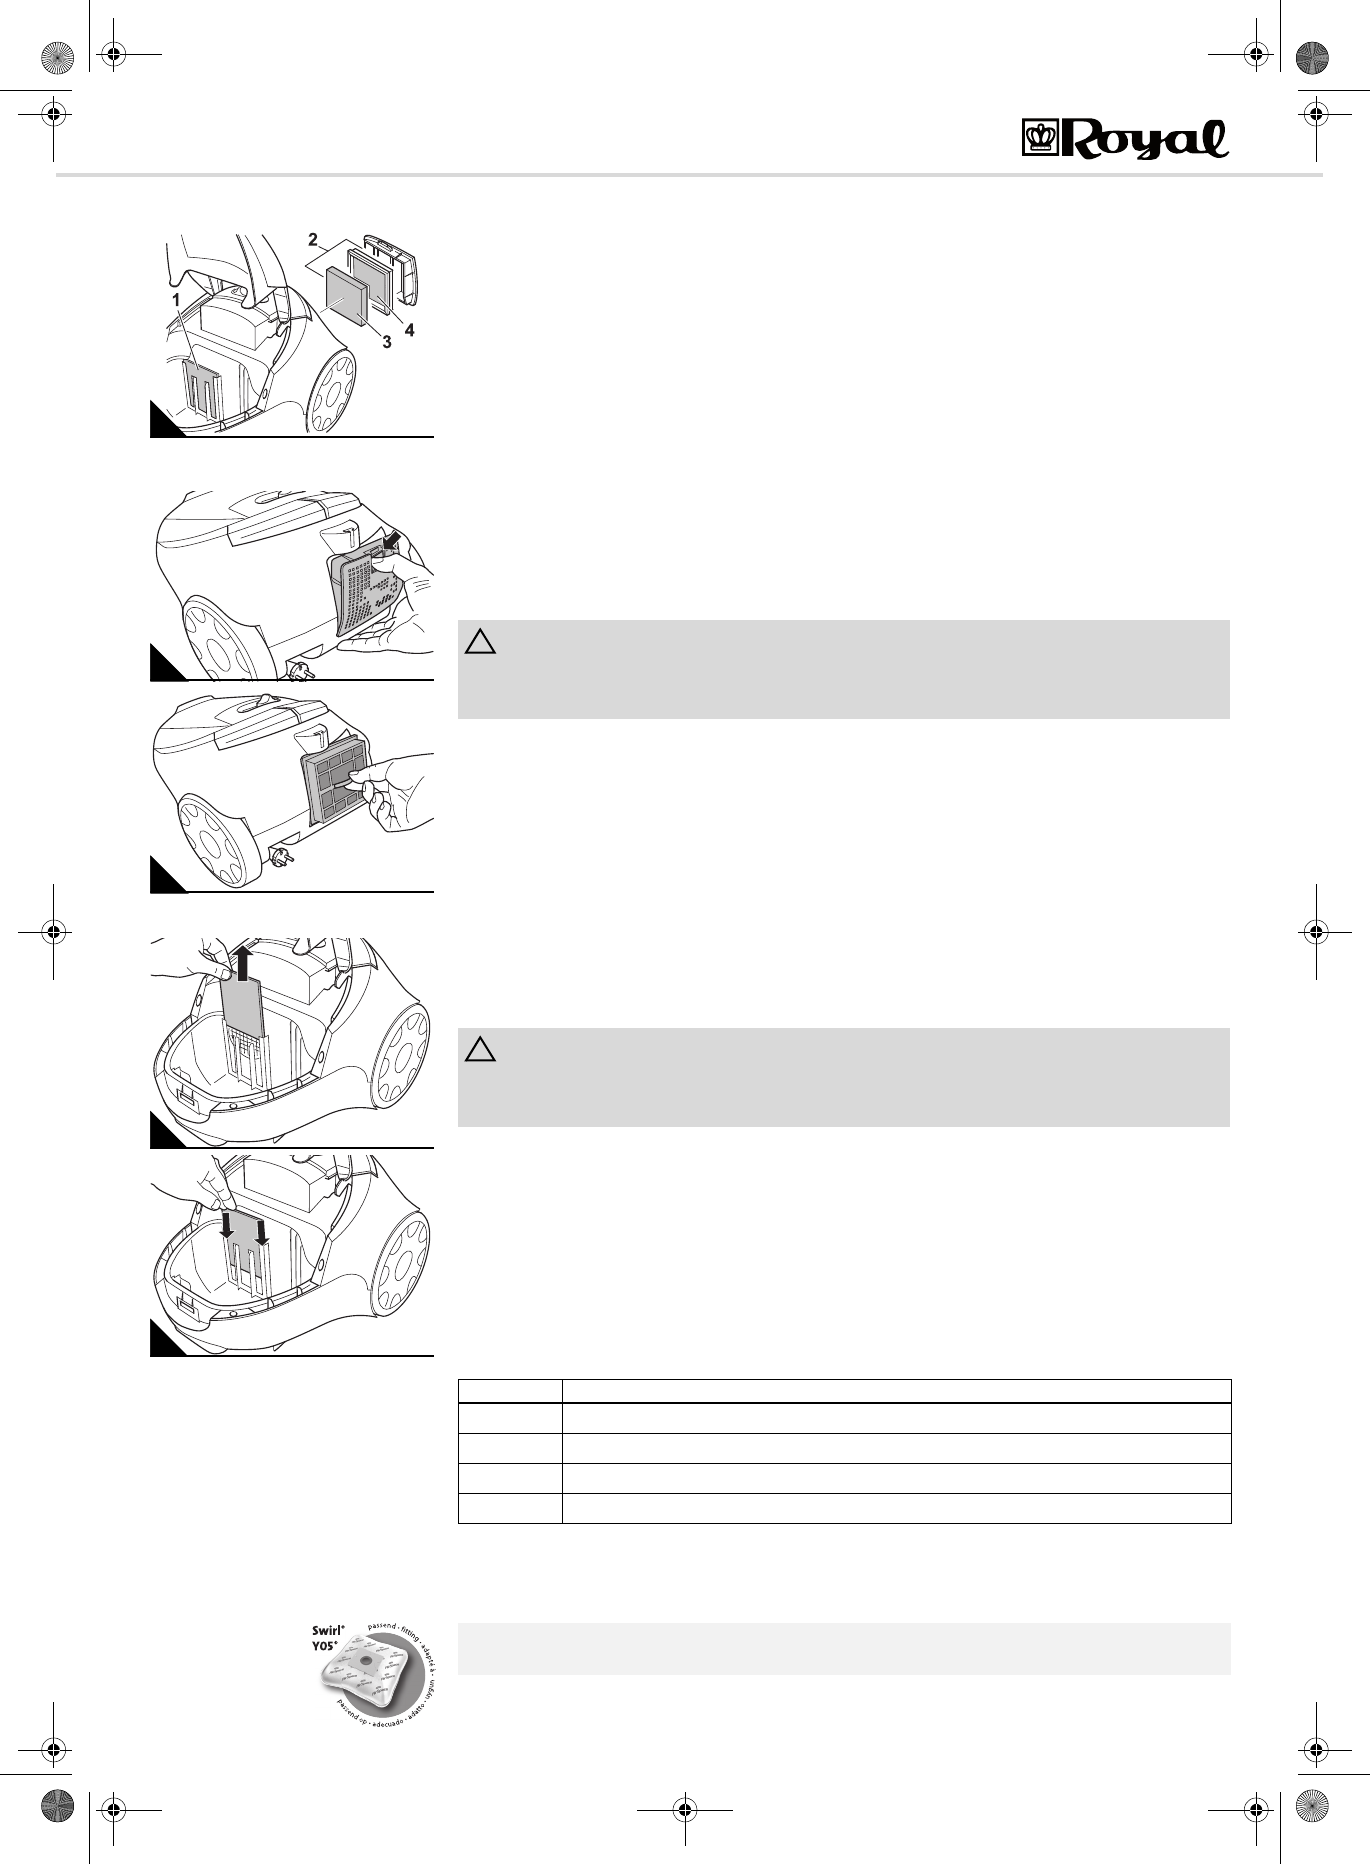
3.1 Overview of the filters
The filters can get dirty during use and therefore must be checked regularly:
The following filters are installed:
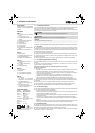
Motor protection filter (Fig. 18/1)
It prevents larger particles from damaging the motor in case the dust filter bag is defective.
- Changing: after each 5th change of the dust filter bag, at the latest every 6 months (chapter 3.3, „Clean-
ing the motor protection filter“).
Exhaust filter unit (Fig. 18/2) consisting of:
- Foam plastic filter element (Fig. 18/3) and
- Filter holder with sewn-in fleece (Fig. 18/4)
The exhaust filter unit filters finest dust particles from the exhaust air stream.
- Changing: every 6 months (chapter 3.2, „Cleaning the exhaust filter unit“).
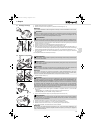
3.2 Cleaning the exhaust filter unit
1. Switch off the vacuum cleaner and pull the plug from the mains socket, chapter 2.3, „Switching off“.
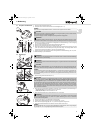
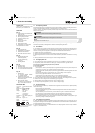
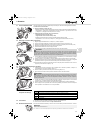
2. Push down the release latch of the exhaust filter cover and fold down the exhaust filter cover (Fig. 19).
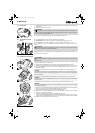
3. Remove the exhaust filter unit from its receptacle by the pulling the tab provided (Fig. 20).
4. Hold the exhaust filter unit low over a dustbin.
5. Remove the foam plastic filter element from the filter holder.
6. Thoroughly rinse both filter elements by hand with clear cold water.
7. If a filter element is damaged or deformed, replace it by a new one (chapter 3.4, „Accessories and Spare
Parts“).
8. Put the cleaned or new foam plastic filter element back into the filter holder.
9. Now put the filter holder with the freshly fitted filters back into its receptacle (Fig. 20). Make sure that the
tab for removing the filter holder shows towards the outside of the appliance.
10. Attach the exhaust filter cover at the bottom side first and then push in the upper side until you feel it locking
into place (Fig. 19).
3.3 Cleaning the motor protection filter
1. Switch off the appliance and remove the dust bag holder complete with the dust filter bag, chapter 2.5,
„Changing the dust filter bag“, steps 1–4.
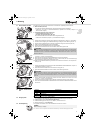
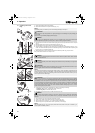
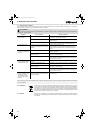
2. Remove the motor protection filter by pulling it upwards out of its guiderails (Fig. 21).
3. Thoroughly rinse the motor protection filter by hand with clear cold water.
4. If the motor protection filter is damaged or deformed, replace it with a new one.(chapter 3.4, „Accessories
and Spare Parts“).
5. Push the motor protection filter back into its respective guiderails (Fig. 22/arrows).
6. Insert the dust bag holder with the dust filter bag and close the dust compartment cover. It snaps shut.
3.4 Accessories and Spare
Parts
3.5 Sources
Ordering address page 40, „International Service“.
Further information is available at http://www.dirtdevil.de
3.6 Recommendation
We recommend: Swirl
Y05 dust filter bags with MicroPor
filtration
Swirl
, MicroPor
and "Y05" are registered trade marks of a company of the Melitta group and used with their permission.
18
ATTENTION:
The filter elements of the exhaust filter unit are washable, but not suitable for cleaning in washing machines
or dishwashers. Also, do not use cleansers for cleaning the filters. Then leave the filter elements to dry
(approx. 24 hours at room temperature). Only put them back into the appliance when they are completely dry.
19
20
ATTENTION:
The motor protection filter is washable, but not suitable for cleaning in washing machines or dishwashers.
Also, do not use cleansers for cleaning the filter. Then leave the motor protection filter to dry (approx. 24
hours at room temperature). Only put it back into place when it is completely dry.
21
22
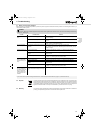
Item number Description
7010022 Set of 5 dust filter bags and 1 motor protection filter
7011002 1 exhaust filter unit (incl. Foam plastic filter element (Fig. 18/3) and filter holder (Fig. 18/4))
M203 1 parquet brush
M209 1 turbo brush
NOTE:
Insert bag in direction "C."
M3200.book Seite 12 Dienstag, 21. August 2012 10:49 10