


www.desatech.com
122075-01B
2
Figure 3 - Installing Header
Left Leg
Assembly
Right Leg
Assembly
Header
Shoulder
Figure 1 - Attaching Front Leg
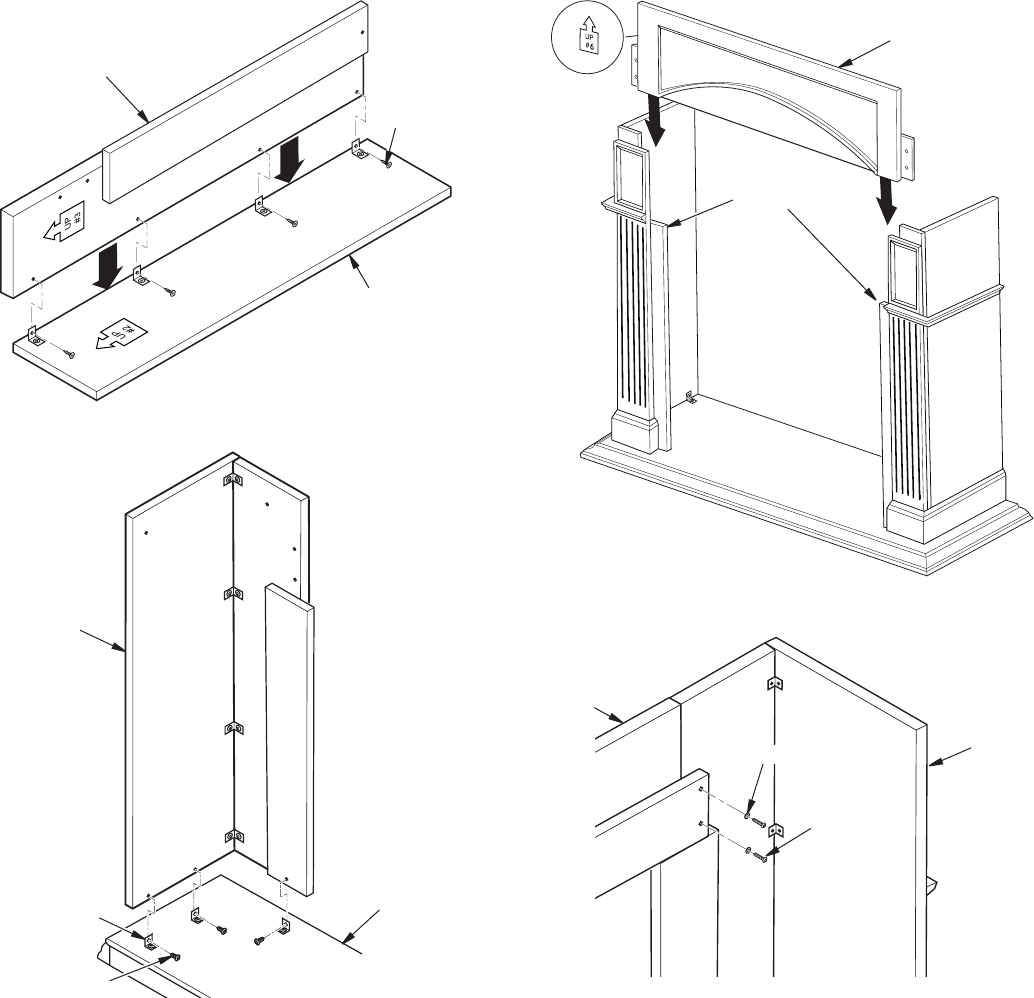
Figure 4 - Attaching Header to Leg Assembly
Header
Leg
Assembly
1
1
/
4
" Screw
1. Lay right side panel (#2) face down on a soft surface
to avoid marking nish. Attach four brackets with 1/2"
screws to bottom of right front leg (#3) leaving screws
slightly loose. Face brackets out (see Figure 1). Place
right front leg (#3) over right side (#2) as shown in Figure
2, paying close attention to direction arrow pointing up
on panels. Align threaded holes with brackets on side.
Start four 1/2" screws through brackets. Align bottom of
side and leg assembly so they are ush with each other.
Hold these pieces securely in alignment while tightening
(but not over tightening) screws.
2. Assemble left side (#4) and left leg (#5) as described in
step 1.
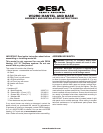
3. Attach 6 brackets to base (#1) at threaded hole locations
using 1/2" screws leaving screws loose. Face brackets
toward outside (see Figure 2).
Right Side
Right Front Leg
1/2" Screws
Washer
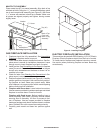
Figure 2 - Leg Assembly to Base
1/2" Screw
Bracket
Right
Side/Leg
Assembly
Base (#1)
4. Place right side/leg assembly on base and align threaded
holes with brackets. Start 1/2" screws through brackets
into threaded holes in side/leg assembly. Back of side/
leg assembly should be ush with back of base. Assure
alignment is correct and spaces are at a minimum and
tighten leaving screws slightly loose.
5. Assemble left side/leg assembly to base (#1) following
step #4.
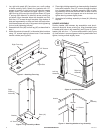
HEADER ASSEMBLY
Position header (#6) between leg assemblies onto shoul-
ders with direction arrow pointing up. Align threaded holes
in header with holes in leg assembly (see Figure 4). Attach
header (#4) with four 1
1
⁄
4
" screws and washers (see Figure
4). Hold header in proper alignment with leg assemblies and
tighten, leaving screws slightly loose.