


ASSEMBLING MANTEL
IMPORTANT: More than one person is required to as-
semble and lift mantel.
Estimated assembly time: 30 minutes.
When assembling mantel do not tighten screws completely until
told to do so. There should be some play in the pieces to allow for
proper alignment and best possible t. It is very important that
more than one person assemble mantel together. Panels must be
held in proper alignment to each other while tightening screws to
assure fewer gaps and proper surface alignment. When tightening
screws, do not over tighten. This may cause threads to strip. For
this reason, the supplied Allen wrench should be used rather than
a power screwdriver. The panels have threaded inserts installed to
mark your screw locations. Screws should start and turn easily in
threaded holes when assembled according to instructions. Do not
force screws into holes.
IMPORTANT: There is a serial number label inside of right side
panel and on outside package. When calling to request technical as-
sistance or for replacement parts please have that number ready.
Leg Assembly
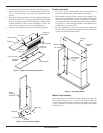
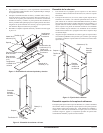
1. Lay right side panel (#2) face down on a soft surface to avoid
marking nish. Attach three brackets with 1/2" screws to bot-
tom of right front leg (#3) leaving screws slightly loose. Face
brackets out toward tongued side (see Figure 1, page 2). Place
right front leg over right side (#2) matching groove in leg to
tongue on side, as shown in Figure 1 on page 2, matching trim
pieces on side with trim on front. Align threaded holes with
brackets on side. Start three 1/2" screws through brackets. Align
bottom of side and leg assembly so they are ush with each
other. Hold these pieces securely in alignment while tightening
(but not over tightening) screws.
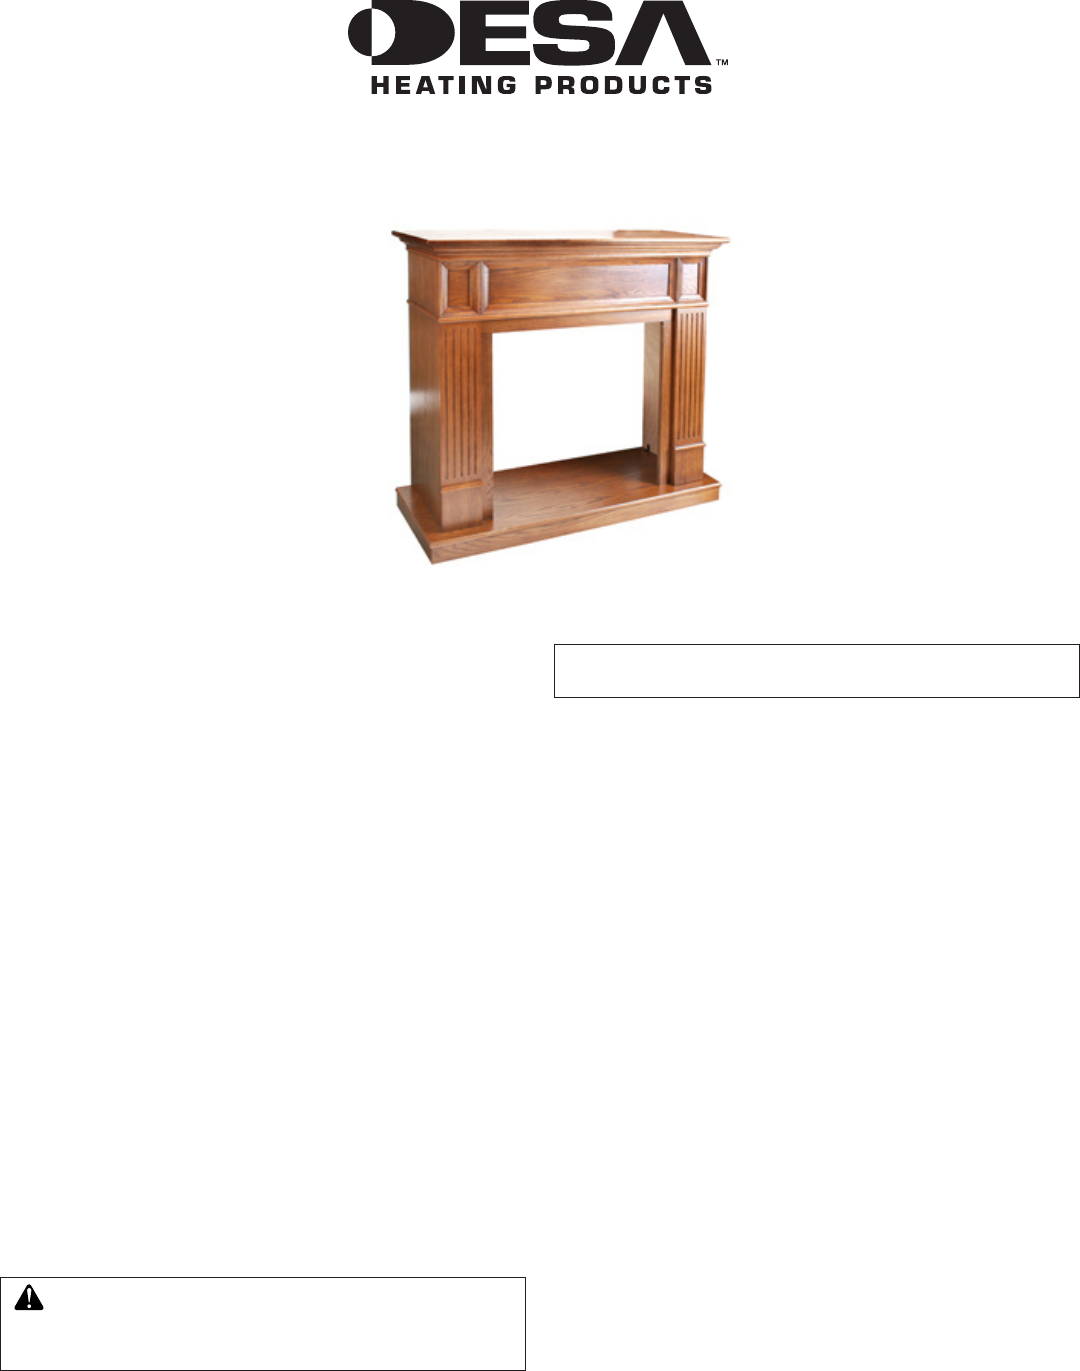
W26LT Wall Mantel and Base
ASSEMBLY AND INSTALLATION INSTRUCTIONS
IMPORTANT: Read entire instruction sheet before
assembling or installing mantel kit.
The W26LT mantel is only approved for use with any
DESA Heating Products compact replace system
and Dimplex Electric Fireplace. Do not use mantel
with any other product.
This mantel kit contains the following:
• Mantel pieces - unassembled and marked as follows:
Base #1 Left Front Leg #5 with arrow
Right Side #2 with arrow Header #6 with arrow
Right Front Leg #3 with arrow Top #7
Left Side #4 with arrow
• Hardware Kit
The hardware kit consists of:
• 16 - Metal Brackets
• 32 - Screws M6 x 12mm (1/2")
• 7 - Screws M6 x 30mm (1
1
/
4
")
• 7 - Washers M6
• 1 - Allen Wrench
*Extra hardware may be included.
If any wood pieces are missing or damaged, contact the dealer where
you purchased this mantel for replacement. If hardware is missing
or damaged, contact DESA Heating Products at 1-866-672-6040 for
referral information. You can also visit DESA Heating Products’
technical service web site at www.desatech.com.
Note: Gather all mantel pieces together before assembling mantel.
WARNING: Use only 1/2" screws to attach metal
angle brackets. Damage to mantel will result if other
screws are used for this purpose.
www.desatech.com