


www.desatech.com
110021-01M 19
INSTALLATION
Continued
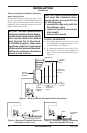
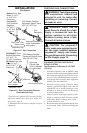
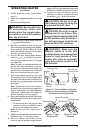
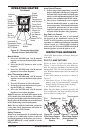
Figure 22 - Installing Log #5 (Right) and
Log #6 (Left) (Model CSG3924NR Shown)
Log #5
Log #6
Log #4
Log #3
Log #1
Log #2
5. Place back of log #5 on notch in log #4 (as
shown in Figure 22), across back part of log
#1 and onto pin on log #2 (see Figure 20, page
18 and Figure 22).
6. Place log #6 onto two pins on log #1 (ember
bed) and rest back of log #6 on back log #4
(see Figure 22).
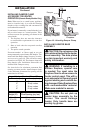
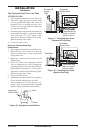
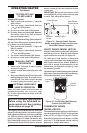
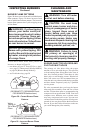
Figure 23 - Installing Log #2 (Right) and
Log #3 (Left) (Model VRL30NR Shown)
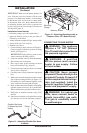
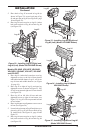
Figure 24 - Installing Log #4 (Model
VRL30NR Shown)
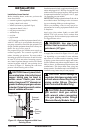
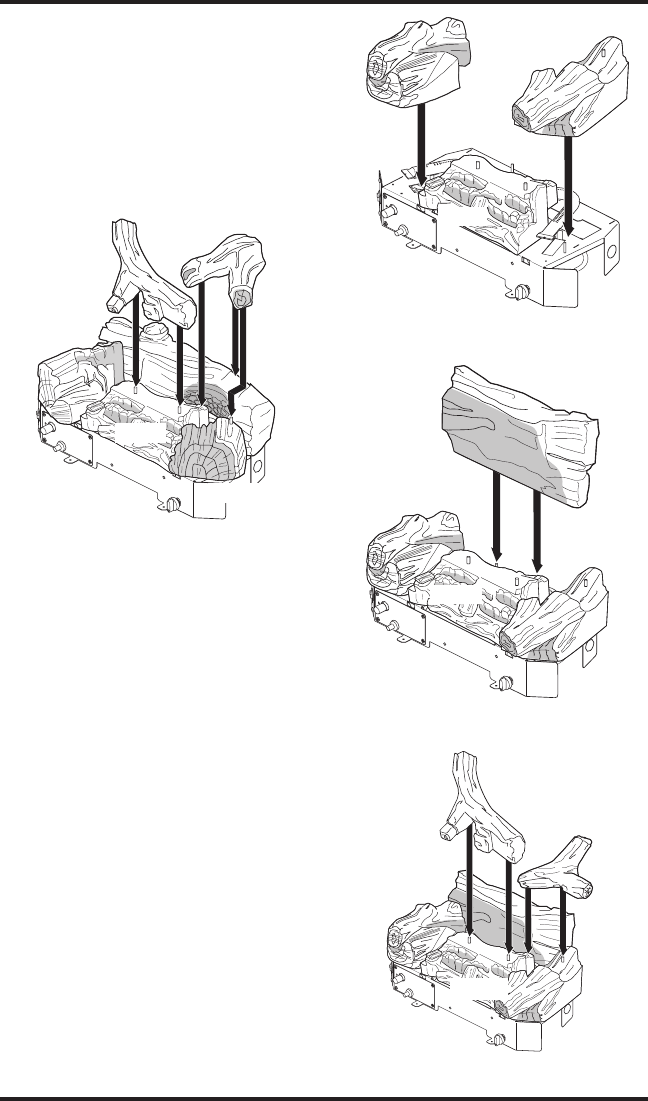
Figure 25 - Installing Log #5 and Log #6
(Model VRL30NR Shown)
Log #6
Log #5
Log #2
Log #4
Log #3
Log #1
Log #2
Log #3
Log #1
Log #4
Log #2
Log #3
Log #1
Models VRL24NR, VRL24PR, VRL30NR,
VRL30PR, VRL24NT, VRL24PT, VRL30NT
and VRL30PT
1. Place log #1 (ember bed) onto base over log
alignment screws to the left of front burner
and behind middle burner. Log #1 will sit on
top of front and middle burners (see Figure
19, page 18).
2. Place log #2 to right of log #1 and onto log
alignment screw as shown in Figure 23. Log
#2 will wrap around right end of rear burner
(see Figure 23).
3. Place log #3 on left side of base and onto
alignment screw to right of rear burner (see
Figure 23). Log #3 will wrap around left end
of rear burner.
4. Place log #4 onto two alignment screws to rear
of base (see Figure 24).
5. Locate hole on bottom of log #5 and place over
pin on log #2. Log #5 will rest on back of log
#1 (ember bed). See Figure 19, page 18 and
Figure 25.
6. Place log #6 onto two pins on log #1 (ember
bed) and rest back of log #6 on back log #4
(see Figure 25).