


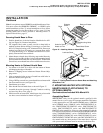


109889
For more information, visit www.desatech.com
For more information, visit www.desatech.com
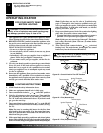
11
11
Note:
It is an option to secure GHB802A model hearth base to floor.
You must secure the GHB802B, GHB802C, or GHB38 series
model hearth base to floor. To secure hearth base to floor, follow
instructions under Securing Hearth Base to Floor, page 11. If not
securing hearth base to floor, proceed to Mounting Heater to
Optional Hearth Base, page 11.
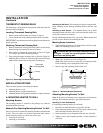
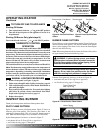
Securing Hearth Base to Floor
1. Position hearth base in desired location. Mark holes for drill-
ing (see Figure 16). Remove hearth base.
2. For carpeted floor, make a small cut with a sharp knife at
marked locations before drilling. If securing to a wood floor,
drill a 3/4" deep hole using a 1/8" diameter drill bit. Do not use
anchors in wood floors. If securing to a concrete floor, drill a
1
3
/8" deep hole using a 1/4" diameter concrete drill bit. Com-
pletely insert anchors into each hole.
3. Mount heater to hearth base following steps under Mounting
Heater to Optional Hearth Base, below. After mounting heater,
position heater and hearth base over drilled holes. With slotted
screwdriver, secure hearth base to floor with four wood screws.
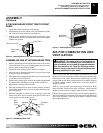
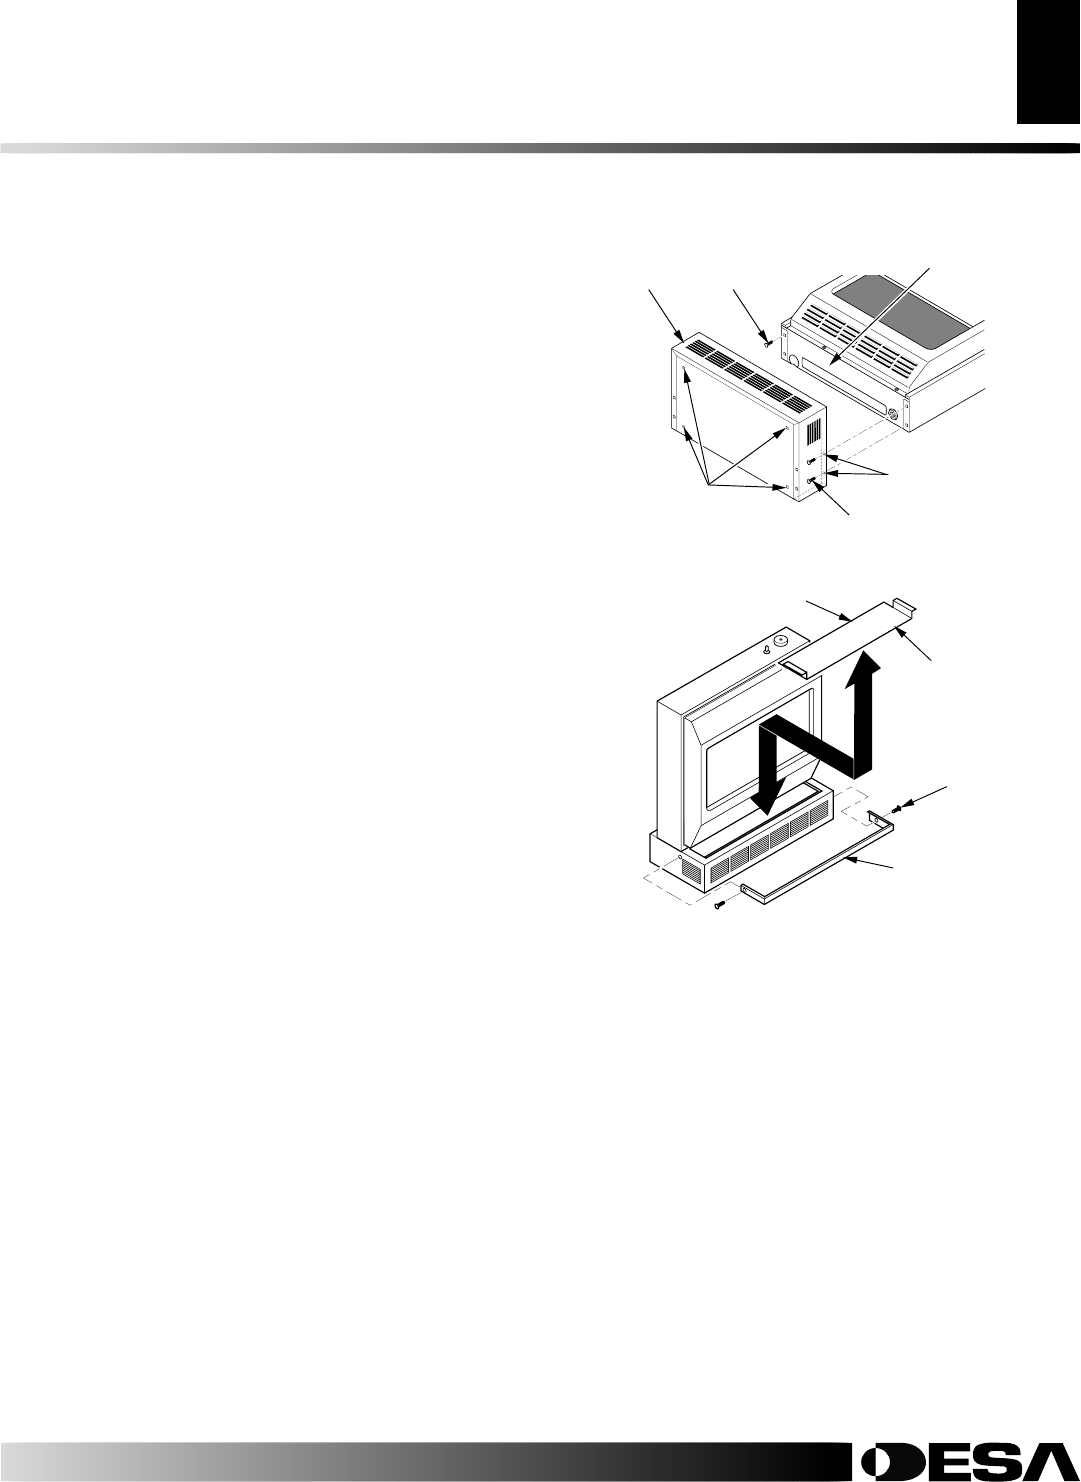
Mounting Heater to Optional Hearth Base
1. Lay heater on its back on a table with the bottom of heater
overhanging the edge of the table.
2. Remove 2 shipping screws in bottom of heater. Discard ship-
ping screws.
3. Line up mounting holes on top of hearth base with holes in
bottom of heater (see Figure 16).
4. Using a Phillips screwdriver, secure hearth base to heater with
four sheet metal screws (see Figure 16).
5. Stand heater up on base.
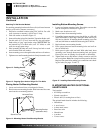
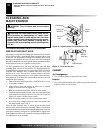
6. Place hearth insert in hearth base as shown in Figure 17.
7. Assemble brass trim (see steps 1 through 7 under Assembling
and Attaching Brass Trim, page 5).
8. Slide base trim on heater base. Attach brass trim to base with
two brass screws included as shown in Figure 17.
INSTALLATION
Continued
INSTALLATION
B. Mounting Heater On Optional Hearth Base (Cont.)
C. Mounting Heater With Optional Hearth Base (If Applicable) To Optional Mantel
Figure 17 - Placing Hearth Insert on Heater Base and Attaching
Brass Base Trim
Brass Base
Trim
Figure 16 - Attaching Heater to Hearth Base
Base
Holes for Securing
Heater to Floor
Shipping
Screw
Bottom of Heater
Hearth
Insert
Laminate Sheet
Screw
Sheet Metal Screw
Mounting Holes
C. MOUNTING HEATER
WITH OPTIONAL
HEARTH BASE (IF APPLICABLE) TO
OPTIONAL MANTEL
See Instructions Included With Mantel Kit.
Assembling Mantel
IMPORTANT:
Only use the optional mantels specified in this
manual. See Accessories, page 21 for proper mantel kits. This heater
is only approved for use with models GMF800 series / GMU801
series, GM900F series / GM901U series, GM700F/GM701U se-
ries, GMC22F/GMC23U/GMC24U series, GMC32F/GMC33U
series, GMC34F/GMC35U series, and GMC26F/GMC27U/
GMC28F series mantel kits. Using any other mantel will void the
CSA approval for this heater. Do not use models GMF800/GMU801
series, GM900F/GM901U series, GM700F/GM701U series,
GMC22F/GMC23U/GMC24U series, GMC32F/GMC33U series,
GMC26F/GMC27U/GMC28F series and GMC34F/GMC35U se-
ries mantels with any other product. If the metal base is required
with your mantel, the heater must be mounted on the base first.