


www.desatech.com
112882-01B
18
INSTALLING LOGS
WARNING: Failure to position
the parts in accordance with these
diagrams or failure to use only
parts specifically approved with
this heater may result in property
damage or personal injury.
CAUTION: After installa-
tion and periodically thereafter,
check to ensure that no flame
comes in contact with any log.
With the heater set to
HI, check
to see if flames contact any log. If
so, reposition logs according to
the log installation instructions
in this manual. Flames contact-
ing logs will create soot.
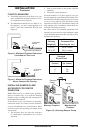
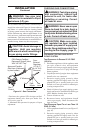
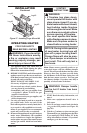
1. Align two pins at rear of base with two holes
in bottom of rear log (#1). Place logs on pins
(see Figure 24).
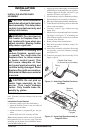
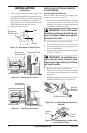
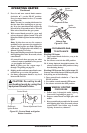
2. Align pin at center of base with hole in right
bottom log (#2) and notch in front of log to
right grate finger. Place log on base as shown
in Figure 25.
3. Align notch on left bottom log (#3) with left
grate finger and place log on base as shown
in Figure 25.
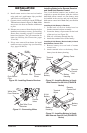
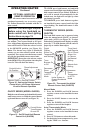
4. Align hole in bottom of log #4 with pin on
base as shown in Figure 26. The end of log
#4 will rest on base sllightly behind log #2.
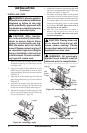
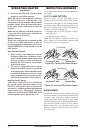
5. Align holes in bottom of left top log (#5) with
pins on top of left bottom log (#3). Place log
on pins (see Figure 27, page 19).
INSTALLATION
Continued
6. Align holes in bottom of right top log (#6) with
pins on top of right bottom log (#2). Place log
on pins (see Figure 27,page 19).
7. The effect of glowing embers can be created
by placing rock wool on front burner. For best
effect, use only the smallest amount necessary
to create the glow. Tear rock wool into dime-
size pieces and place pieces on and around
front burner. Do NOT place rock wool in
area of pilot or rear burner.
8. Add lava rock around base to heater if
desired. Do not place lava rock on logs
or burner. Do NOT place lava rock on or
around front burner.
CAUTION: Placing lava rock
on or around front burner will
cause severe sooting. Please
keep ember material (rock wool)
separate from lava rock.
WARNING: All previously
applied loose material must be
removed prior to reapplication.
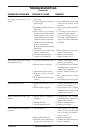
Figure 24 - Installing Log #1
Log #1
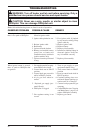
Figure 25 - Installing Logs #2 and #3
Left
Grate
Finger
Log #2
Log #3
Right
Grate
Finger
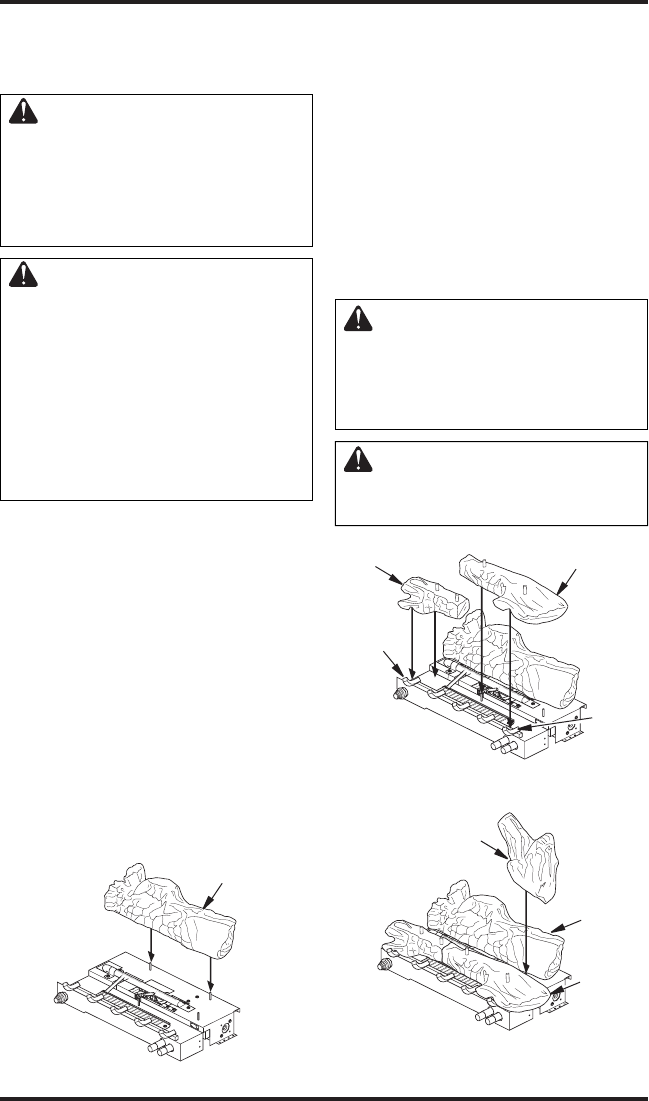
Figure 26 - Installing Log #4
Log #4
Log #2
Log #1