


www.desatech.com
110373-01E
6
CAUTION: This heater cre-
ates warm air currents. These
currents move heat to wall sur-
faces next to heater. Installing
heater next to vinyl or cloth wall
coverings or operating heater
where impurities (such as, but
not limited to, tobacco smoke,
aromatic candles, cleaning flu-
ids, oil or kerosene lamps, etc.) in
the air exist, may discolor walls
or cause odors.
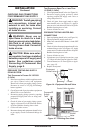
CAUTION: If you install the
heater in a home garage
• heater pilot and burner must
be at least 18" above floor.
• locate heater where moving
vehicle will not hit it.
For convenience and efficiency, install heater
• where there is easy access for operation, inspec
-
tion and service
• in coldest part of room
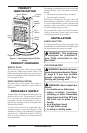
INSTALLATION
Continued
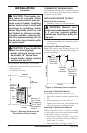
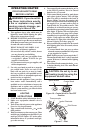
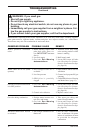
36"
3"
FLOOR
CEILING
Minimum
Minimum To Top Surface
Of Carpeting, Tile Or Other
Combustible Material
6"
Minimum
From
Sides Of
Heater
Right
Side
Left
Side
Figure 2 - Mounting Clearances As
Viewed From Front of Heater
Minimum To
Top Surface
Of Carpeting,
Tile Or Other
Combustible
Material
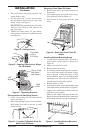
THERMOSTAT SENSING BULB
The thermostat sensing bulb is located inside the
heater. Do not move this bulb during installation
or operation of the heater.
INSTALLING HEATER TO WALL
Marking Screw Locations
1. Determine where you will locate heater.
WARNING: Maintain mini-
mum clearances shown in Figure
3. If you can, provide greater
clearances from floor and join-
ing wall.
2. Mark two mounting screw locations on wall
(see Figure 3).
Installing Two Mounting Screws
Note: Wall anchors and mounting screws are
in hardware package. The hardware package is
provided with heater.
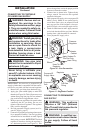
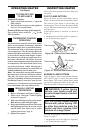
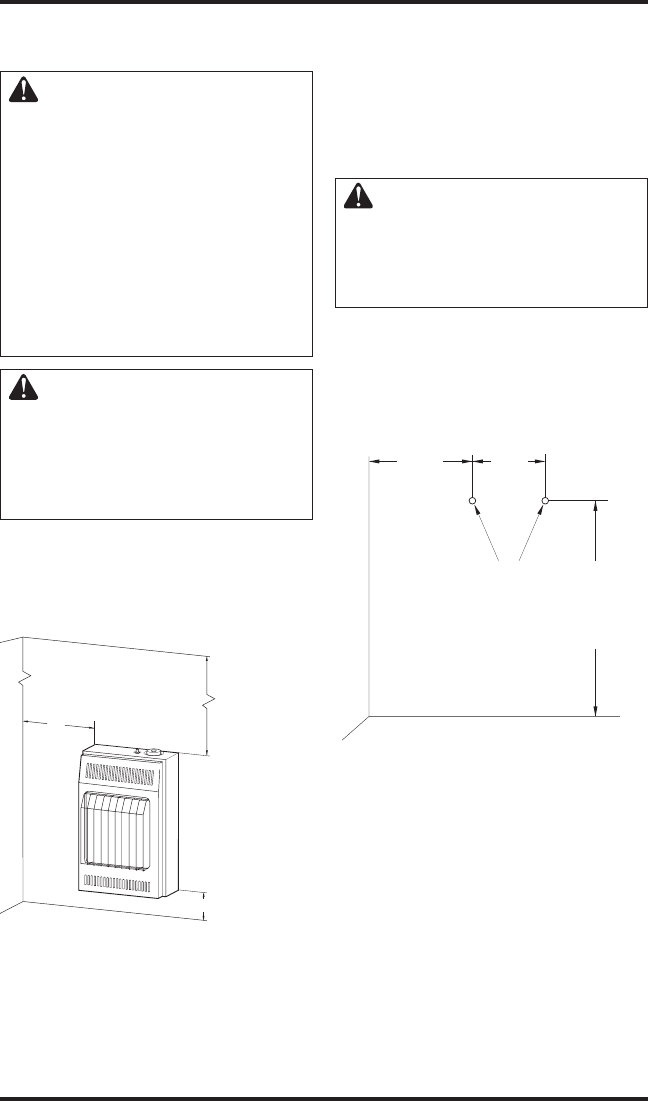
Figure 3 - Mounting Screw Locations
Mounting
Screw
Locations
8
7
/
8
"
Minimum To
Maintain 6"
Clearance
From Wall
7
3
/
4
"
20
1
/
4
"
Minimum To
Maintain 3"
Clearance
From Floor
FLOOR
JOINING WALL
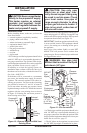
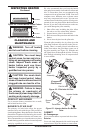
Attaching To Wall Stud Method
For attaching mounting screw to wall stud
1. Drill hole at marked location using 9/64" drill
bit.
2. Insert mounting screw into wall stud.
3. Tighten screw until 1/16" space (thickness of
penny) is between screwhead and wall.
Attaching To Wall Anchor Method
Follow instructions below to attach mounting
screws to hollow walls (wall areas between studs)
or solid walls (concrete or masonry).
1. Drill holes at marked locations using 5/16"
drill bit. For solid walls (concrete or masonry),
drill at least 1
1
/
4
" deep.
2. Fold wall anchor (see Figure 4, page 7).