


108382-01D
15
15
For more information, visit www.desatech.com
For more information, visit www.desatech.com
CAUTION: Do not try to adjust heating levels by
using the equipment shutoff valve.
WARNING: Make sure the selector switch is in the
OFF position when you are away from home for long
periods of time. Heater will come on automatically with
selector switch in the ON position.
OPERATING HEATER
Continued
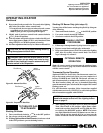
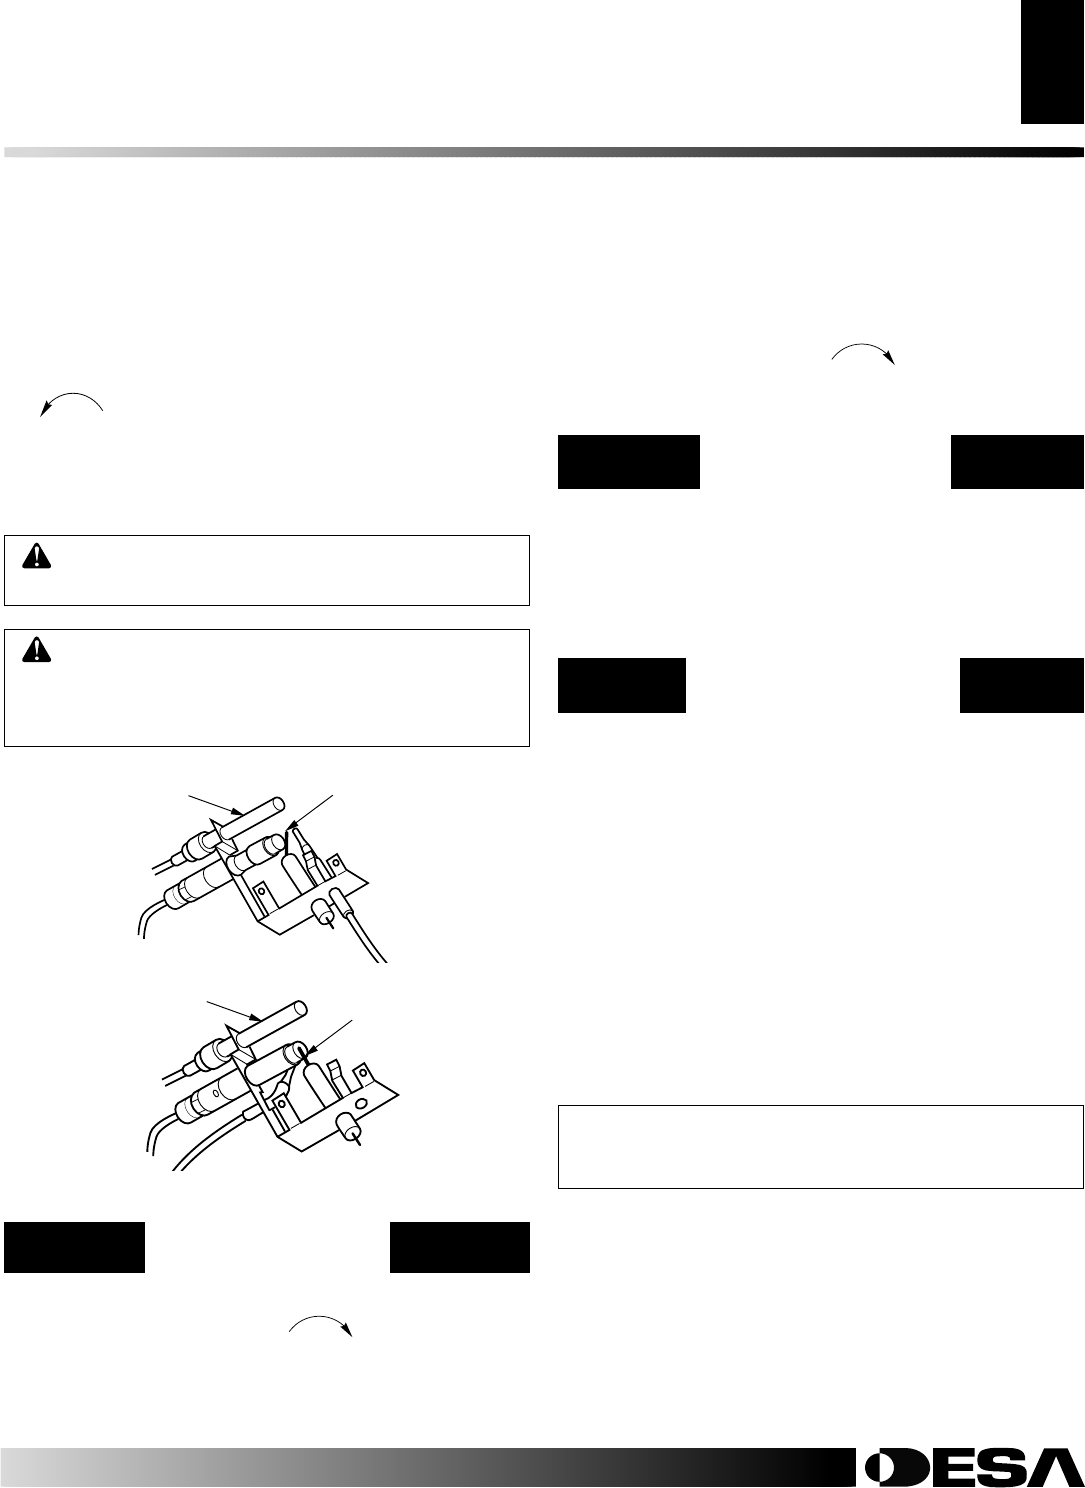
Ignitor
Electrode
Pilot Burner
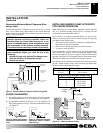
TO TURN OFF GAS
TO APPLIANCE
Shutting Off Heater
1. Turn control knob clockwise to the OFF position.
2a. Set selector switch in the OFF position.
2b. If Using Optional Hand-Held Remote: Set selector switch
in the OFF position to prevent draining battery.
MANUAL LIGHTING
PROCEDURE
1. Follow steps 1 through 6 under Lighting Instructions, page 14.
2. Depress control knob and light pilot with match.
3. Keep control knob pressed in for 30 seconds after lighting
pilot. After 30 seconds, release control knob. Now follow
steps 9 through 11, column 1.
OPTIONAL REMOTE
OPERATION
Note:
All remote control accessories must be purchased sepa-
rately (see Accessories, page 24). Follow instructions included
with the remote control.
Thermostat Control Operation
(Optional GHRCTA Series Only) The thermostat control set-
ting on the remote control unit can be set to any comfort level
between WARMER and COOLER. The burner will turn on
and off automatically to maintain the comfort level you select.
The ideal comfort setting will vary by household depending
upon the amount of space to be heated, the output of the central
heating system, etc.
For wall thermostat operation, follow instructions supplied
with thermostat accessory GWMT1. For wall switch operation
follow instructions supplied with GWMS2.
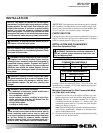
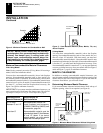
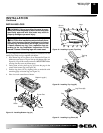
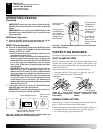
Figure 24 - Propane/LP Gas Pilot
Figure 23 - Natural Gas Pilot
Ignitor
Electrode
Pilot Burner
8. Keep control knob pressed in for 30 seconds after lighting
pilot. After 30 seconds, release control knob.
• If control knob does not pop out when released, contact
a qualified service person or gas supplier for repairs.
Note:
If pilot goes out, repeat steps 4 through 8.
9. Slightly push in and turn control knob counterclockwise
to the ON position.
10. Wait one minute and switch selector switch to the ON posi-
tion to light burner.
Note:
AUTO is only functional when
using GWMT1, or GWMS2 optional accessories.
11. Set flame adjustment knob to any level between HI and LO.
OPERATION
LIghting Instructions (Cont.)
To Turn Off Gas To Appliance
Manual Lighting Procedure
Optional Remote Operation
Shutting Off Burner Only (pilot stays lit)
You may shut off the burner and keep the pilot lit by doing one
of the following:
1. Turn control knob clockwise to the PILOT position.
2. Use remote control manual OFF button.
3. Set selector switch in the OFF position.
NOTICE: You must light the pilot before using the
hand-held remote control unit. See
Lighting Instruc-
tions
on page 14.
1. After lighting, let pilot flame burn for about one minute.
Turn control knob to ON position. Adjust flame adjust-
ment knob anywhere between HI and LO. Slide the selec-
tor switch to the REMOTE position.
NOTE:
The burner
may light if hand-held remote ON button was on when se-
lector switch was last turned off. You can now turn the
burner on and off with the hand-held remote control unit.