


13
105163
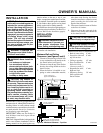
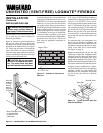
OWNER’S MANUAL
OPERATING
GUIDELINES &
MAINTENANCE
INSTRUCTIONS
When lit for the first time, a vent-free log
heater will emit a slight odor for about an
hour or two. This is a normal occurrence
which is due to the "curing" of the logs and
the "burn-in" of internal paints and lubri-
cants used in the manufacturing process.
Keep control compartments, logs, burners,
and areas surrounding the logs clean by vacu-
uming or brushing at least twice a year.
Temporary removal of the log set may ease
the cleaning of the burner and pilot assembly.
In cleaning, take care not to alter the settings
on the pilot assembly. See the operating
instructions supplied with your vent-free log
heater for additional cleaning instructions.
WARNING: Logs can be very
hot! Allow logs to cool before
handling.
IMPORTANT:
Turn off the gas supply at
the external shutoff valve before servicing
appliance. Any safety screen or guard re-
moved for servicing must be replaced prior
to operating the appliance.
Installation and repair should be done by a
qualified person. The appliance should be
inspected before use and at least annually by
a professional service person. More fre-
quent cleaning may be required due to ex-
cessive lint from carpeting, pet hair, etc. It is
imperative that the control compartments,
burners and circulating air passageways of
the appliance be kept clean.
WARNING: Children and
adults should be alerted to the
hazards of high surface tempera-
tures and to stay away to avoid
burns or clothing ignition. Young
children should be carefully su-
pervised when they are in the
same room as the appliance.
For lighting and operating this vent-free
firebox, please refer to the vent-free gas logs
manufacturer’s instruction manual.
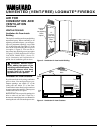
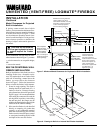
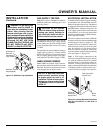
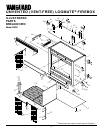
HEAT DEFLECTIVE HOOD
INSTALLATION
The factory supplied heat deflective hoods
must be installed inside the fireplace open-
ings on all three sides for the safe operation
of the unit as shown in Figure 19.
1. Remove protective covering from
hoods.
2. Position deflective hood into opening on
one side of the firebox and secure to the
top of the opening using screws provided.
3. Secure the ends of the hood to the fire-
box using two screws (provided) for
each side.
4. Repeat steps 2 and 3 to install hoods on
the remaining side and end of firebox.
CAUTION: Do not clean hood
with abrasive cleanser. Use only
regular household cleaners and
a smooth cloth.
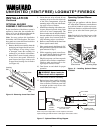
Figure 19- Typical Hood Installation
(Both Sides)
2 Screws
Each End of
Hood
Corner Post
Front Hood
(Typical Each Side)
3 Screws
(Top)
INSTALLATION
Continued