


110021-01G
For more information, visit www.desatech.com
For more information, visit www.desatech.com
15
15
INSTALLING LOGS
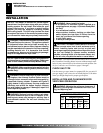
WARNING: Failure to position the parts in accor-
dance with these diagrams or failure to use only parts
specifically approved with this heater may result in
property damage or personal injury.
CAUTION: After installation and periodically there-
after, check to ensure that no yellow flame comes in
contact with any log. With the heater set to HI, check to
see if flames contact any log. If so, reposition logs
according to the log installation instructions in this
manual. Yellow flames contacting logs will create soot.
It is very important to install the logs exactly as instructed. Do not
modify logs. Only use logs supplied with heater. Before installing
logs, make sure log alignment screws are in place and straight.
Models CSG3924NT, CSG3924PT, CSG3924NR,
CSG3924PR, CTB3924NT, CTB3924PT, CTB3924NR
CTB3924PR, CSG3930NR, and CSG3930PR,
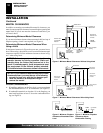
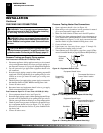
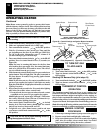
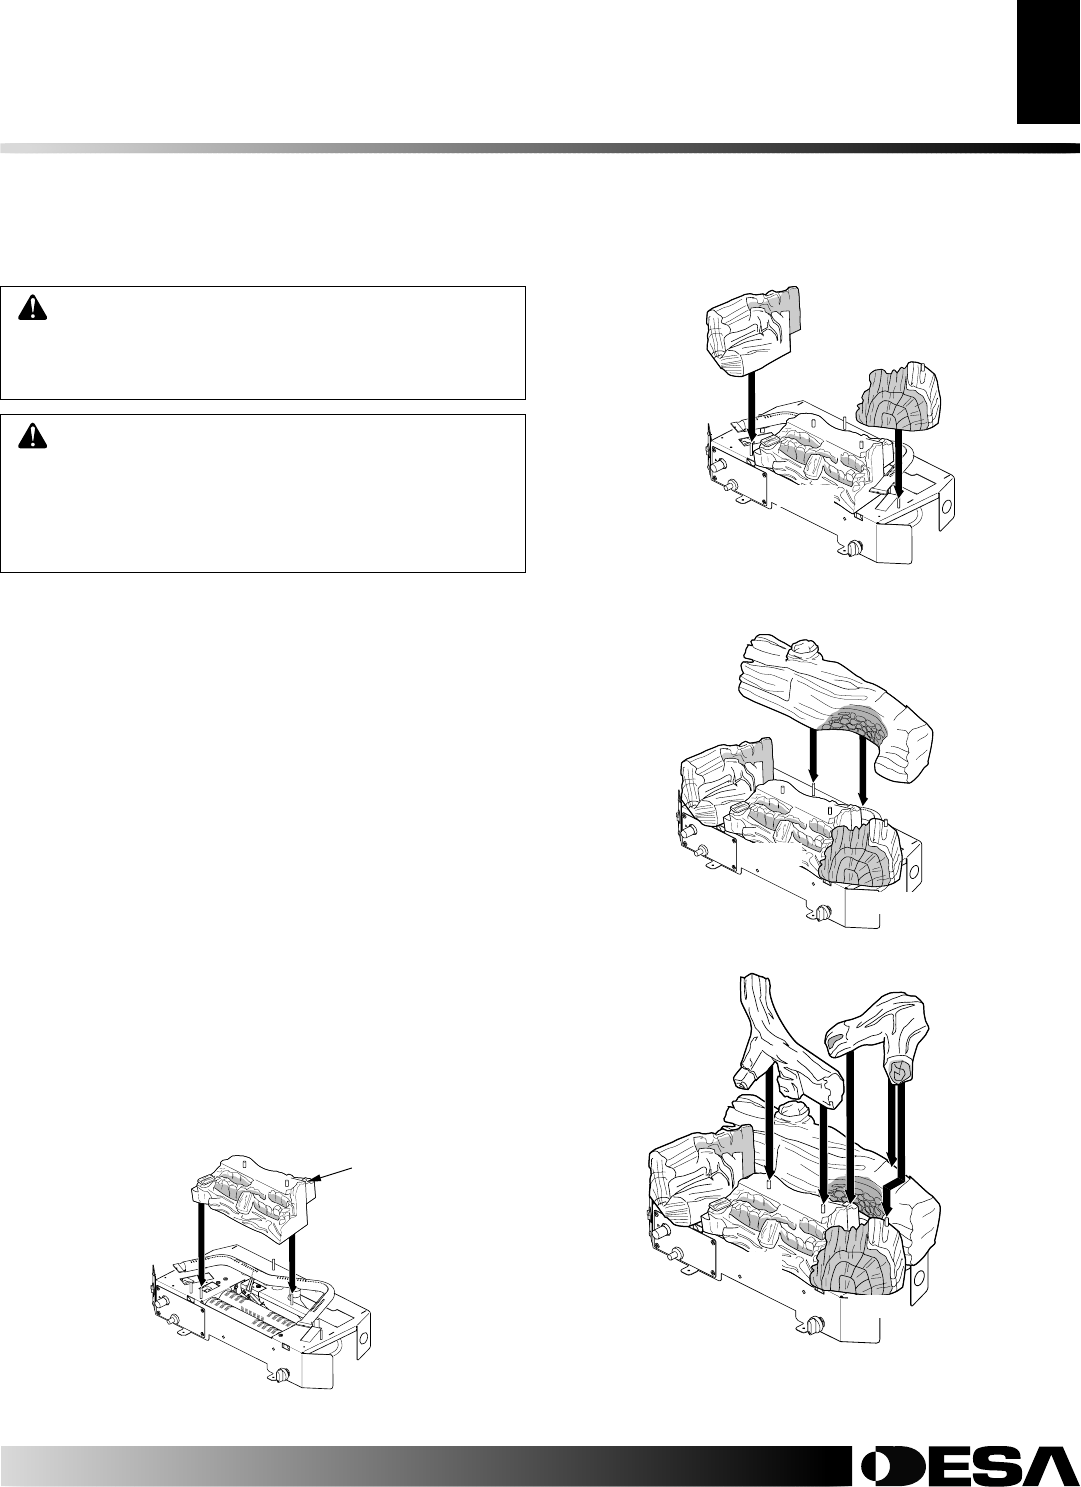
1. Place log #1 (ember bed) onto base. Position log over alignment
screws to left of front burner and behind middle burner. Ember
bed will sit on top of front and middle burners (see Figure 19).
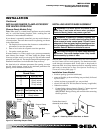
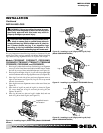
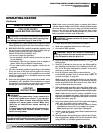
2. Place log #2 to the right of log #1. Log #2 will wrap around right
end of rear burner and sit on log alignment screw (see Figure 20).
3. Place log #3 on left side of base and onto alignment screw to
right of rear burner (see Figure 20). Log #3 will wrap around
left end of rear burner.
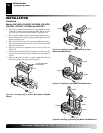
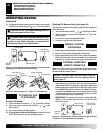
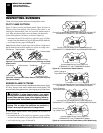
4. Place log #4 onto two alignment screws to the rear of base (see
Figure 21).
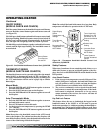
5. Place back of log #5 on notch in log #4 (as shown in Figure
22), across back part of log #1 and onto pin on log #2 (see
Figures 20 and 22).
6. Place log #6 onto two pins on log #1 (ember bed) and rest
back of log #6 on back log #4 (see Figure 22).
INSTALLATION
Installing Logs
INSTALLATION
Continued
Figure 19 - Installing Log #1 (Ember Bed) (Model CSG3924NR
Shown)
Figure 20 - Installing Log #2 (Right) and Log #3 (Left)
(Model CSG3924NR Shown)
Figure 21 - Installing Log #4 (Model CSG3924NR Shown)
Figure 22 - Installing Log #5 (Right) and Log #6 (Left)
(Model CSG3924NR Shown)
Log #5
Log #6
Log #4
Log #3
Log #1
Log #2
Log #4
Log #3
Log #1
Log #2
Log #3
Log #1
Log #2
Log #1
Log #5 will seat in
this location.