


7
104275
OWNER’S MANUAL
INSTALLATION
CHECK GAS TYPE
Use only propane/LP. If your gas supply is
not propane/LP, do not install heater. Call
dealer where you bought heater for proper
type heater.
INSTALLATION ITEMS
Before installing heater, make sure you have
the items listed below.
• piping (check local codes)
• sealant (resistant to propane/LP gas)
• equipment shutoff valve *
• ground joint union
• test gauge connection *
• sediment trap
• tee joint
• pipe wrench
* A CSA/AGA design-certified equipment
shutoff valve with 1/8" NPT tap is an ac-
ceptable alternative to test gauge connec-
tion. Purchase the optional CSA/AGA de-
sign-certified equipment shutoff valve from
your dealer. See Accessory, page 16.
WARNING: A qualified ser-
vice person must install heater.
Follow all local codes.
NOTICE: This heater is intended
for use as supplemental heat. Use
this heater along with your pri-
mary heating system. Do not in-
stall this heater as your primary
heat source. If you have a central
heating system, you may run
system’s circulating blower while
using heater. This will help circu-
late the heat throughout the
house. In the event of a power
outage, you can use this heater
as your primary heating source.
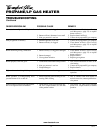
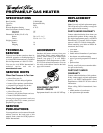
36"
3"
FLOOR
CEILING
Minimum
Minimum
Of Carpet
i
Combusti
8"
Minimum
From
Sides Of
Heater
Right
Side
Left
Side
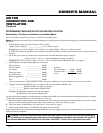
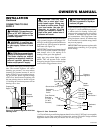
Figure 4 - Mounting Clearances As Viewed
From Front of Heater
LOCATING HEATER
This heater is designed to be mounted on a wall.
CAUTION: This heater cre-
ates warm air currents. These
currents move heat to wall sur-
faces next to heater. Installing
heater next to vinyl or cloth wall
coverings or operating heater
where impurities (such as to-
bacco smoke, aromatic candles,
cleaning fluids, oil or kerosene
lamps, etc.) in the air exist, may
discolor walls.
WARNING: Never install the
heater
• in a bathroom
• in a recreational vehicle
• where curtains, furniture,
clothing, or other flammable
objects are less than 36 inches
from the front, top, or sides of
the heater
• as a fireplace insert
• in high traffic areas
• in windy or drafty areas
WARNING: Maintain the mini-
mum clearances shown in Fig-
ure 4. If you can, provide greater
clearances from floor, ceiling,
and joining wall.
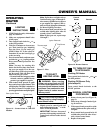
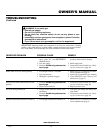
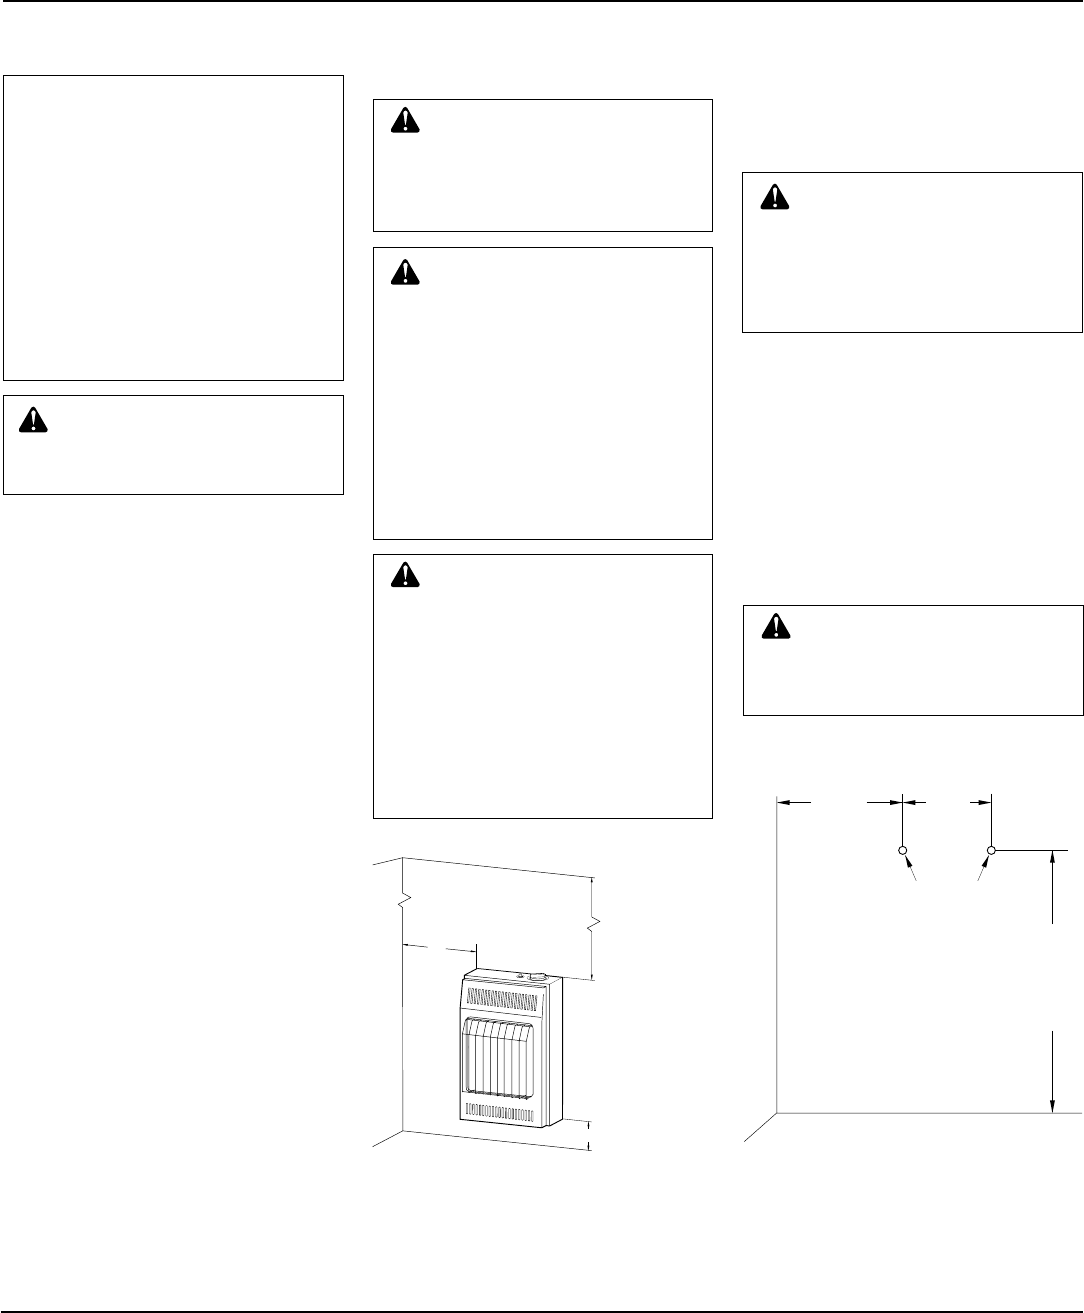
Minimum To
Top Surface
Of Carpeting,
Tile Or Other
Combustible
Material
Mounting
Screw
Locations
10
7
/8"
Minimum To
Maintain 6"
Clearance
From Wall
7
3
/4"
20
1
/4"
Minimum To
Maintain 3"
Clearance
From Floor
FLOOR
JOINING WALL
INSTALLING HEATER TO
WALL
Marking Screw Locations
1. Determine where you will locate heater.
Figure 5 - Mounting Screw Locations
Continued
For convenience and efficiency, install heater
• where there is easy access for operation,
inspection, and service
• in coldest part of room
CAUTION: If you install the
heater in a home garage
• heater pilot and burner must be
at least 18 inches above floor
• locate heater where moving
vehicle will not hit it
IMPORTANT:
Vent-free heaters add mois-
ture to the air. Although this is beneficial,
installing heater in rooms without enough
ventilation air may cause mildew to form
from too much moisture. See Air for Com-
bustion and Ventilation, pages 4 through 6.
WARNING: Maintain minimum
clearances shown in Figure 5. If
you can, provide greater clear-
ances from floor and joining wall.
2. Mark two mounting screw locations on
wall (see Figure 5).