


111160-01B
For more information, visit www.desatech.com
For more information, visit www.desatech.com
15
15
INSTALLATION
Continued
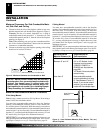
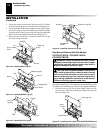
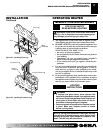
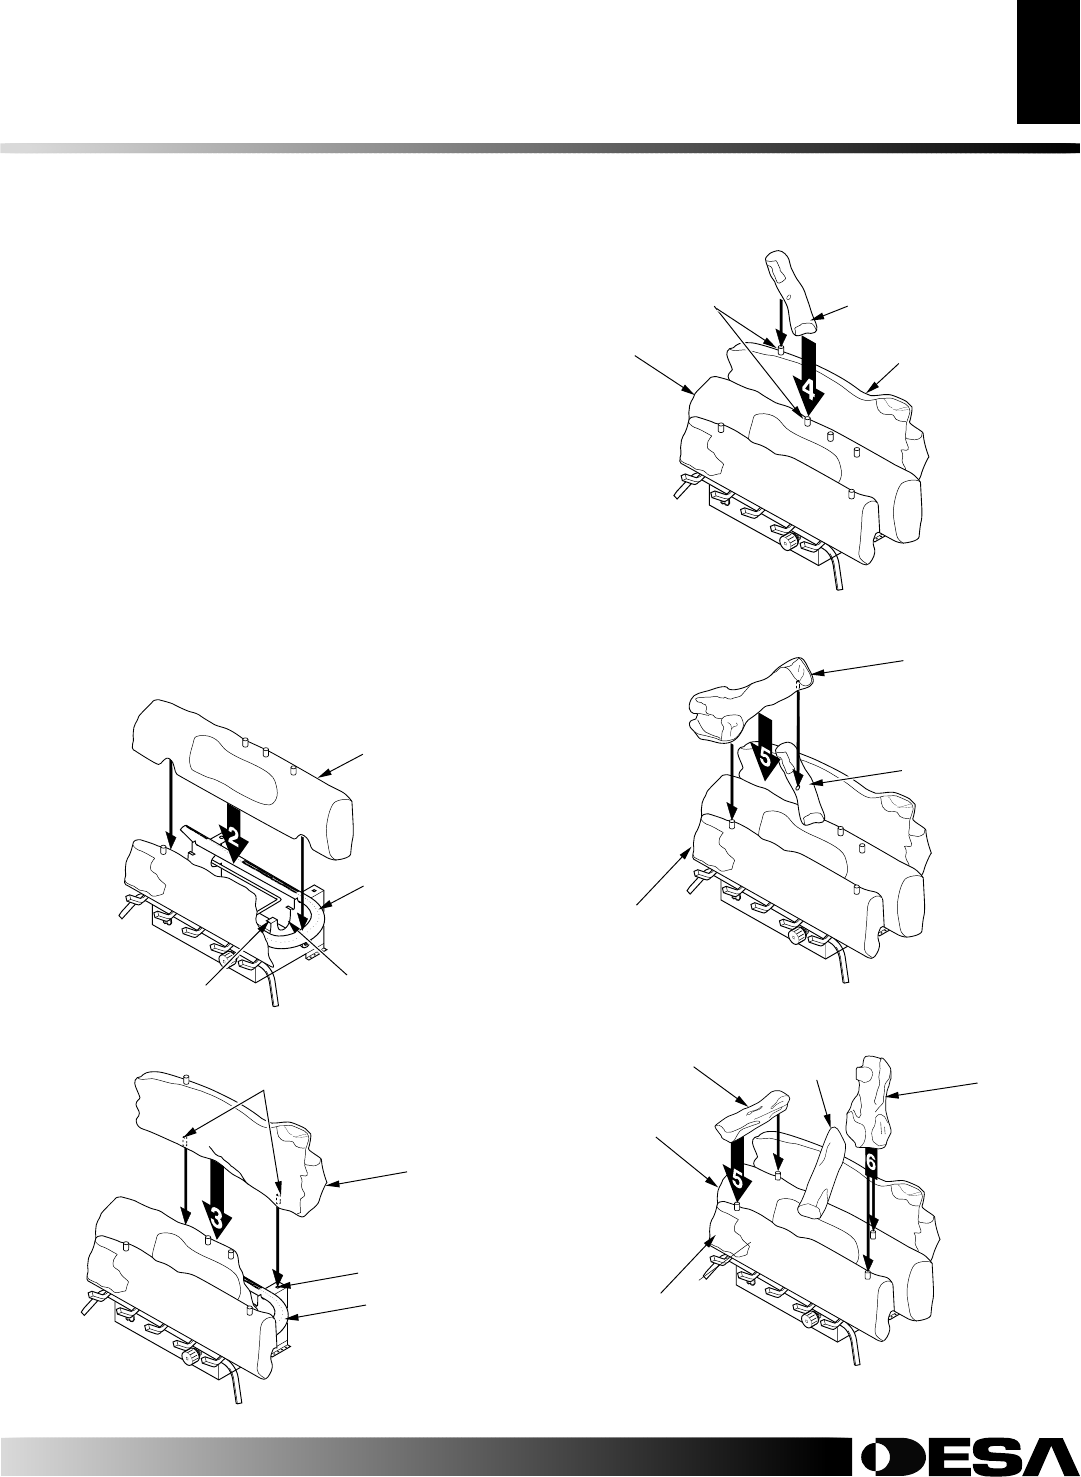
Figure 25 - Installing Middle Log #2 (CCL3930PTB/NTB Shown)
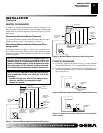
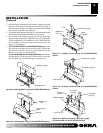
Figure 26 - Installing Rear Log #3 (CCL3930PTB/NTB Shown)
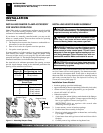
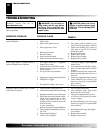
Figure 27 - Installing Crossover Log #4 (CCL3930PTB/NTB
Shown)
Middle Log (#2)
Tab
Burner
U-Shaped Slot
Hole in Grate
Base
Pins
Burner
Middle Log
(#2)
Back
Log (#3)
Pins
Crossover Log (#4)
INSTALLATION
Installing Logs (Cont.)
2. Place the base of the middle log (#2) in the U-shaped slots of the
grate base. The cutout on the right of the middle log should fit
over the burner (see Figure 25). Make sure the front of the middle
log is resting on the tabs of the grate base.
3. Locate pins on the bottom of back log (#3). Slide these pins into the
holes in the grate base behind the burner (see Figure 26).
4. Locate holes on the bottom of crossover log (#4). Slide front
hole onto the left pin (CCL3924PTA/NTA or CCL3930PTB/
NTB) or middle pin (CCL3018PA/NA or CCL3018PTA/NTA)
on the middle log (#2) and the pin on the back log (#3). See
Figure 27 for placement.
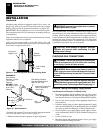
5.
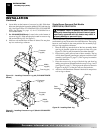
For CCL3924PTA/NTA and CCL3930PTB/NTB Only: Locate
pin and hole on the bottom of crossover log (#5). Slide the pin
into the hole located in crossover log (#4). Slide the hole onto
the pin on front log (#1). See Figure 28.
For CCL3018PA/NA and CCL3018PTA/NTA Only: Locate holes
on the bottom of crossover log (#5). Slide the holes over the left
pins on middle log (#2) and front log (#1). See Figure 29.
Figure 28 - Installing Crossover Log #5 (CCL3930PTB/NTB
Shown)
Crossover Log (#4)
Front Log (#1)
Crossover
Log (#4)
Front Log (#1)
Figure 29 - Installing Crossover Log #5 and Log #6
(CCL3018PA/NA and CCL3018PTA/NTA Only)
Crossover Log (#5)
Crossover
Log (#5)
Rear Log
(#3)
Middle Log (#2)
Crossover
Log (#6)