


4
105616
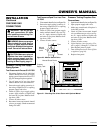
VENT-FREE PROPANE COMPACT FIREPLACE
WARNING: Failure to position
the parts in accordance with these
diagrams or failure to use only
parts specifically approved with
this fireplace may result in prop-
erty damage or personal injury.
ASSEMBLY
WARNING: Always have
branch support and screen in
place before operating fireplace.
This prevents excessive tempera-
tures on fireplace surfaces.
ASSEMBLING FIREPLACE
Tools Required:
• Phillips screwdriver,
• 5/16" hex wrench
• Slotted screwdriver
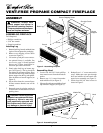
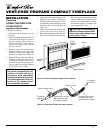
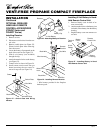
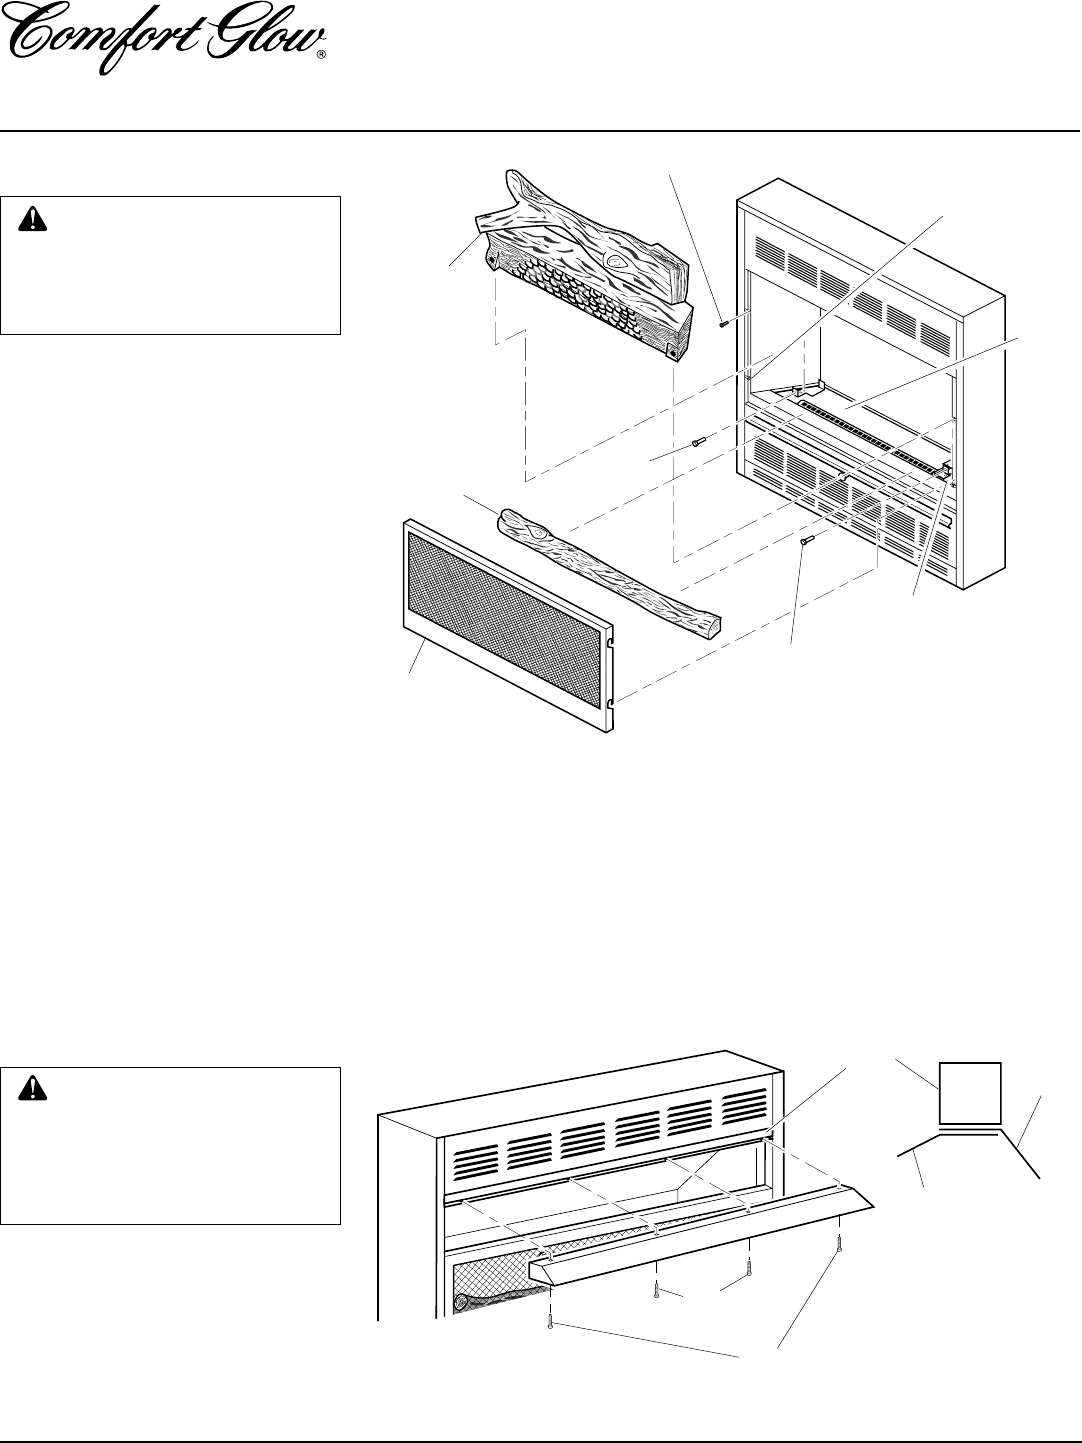
Installing Log
1. Remove back log, branch, and hood from
log box. Discard protective packaging.
2. Remove two shipping screws above
screen (see Figure 2).
3. Lift screen up and pull out to remove.
4. An optional blower is available. See
Accessories, page 24. Install optional
blower now. Follow installation in-
structions provided with blower.
5. Gently place back log on burner sup-
port (see Figure 2). The log should fit
flat against top of burner support. Place
two #10 one-inch-long screws through
burner support into the log and tighten.
Place branches on branch support (see
Figure 2).
6. Do not allow branch to contact flame.
If flame contacts branch, soot will be
created.
7. Reattach screen by placing notches in
screen frame over shoulder screws and
pushing down.
Figure 2 - Assembling Fireplace
Back Log
Screen
Branch
Burner
Support
Screw
Branch Support
Screen Shipping Screw
Shoulder Screw
Screw
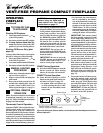
Assembling Hood
1. Locate four #10-3/8" black phillips
sheet metal screws from the hardware
packet.
2. Remove two 1
3
/4" screws from under-
neath middle rail (see Figure 3).
3. Slip top of hood between middle rail and
top of firebox wrapper (see Figure 3).
Figure 3 - Assembling Hood
2 Short
Screws
1
3
/4" Screws
Firebox Top
Hood
Middle Rail
4. Reinstall two 1
3
/4" screws removed in
step 2. Make sure screw pass through
hood and middle rail and attach into
upper louver assembly (see Figure 3).
5. Attach four #10-3/8" hood screws as
shown in Figure 3.