


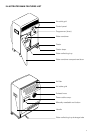


1
2
8
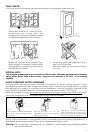
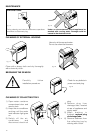
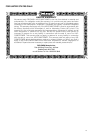
TEMPORARY INSTALLATION
Note: In both cases (permanent and temporary installations) make sure that the Pinguino is
positioned on level ground. If necessary use the two caster stops for the front casters
This installation makes it easy to
use Pinguino in any room,
provided there is a window or a
door: it allows you to use the
Pinguino immediately (Fig. 5).
Suction discs may be used to
keep window or door closed (Fig.
6).
Pinguino is equipped with an
adjustable window bracket. If you
have a sash window, place the
bracket on the window sill, extend
the bracket fully within the window
frame and lower the window onto
the bracket. Insert the nozzle of the
exhaust hose into the slot, then
connect the hose to the air
conditioner (Fig. 7).
Thanks to the wing nut, it’s possible to
use the window bracket also for sliding
windows. Position the hole of the
bracket so to allow a correct
installation of the exhaust hose (see
the following instructions).
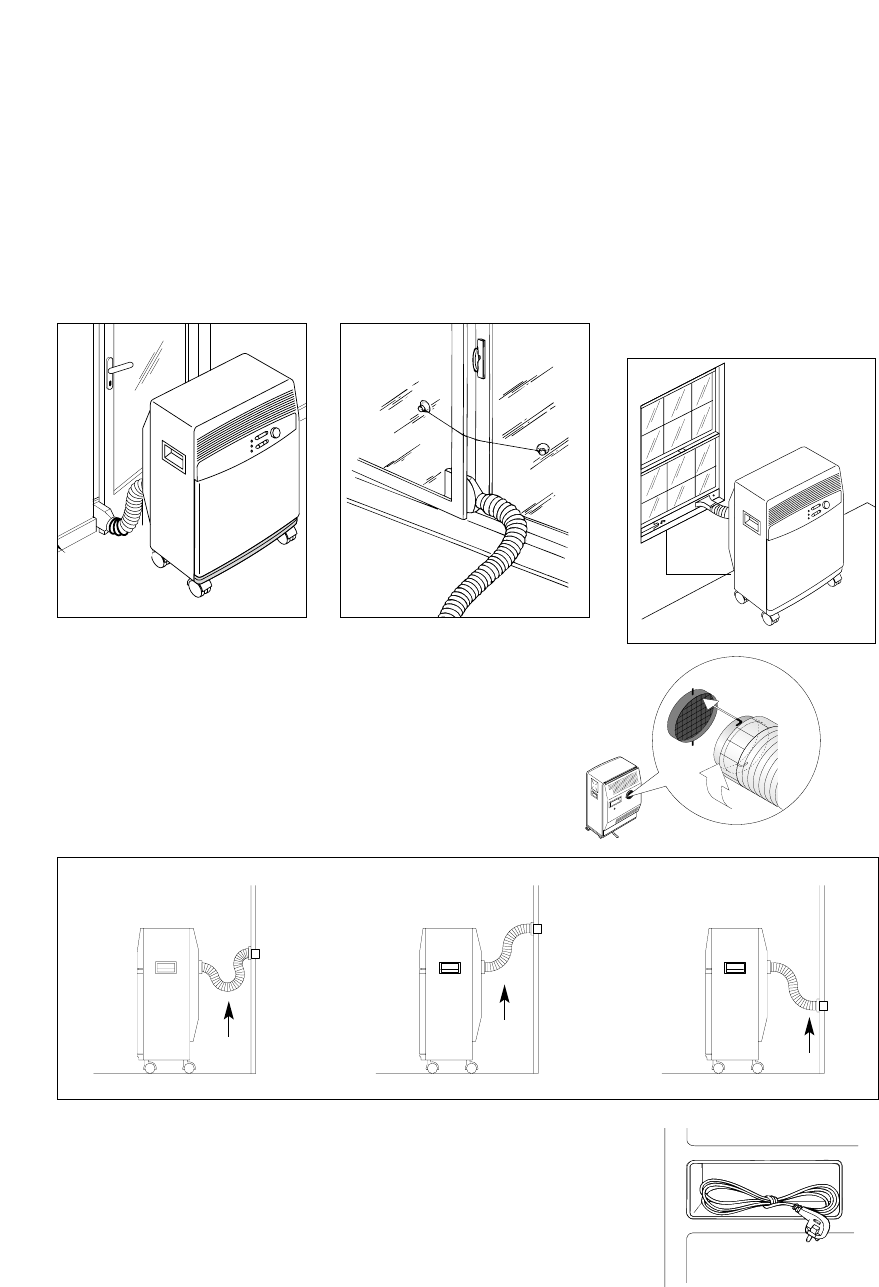
30 cm
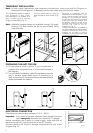
PREPARING THE UNIT FOR USE
1) Fit the exhaust tube in place; if your conditioner is
supplied with a bayonet tube, it is fitted as illustrated in
the diagram.
2) For permanent installation, place the appliance near the
wall or window outlet. Make sure it is standing on a
level surface and fit the special shock absorbers/castor
stops underneath the castors.
1) Water collects at this point 2) Bend this section 3) Bend this section
NO YES YES
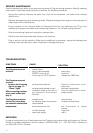
ELECTRICAL CONNECTION
Check that the power supply voltage is 115 V ~ 60 Hz.
Important: if you need to use and extension cord, please be sure to
use a
heavy duty extension cord (minimum 14 gauge).
Before connecting the Pinguino to power supply, make sure that all
switches on the front control panel are in the OFF position.
Connect power cord found in storage compartment at rear of the
Pinguino (Fig. 9).
fig. 5 fig. 6
fig. 7
fig. 8
fig. 9
window
bracket
Note: Additional exhaust hoses are available through Dè longhi
America. For best results we do not recommend using
more than one.