


Version B - For Reduction G016.J
®
Dayton Operating Instructions and Parts Manual
5
Model 3VG81
Installation (Continued)
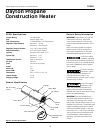
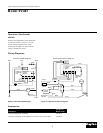
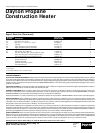
Hose
Propane
Tank
Hose
POL
Fitting
Supply
Valve
Inlet Connector
Regulator
Vent
(pointing
down)
Figure 4 - Regulator With Vent Pointing
Down
IMPORTANT: Extra hose or piping may be
used if needed. Install extra hose or piping
between hose/regulator assembly and
propane tank. You must use the regulator
supplied with heater.
4. Open propane supply valve on propane
tank(s) slowly.
NOTE: If not opened slowly, excess-flow
check valve on propane tank will stop gas
flow. If this happens, close propane supply
valve and open again slowly.
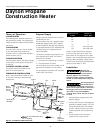
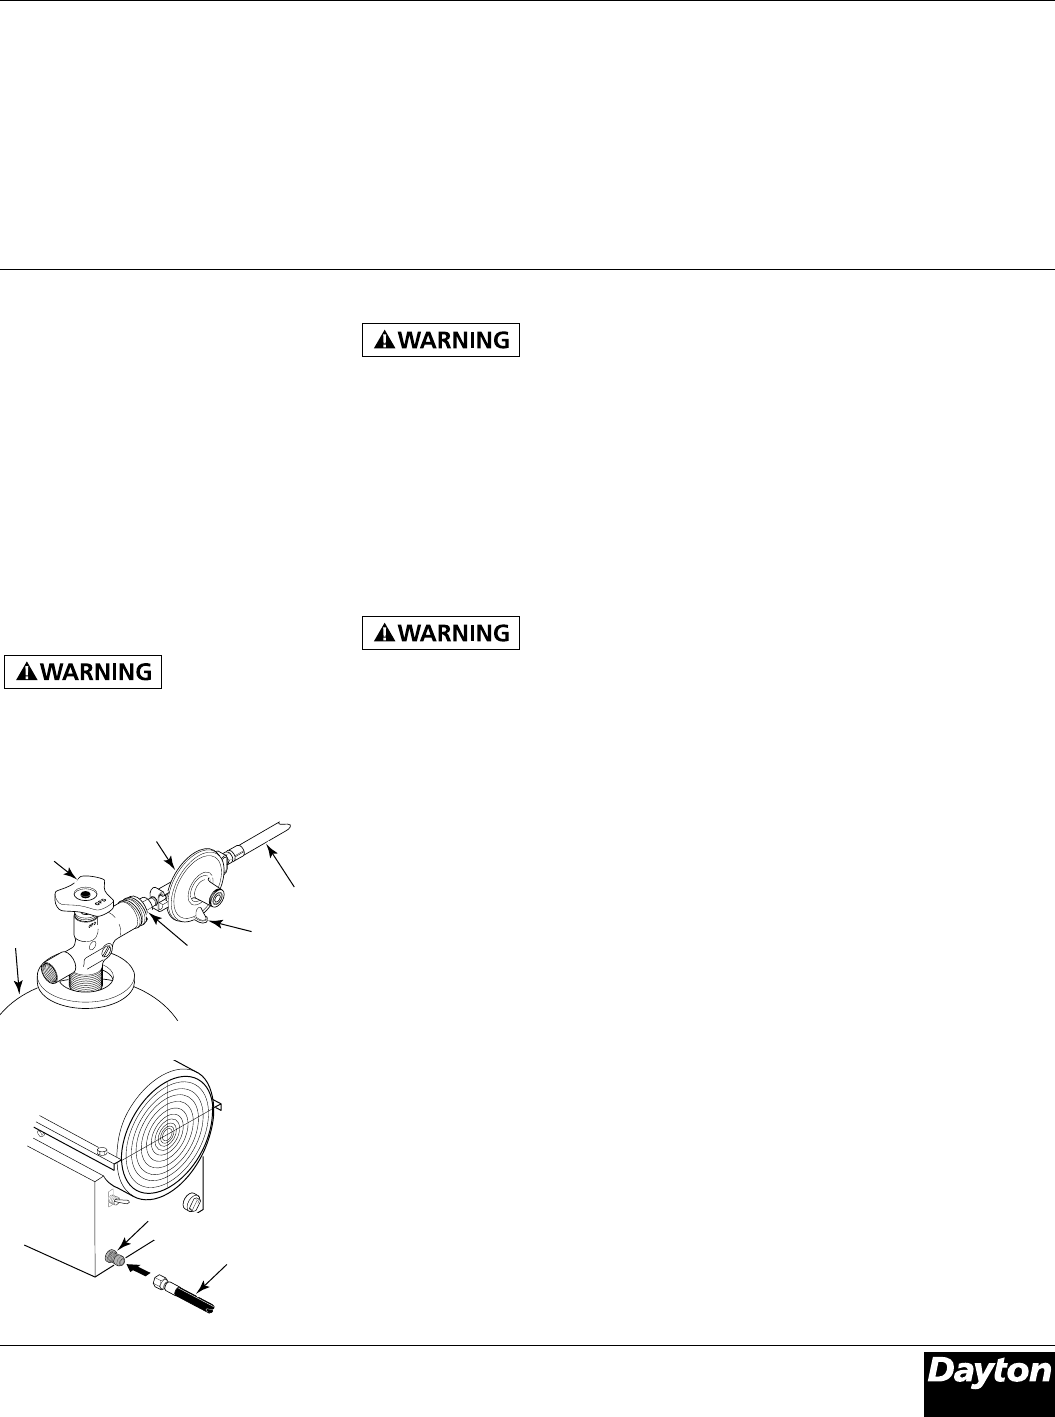
5. Check all connections for leaks.
Figure 5 - Hose and Inlet Connector
Never use an open
flame to check for
a leak. Apply a mixture of liquid soap
and water to all joints. Bubbles
forming show a leak. Correct all leaks
at once.
6. Close propane supply valve.
Ventilation
Follow the mini-
mum fresh, outside
air ventilation requirements. If proper
fresh, outside air ventilation is not
provided, carbon monoxide poisoning
can occur. Provide proper fresh, outside
air ventilation before running heater.
Provide a fresh air opening of at least
three square feet for each 100,000 Btu/Hr
rating. Provide extra fresh air if more
heaters are being used.
Operation
Review and
understand the
warnings in the Safety Information
Section, pages 2 and 3. They are needed
to safely operate this heater. Follow all
local codes when using this heater.
TO START HEATER
1. Follow all installation, ventilation and
safety information.
2. Locate heater on stable and level
surface. Make sure strong drafts do
not blow into front or rear of heater.
3. Plug power cord of heater into a three-
prong, grounded extension cord.
Extension cord must be at least six feet
long. Extension cord must be UL listed.
Extension Cord Size Requirement
Up to 50 feet long, use 18 AWG rated
cord.
51 to 100 feet long, use 16 AWG
rated cord.
101 to 200 feet long, use 14 AWG
rated cord.
4. Plug extension cord into a 120 volt/60
hertz, three-hole, grounded outlet.
5. Open propane supply valve on propane
tank(s) slowly.
NOTE: If not opened slowly, excess-flow
check valve on propane tank will stop gas
flow. If this happens, close propane supply
valve and open again slowly.
6. Turn thermostat control knob fully
counterclockwise to the "COOLER"
position. Turn ON/OFF switch to the
ON position. Turn thermostat control
knob slowly clockwise until electric
motor and fan begin to run. Heater
will start in approximately 3 seconds.
Adjust thermostat control knob to
WARMER or COOLER setting as
needed.
NOTE: If heater does not start after 3
seconds, the ignition control will automati-
cally attempt to start heater one time. If
heater fails to start on this attempt, the
safety control will "lock out" and no
further automatic restarts will be at-
tempted. This could occur if air remains in
fuel line. If heater fails to start on this
attempt, turn ON/OFF switch to OFF
position. Wait ten seconds for safety
control to reset, then turn ON/OFF switch
back to ON position and try to start heater
again.
7. Thermostat Operation Only: During
normal thermostat operation, heater
will cycle off when air temperature
rises to thermostat setting. When air
temperature drops sufficiently below
thermostat setting, the electric motor
and fan will begin to run. After 15 to
60 seconds, heater burner should
automatically ignite and provide heat
to maintain temperature setting.