


Dayton Operating Instructions and Parts Manual 3VG78
6
®
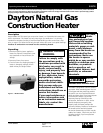
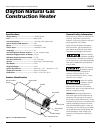
Dayton Natural Gas
Construction Heater
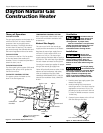
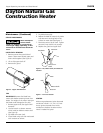
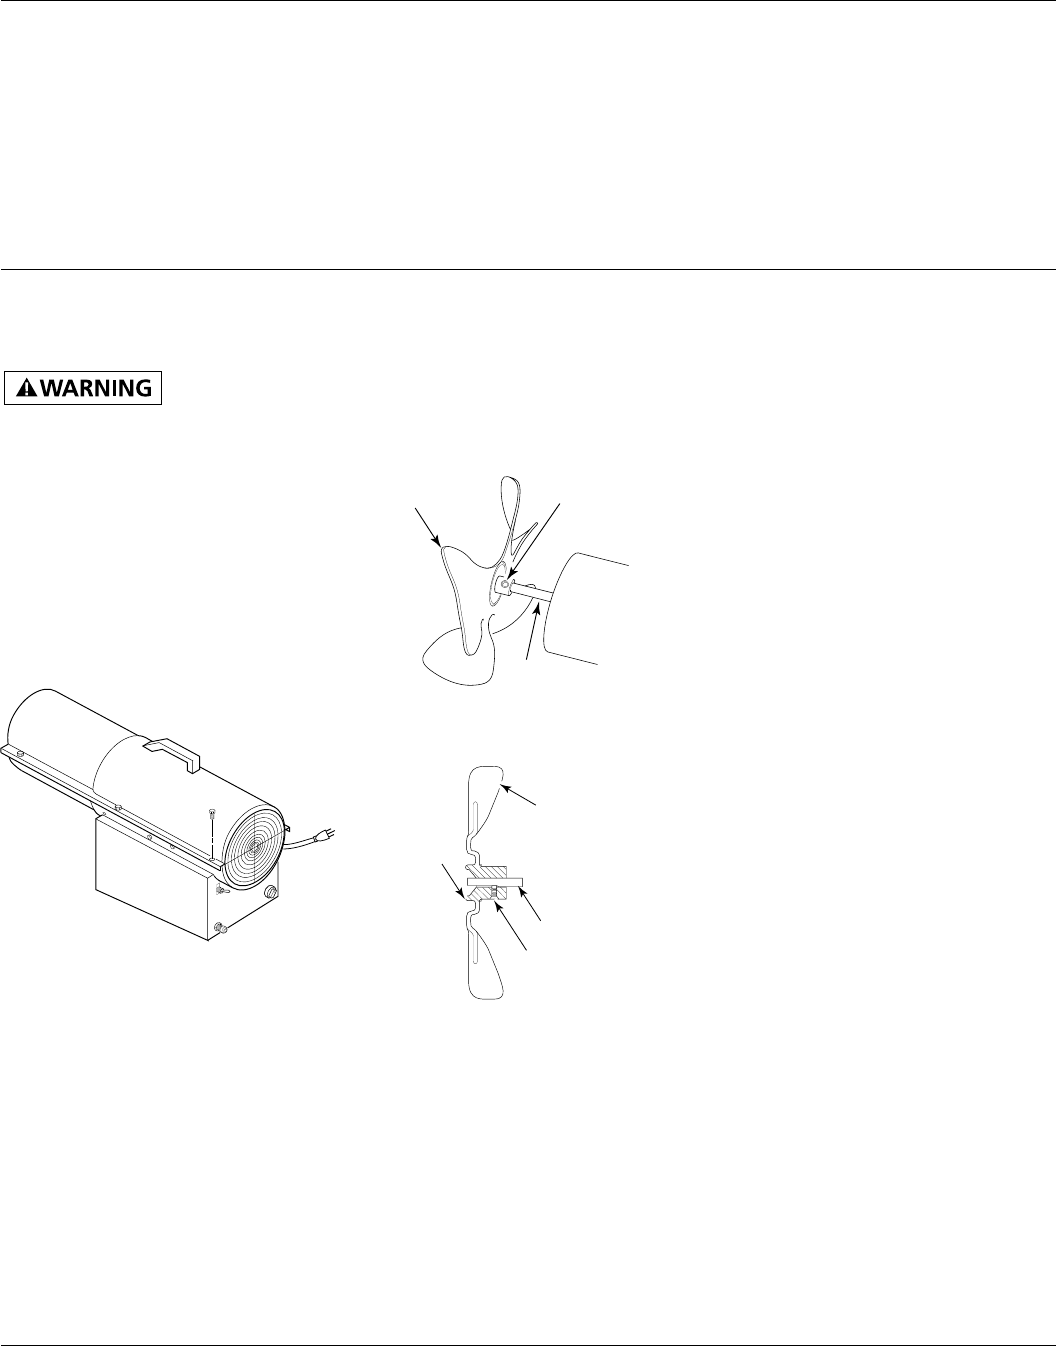
Figure 6 - Fan, Motor Shaft, and Setscrew
Location
Figure 7 - Fan Cross Section
FAN
IMPORTANT: Remove fan blade from
motor shaft before removing motor from
heater. The weight of the motor resting on
the blade could damage the fan pitch.
1. Remove upper shell (See Upper Shell
Removal).
2. Use hex wrench to loosen setscrew
which holds fan blade to motor shaft
(See Figure 6)..
3. Slip blade off motor shaft.
4. Clean blade using soft cloth moistened
with kerosene or solvent.
IGNITOR
Make sure gap between ignitor electrode
and burner nozzle is .13" min./.15"max.
Access ignitor electrode from inside
combustion chamber. No other mainte-
nance is needed for ignitor.
Never attempt to
service heater
while it is plugged in, connected to
natural gas supply, operating, or hot.
Severe burns and electrical shock can
occur.
SERVICE PROCEDURES
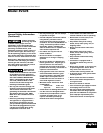
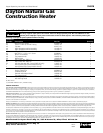
UPPER SHELL REMOVAL
1. Remove screws along each side of
heater. These screws attach upper and
lower shells together (See Figure 5).
2. Lift or slide upper shell off.
3. Remove fan guard.
Figure 5 - Upper Shell Removal
5. Dry blade thoroughly.
6. Replace fan blade on motor shaft. Make
sure setscrew is touching back of flat
surface on motor shaft (See Figure 7).
7. Place setscrew on flat of shaft. Tighten
setscrew firmly (40-50 inch-pounds).
8. Replace fan guard and upper shell.
FAN LP-PFA/P 023
Fan Blade
Setscrew
Motor
shaft
FAN CROSS SECTION LP-PFA/P 013
Hub
Setscrew
Motor Shaft
Fan
Maintenance (Continued)