


Copyright 2004 37 Cheap Charlie Owner’s Manual
Canadian Comfort Industries www.dansons.com
Dansons Group Inc.
APPENDIX “E” … continued
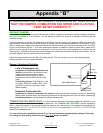
INSTALLATION
NOTE: Always Disconnect Power Before Performing the Thermostat Installation
A 24 volt wall thermostat and 25 feet of 18 gage thermostat wire is included in your heaters accessory package. It is
recommended that the thermostat and thermostat wire be installed by an authorized
Cheap Charlie dealer.
Tools Needed
¼” Hex Nutsetter & Driver
Wirestripper
Smaller size Flat Head Screwdriver
Installation Steps
Follow the thermostat manufactures installation procedures for the Heating Thermostats
1. Unplug stove power cord from the wall outlet.
2. To gain access to the inside of the stove, remove the six x ¼” hex screws from the slotted back access
panel.
3. Unscrew the control board from the side of the heater. 2 x ¼” hex screws.
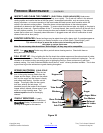
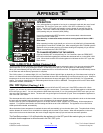
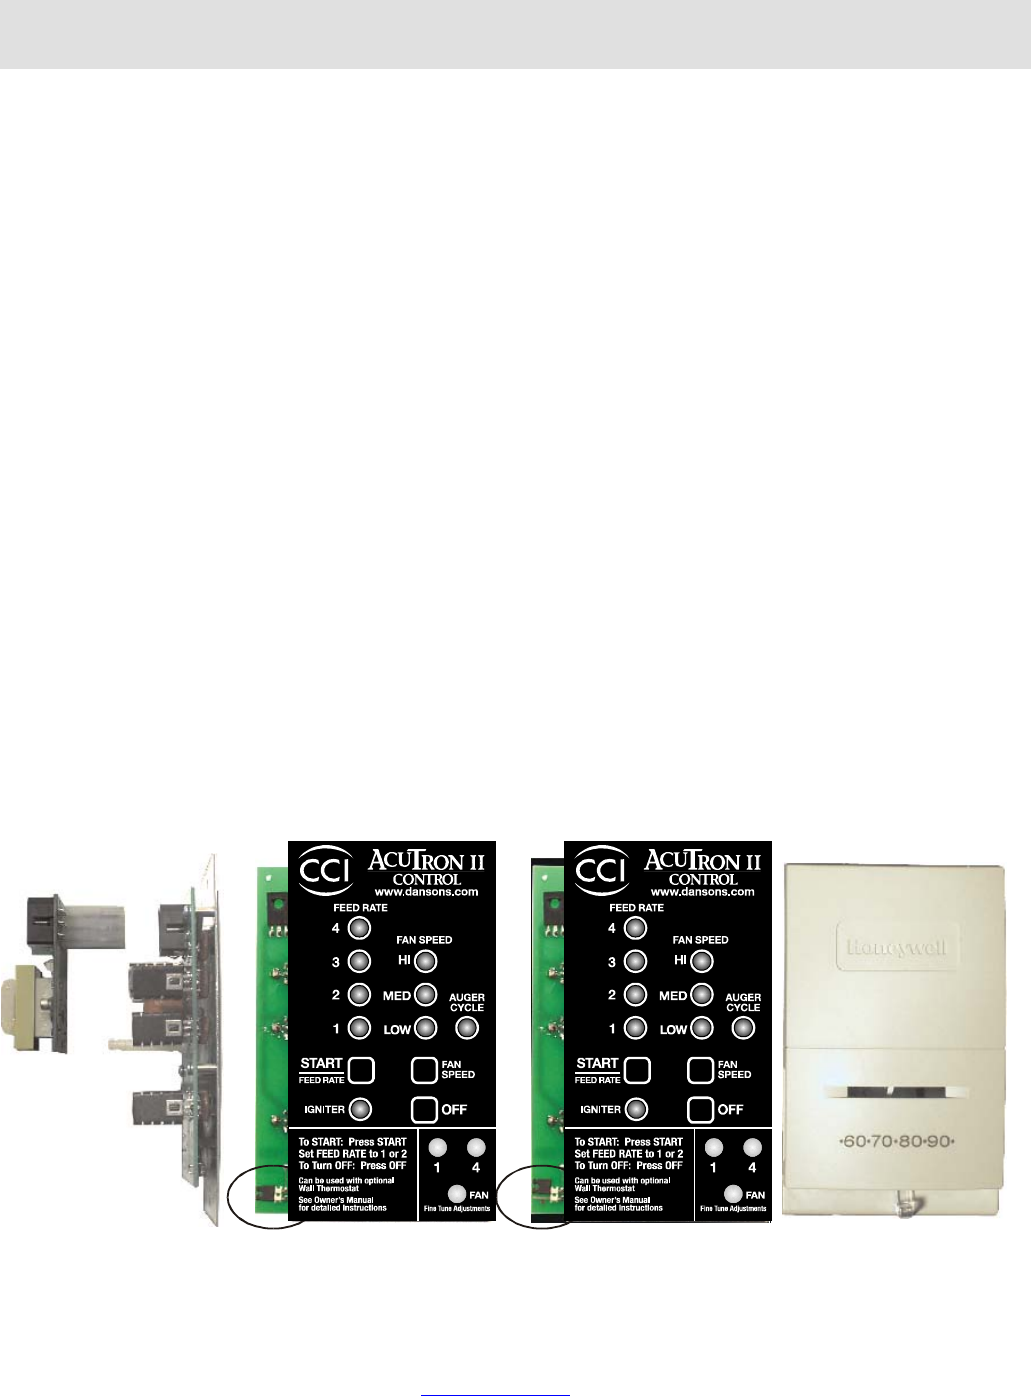
4. Locate the thermostat terminal block, marked T’STAT INPUT, found on the back of the board (see figure
31).
5. Be sure to run the thermostat wires through one of the slots of the rear access panel, before connecting the
wires.
6. Connect the two wires from your thermostat to the terminals (one per terminal). Ensure the wires are firmly
connected.
7. Connect the two wires at your wall thermostat to their terminals. Ensure these are firmly connected.
8. Remove the black two prong jumper, (see figure 32), located on the front, left hand side, near the bottom
corner and reconnect it to only one of the posts. (see figure 33).
9. Reinstall the control board and the slotted rear access panels.
10. Plug in the stove and you are ready to operate with your thermostat!
figure 31 figure 32 figure 33 figure 34
IMPORTANT: IF THE WALL THERMOSTAT PROVIDED IS NOT USED, THE JUMPER IS
REQUIRED FOR THE STOVE TO OPERATE IN MANUAL MODE (SEE FIGURE 32).