


5
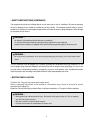
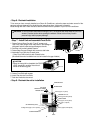
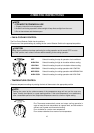
• Step 1 - Prepare Components For Installation
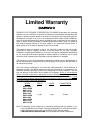
Parts for installation are as follows;
• Sill Bracket (2 pieces)
• Window Kit Left side (Frame ‘L+Shutter) - (1 piece)
• Window Kit Right side (Frame ‘R+Shutter) - (1 piece)
• Sash Bracket (1 piece)
• DRAIN, DRAIN seal
• Frame Guide Lower - (2 pieces)
• Levelling Screw (Machine M8x45) - (2 pieces)
• 1 inch Screw (M5x30) - (4 pieces)
• 5/8 inch Screw - (M4x16) - (8 pieces)
• DRAIN SCREW (M4x8) - (2 pieces)
• 1/4 inch Screw (M4x6) - (8 pieces)
• Window Seal A, B (2 pieces)
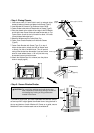
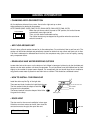
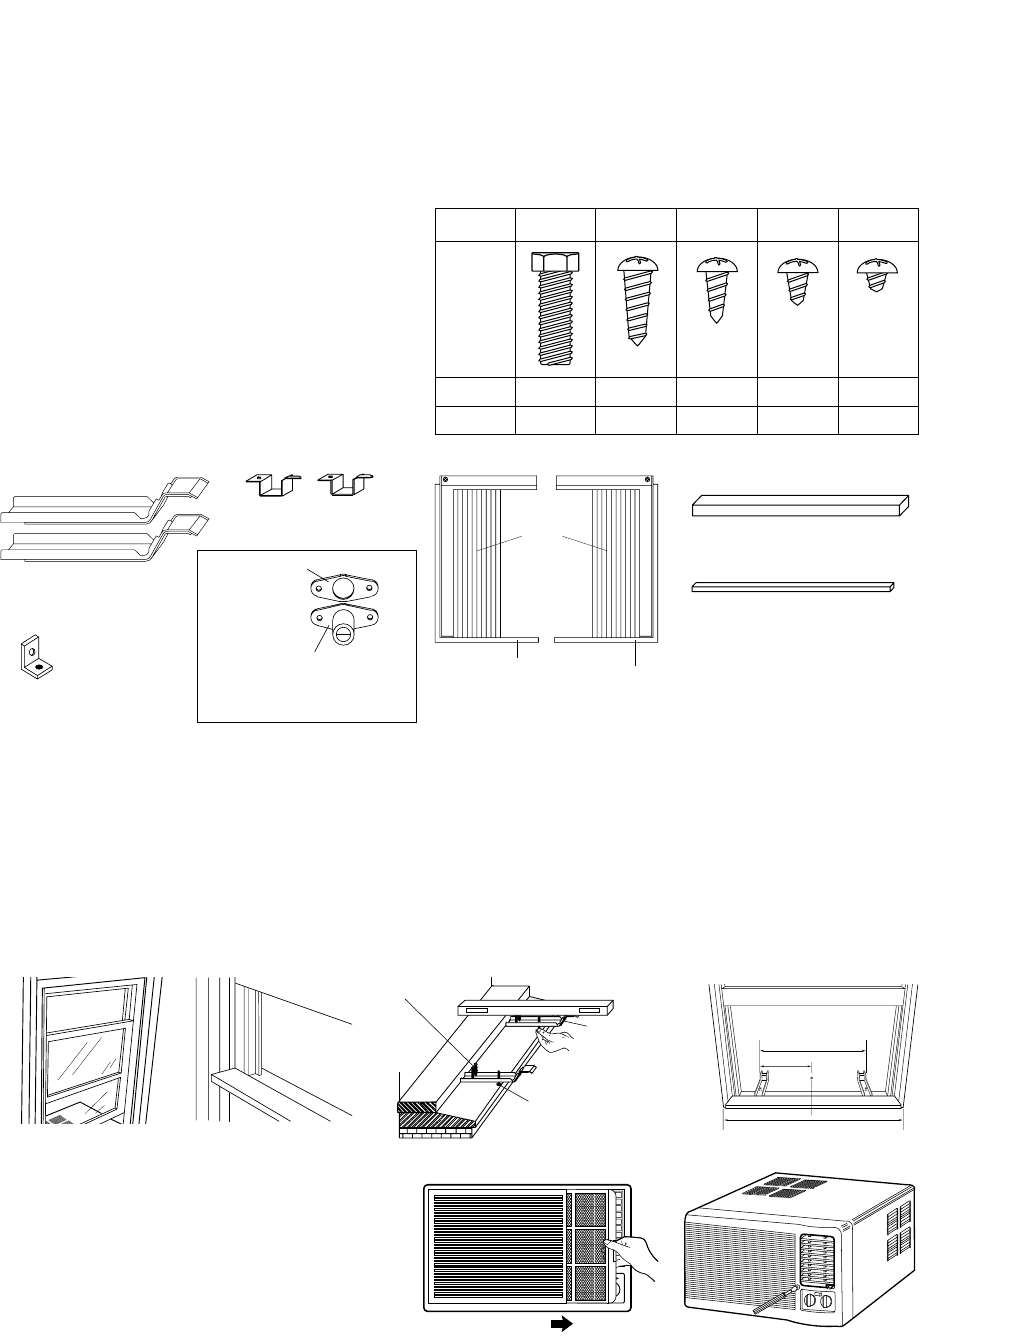
• Step 2 - Prepare Window For Installation
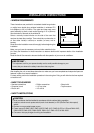
1. Inspect window track, sash and sill to be sure they are strong enough to hold an air conditioner.
2. Measure width between window frame to be sure instant mount will fit in the window. Instant mount models are
designed for Windows 27.5 inch (699mm) to 36 inch (914mm) wide.
3. Mark the center of Window sill with pencil.
4. Insert Screws (Type A) into the sill bracket.
5. Attach Sill bracket to window sill using two Screws (Type B) by each bracket. The outside edge of window bracket
should be 11.8 inch (300mm) from center line.
6. Adjust Screw (Type A) so that Sill Bracket have a slight tilt by using carpenter's level meter.
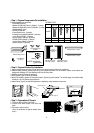
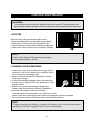
• Step 3 - Preparation of Chassis
1. Pull the Air-filter out of the Front Grille.
2. Loosen screw which fasten Front Grille with
driver.
3. Pull knobs out of the control.
(when the knobs are too tight to release, leave
them.)
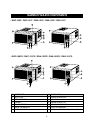
300mm
600mm
720~915mm
Screw Type B
SILL
Screw Type A
SILL BRACKET
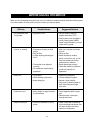
SHAPE
SPEC
Q'TY
Type A
M8 x 45
2
Type B
M5 x 30
4
Type C
M4 x 16
8
Type D
M4 x 8
2
Type E
M4 x 6
8
• SCREW TYPE
Window
Shutter
(2 pieces)
Window Seal A (1 piece)
Window Seal B (1 piece)
Sill Bracket (2 pieces)
Window kit Frame
Left side (1 piece)
Window kit Frame
Right side (1 piece)
Sash Bracket
(1 piece)
Frame Guide Lower
(2 pieces)
DRAIN Seal
DRAIN
699~914mm
SASH
✽ NOTE: Use Screw
(Type D) only