


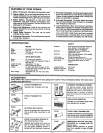

Installation
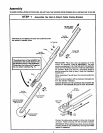
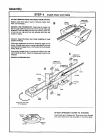
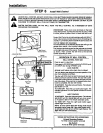
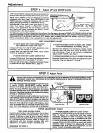
STEP 2 Attach Tee Rail to Header Bracket
Cle_s Pin
5/16"x2-3/4"
Header
Bracket
Packing
MaterLal
PROCEDURE: Position opener chassis on garage floor
below the header bracket. Use packing material base to
protect cover. NOTE: To enable the Tee rail to clear
sectional door springs, it may be necessary to lift the
chassis onto a temporary support.
CAUTION: Chassis must either be eecured to support
or held firmly in place by another person.
Raise the Tee rail until pulley and header brackets come
together. Align bracket holes and join with clevis pin as
shown. Insert ring fastener to secure.
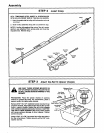
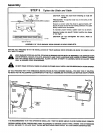
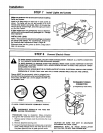
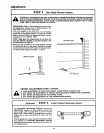
STEP 3
Position Opener Chassis
Follow only those instructions which apply to your door type as illustrated.
TO PREVENT DAMAGE TO ALL LIGHTWEIGHT DOORS AND DOORS WITH WINDOWS, DO NOT REST
THE OPENER ON THE DOOR.
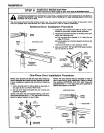
INSTALLATION
SECTIONAL & ONE-PIECE
DOOR WITH TRACK
NOTE: A 2x4 is convenient for setting an ideal door-
to-Tee rail distance. It is not necessary where headroom
is insufficient.
PROCEDURE: Raise the opener chassis onto a step-
ladder. Open garage door. Place a 2x4 on top section of
door near centerline as shown below. Rest Tee rail on 2 x4.
Tee Rail 2x4
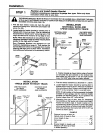
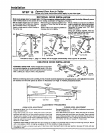
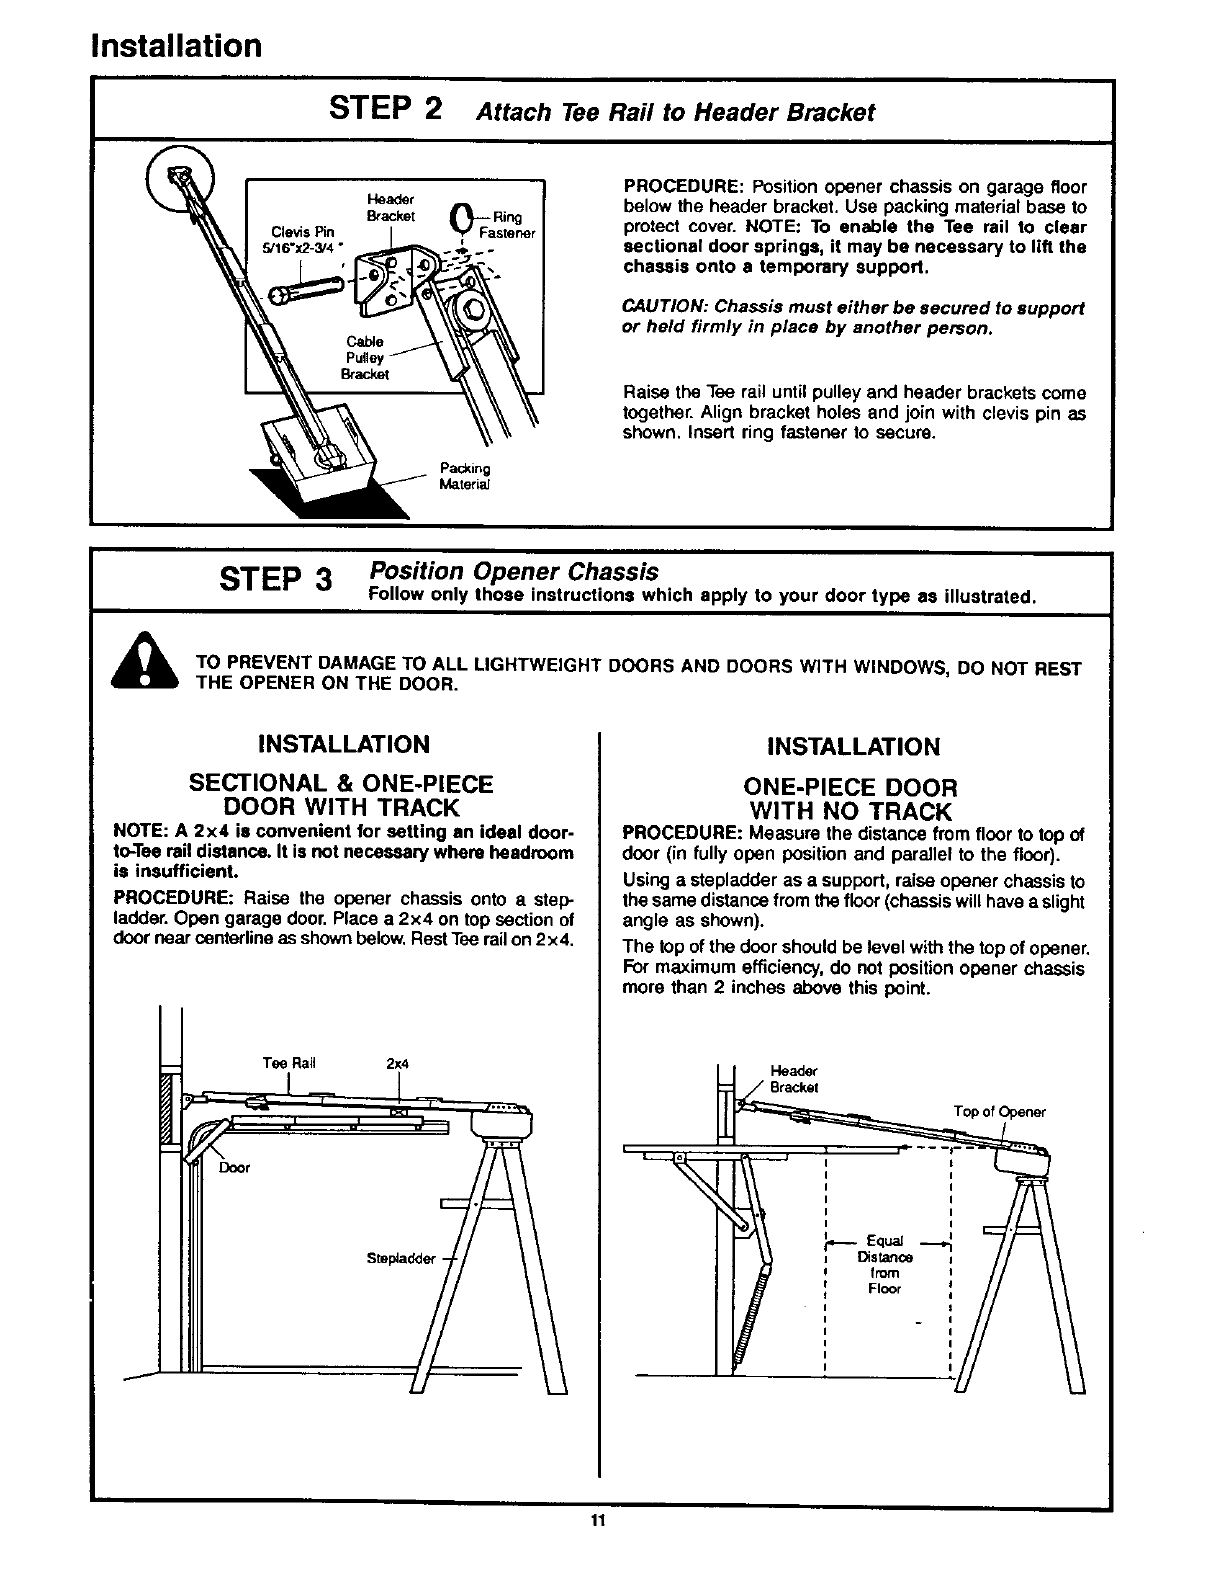
INSTALLATION
ONE-PIECE DOOR
WITH NO TRACK
PROCEDURE: Measure the distance from floor to top of
door (in fully open position and parallel to the floor).
Using a stepladder as a support, raise opener chassis to
the same distance from the floor (chassis will have a slight
angle as shown).
The top of the door should be level with the top of opener.
For maximum efficiency, do net position opener chassis
more than 2 inches above this point.
Header
Top of Opener
11
from
FlOOr