INTRODUCTION
THIS IS A GAS-FIRED, GRAVITY VENTED ROOM HEATER THAT WILL OPERATE SAFELY AND PROVIDE AN EFFICIENT
SOURCE OF HEAT WHEN INSTALLED, OPERATED AND MAINTAINED AS RECOMMENDED IN THESE INSTALLATION
AND OPERATING INSTRUCTIONS. READ THESE INSTRCTIONS THOROUGHLY BEFORE INSTALLING, SERVICING, OR
USING THIS APPLIANCE. IF YOU DO NOT UNDERSTAND ANY PART OF THESE INSTRUCTIONS, CONSULT LOCAL
AUTHORITIES, OTHER QUALIFIED INSTALLERS, SERVICE AGENCIES, THE GAS SUPPLIER, OR THE MANUFACTURER.
VENTING
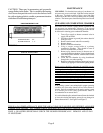
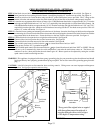
This heater must be connected to a properly installed and maintained venting system. This heater is equipped with a vent safety
shut-off device. Pilot outage will occur if the heater is not connected to a vent system. Pilot outage may occur due to restriction or
blockage in the vent or if connected to a masonry chimney having an area greater than the vent size shown on Page 2.
This appliance should be vented through a properly sized listed type B vent that has been constructed in accordance with the
National Building Code. If a horizontal section of vent is used, it must slope upwards a minimum of ¼ inch per foot of length.
This heater must not be connected to a vent system being used for wood or coal burning appliances. The use of more than one
appliance per vent system will most likely cause the vent safety shut-off device to shut off the heater due to the cooling of vent
temperatures through the draft diverter of the second appliance. In some situations, the vent safety shut-off may shut down the
heater if a too large, unlined, masonry chimney is used. Due to low vent temperatures associated with more efficient heaters it may
take too long to get the vent action going in a chimney before the shut-off device will shut down the heater. If this is the case, we
recommend lining the chimney with the proper size type B vent pipe or type B chimney liner.
WARNING: Do not bypass the vent safety shutoff switch. To do so could expose the consumer to
property damage, personal injury or possible death.
The switch, when activated, will extinguish the pilot flame. If the homeowner experiences this problem, the vent system must be
checked and corrected. NOTE: An existing vent that has worked for years may not be adequate for todays design because of
higher efficiency requirements resulting in lower stack temperatures. The following is a list of possible causes and corrective
actions.
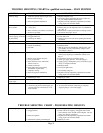
POSSIBLE CAUSES CORRECTIVE ACTION
1. Blockage in vent pipe 1.A) Check vent pipe for blockage, such as bird nest, wasp nest, twigs, leaves, etc.
1.B) Check that the vent cap is properly installed, not shoved too far down on the vent
pipe.
2. Burner is over firin 2.A) Check the manifold pressure.
2.B) Check the rate, NOTE: This appliance was orificed for elevations up to 2,000 feet.
When installed at higher elevations refer to orifice chart in main burner orifice
section of instructions for proper orifice size and re-orifice accordingly.
3. Improper vent system 3. Correct vent system.
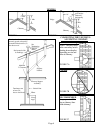
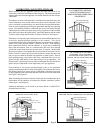
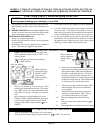
A) Vent too short A) The vent should not terminate less than 5 feet above the drafthood connection. A
gas vent extending through an exterior wall shall not terminate adjacent to the
wall or below eaves or parapets. Also, the top of the vent must be at least 2 foot
above any obstacles within a 10 foot radius, including the roof. See Figure A.
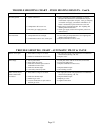
B) Restriction in vent B) All type “B” vent shall extend in a generally vertical direction with offsets not
system caused by exceeding 45 degrees, except that a vent system having not more than one 60
offsets degree offset may be allowed. Any angle greater than 45 degrees from the vertical
is considered horizontal. The total horizontal run of a vent plus the horizontal vent
connector shall be not greater than 75 percent of the vertical height of the vent.
Any offsets used should be as far above the drafthood as possible to allow a
venting action to begin before any restriction is encountered.
C) Incorrect vent pipe C) Use listed “B” type vent pipe. Do not use transite or any other type of ceramic
pipe for venting. Do not use single wall pipe.
4. Loose connections on the 4. Check the connection on both the switch and the gas valve. Tighten if necessary.
Page 3
vent safety wiring harness


