


704530 Rev. A - 6 - Customer First Center · 1121 Highway 74 South · Peachtree City, GA 30269
Port folio
®
Ballast Replacement
• The ballast should be replaced by a qualified electrician.
• The ballast may be replaced either from below or above the ceiling.
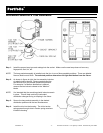
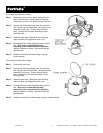
Step 1. Remove the trim assembly.
Step 2. Inside the housing, remove the access door to provide access to the ballast and junction box.
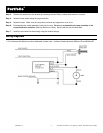
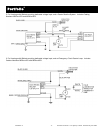
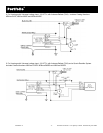
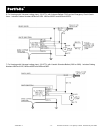
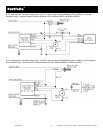
Step 3. Remove the existing ballast and replace with the new ballast. Refer to the applicable wiring diagram at the end
of this document.
Step 4. Close the access door. Re-install the trim.
Lens Maintenance & Replacement
Do not operate without the lens in place. These lamps require the containment
provided by the lens. These lamp types can only be used in enclosed luminaires, for
which the lens is required.
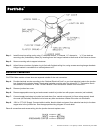
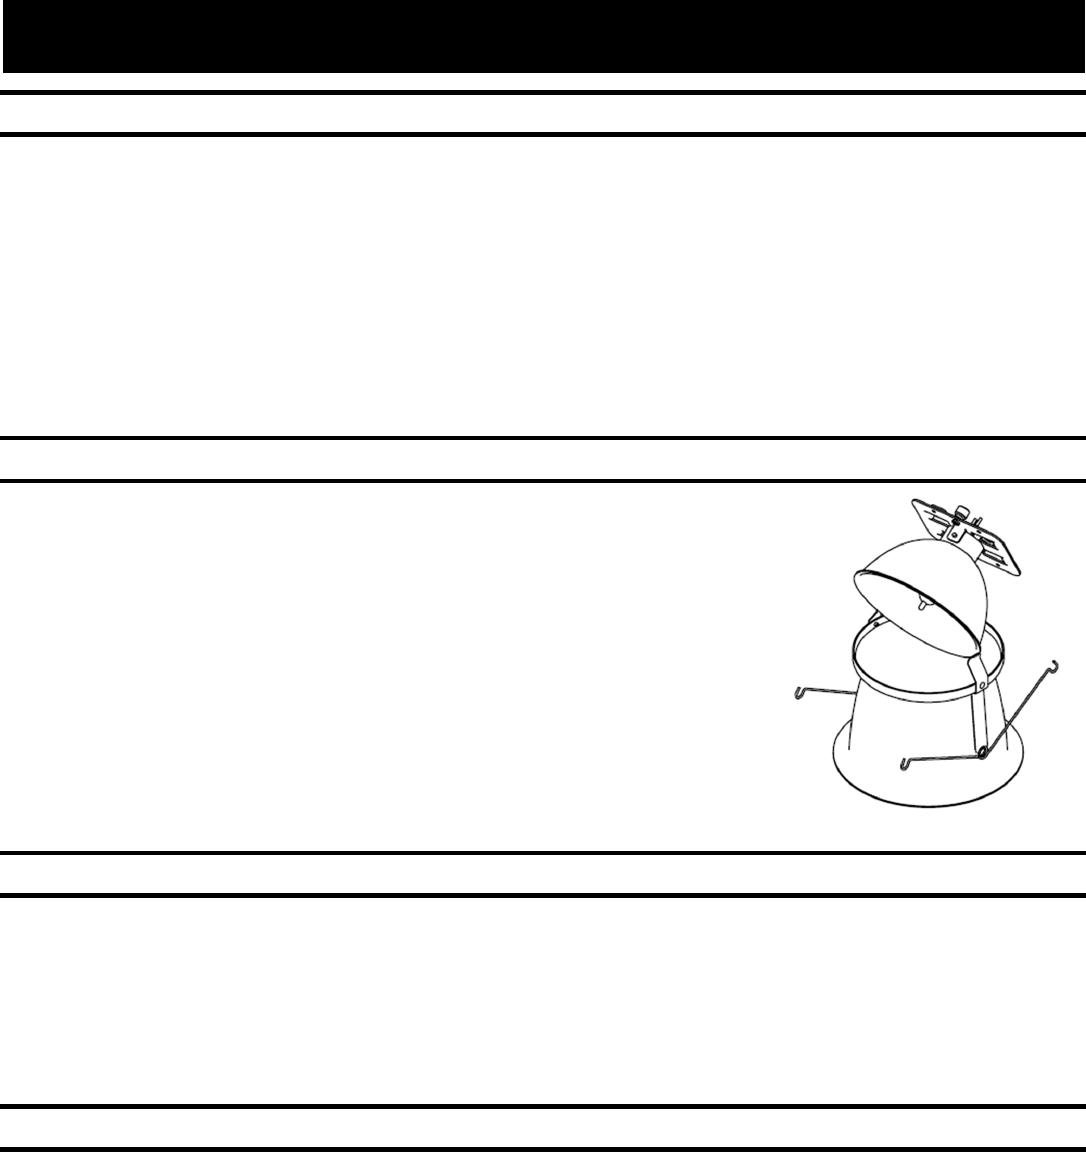
Step 1. Remove the trim assembly from the housing.
Step 2. Slide the Upper Reflector assembly off of the Lower Reflector assembly.
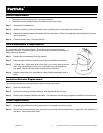
Step 3. To Clean Lens: Gently wipe with a soft, clean, dry, lint free cloth to remove
dust. Use mild detergent solution on a soft cloth to remove fingerprints
and stains. Rinse with clean water and dry with lint free cloth.
Step 4. Install the new/clean lens, and slide the Upper Reflector assembly back in
place.
Insulation Detector Replacement
The insulation detector may be replaced from above or below the ceiling.
Step 1. Open the Junction Box.
Step 2. Remove the existing Insulation Detector, and replace with the new one.
Step 3. Wire the new Insulation Detector as before. For reference, see the wiring diagrams contained in this document.
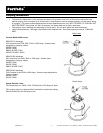
Socket Replacement
Step 1. If replacing from below the ceiling, remove the trim assembly from the housing.
Step 2. Remove the socket assembly from the top of the trim using the two thumbscrews. Use gloves if the assembly is
still warm. Gently remove the lamp.