


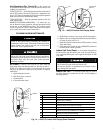


8
Outdoor Unit Coil —
To clean the outdoor unit coil fol-
low the steps below:
1. Remove any dirt, debris or obstruction from discharge
opening.
2. Use a garden hose to spray water on coil. Be sure to spray
between coil fins to remove any debris that may inhibit
heat transfer.
Condensate Drains —
Clean all condensate drains at
the start of each cooling season. Check the flow by pouring wa-
ter into the drain.
System Operation Check List —
The items outlined
in the following list will help to assure proper system operation:
• Be sure unit is connected directly to electrical supply.
• Replace both remote control batteries at the same time
when the Low Battery symbol appears.
• Point the remote control toward the unit display panel
when transmitting a command.
• Place the remote control in a location where there is a
direct line for transmission of data to the unit.
• Select a moderate temperature setting. Extreme tempera-
tures waste electricity.
• Keep doors and windows closed while unit is operating.
• Close air vents in unoccupied rooms to save electricity.
• Contact an authorized service representative if a problem
arises that cannot be easily resolved.
• Do not perform cleaning or maintenance activities while
unit is on.
• Keep remote control out of direct sunlight and heat.
• Keep display panel on unit away from direct sunlight and
heat as this may interfere with remote control transmissions.
• Do not block air intakes and outlets on the indoor or out-
door units.
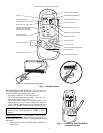
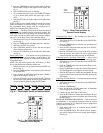
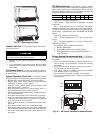
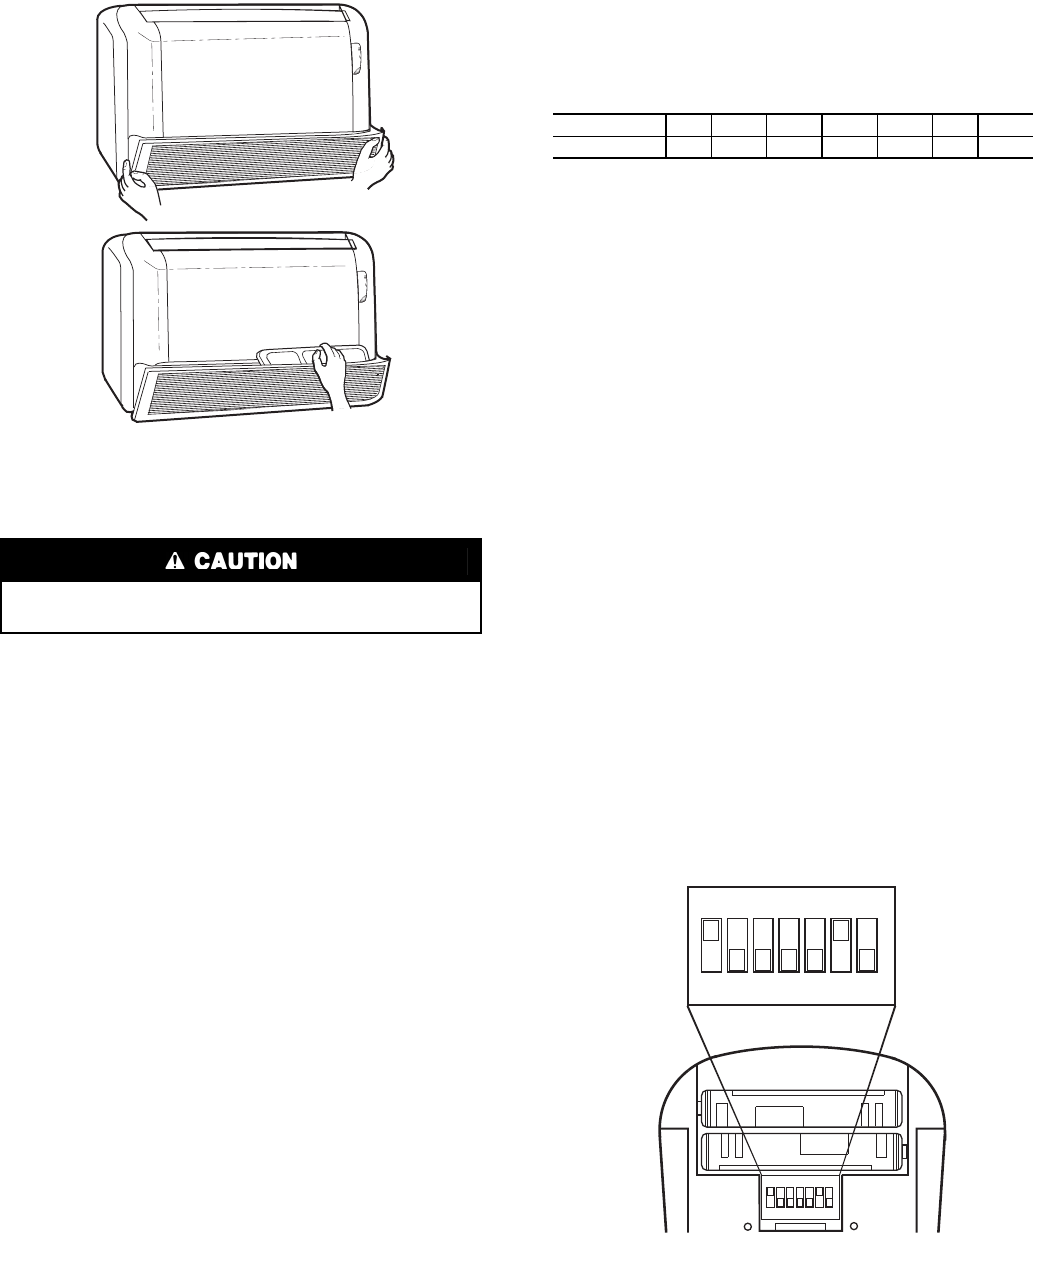
DIP Switch Settings —
The remote control contains
seven DIP switches, located in the battery compartment, two of
which control special system characteristics. See Fig. 16. The
DIP switch default positions are set according to the model air
conditioner installed, as per the following table.
Switch No. 3 should be set as follows:
OFF (default) — When only one air conditioner is installed
in the room.
ON — When there are two air conditioners with remote
controllers installed in the room, in one of the remote control-
lers this switch must be in the ON position. To activate the new
switch setting, simultaneously press the MODE and ROOM
buttons.
Switch No. 4 should be set as follows:
OFF — Displays temperature in °C, with a 24-hour clock
format.
ON — Displays temperature in °F, with a 12-hour clock
(PM indictor) format.
To operate the special systems characteristics:
1. Remove the batteries.
2. Set the DIP switches to the required positions.
3. Wait approximately 2 minutes and return batteries to
proper position.
Energy Saving Recommendations —
The follow-
ing recommendations will add greater efficiency to the duct
free system:
• Select a comfortable thermostat setting and leave it at
chosen setting. Avoid continually raising and lowering
the setting.
• Keep unit filter clean. Frequent cleaning may be neces-
sary depending on indoor air quality.
• Use drapes, curtains or shades to keep direct sunlight
from heating room on very hot days.
• Do not obstruct front grille air intake on front panel.
• Turn on air conditioning before indoor air becomes too
uncomfortable.
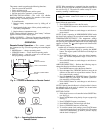
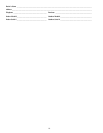
Sharp fins and other metal parts on the outdoor unit coil
can cause personal injury during cleaning.
SWITCH12 3 4 567
POSITION ON OFF OFF OFF OFF ON OFF
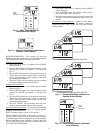
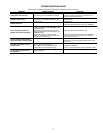
Fig. 15 — Removing Air Filters
ON
ECE
12
3
4567
12
3
4567
OFF
ON
Fig. 16 — DIP Switch Location in Remote Control