


9
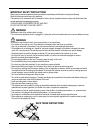
OPERATING THE VACUUM CLEANER
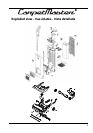
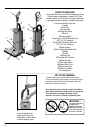
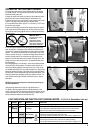
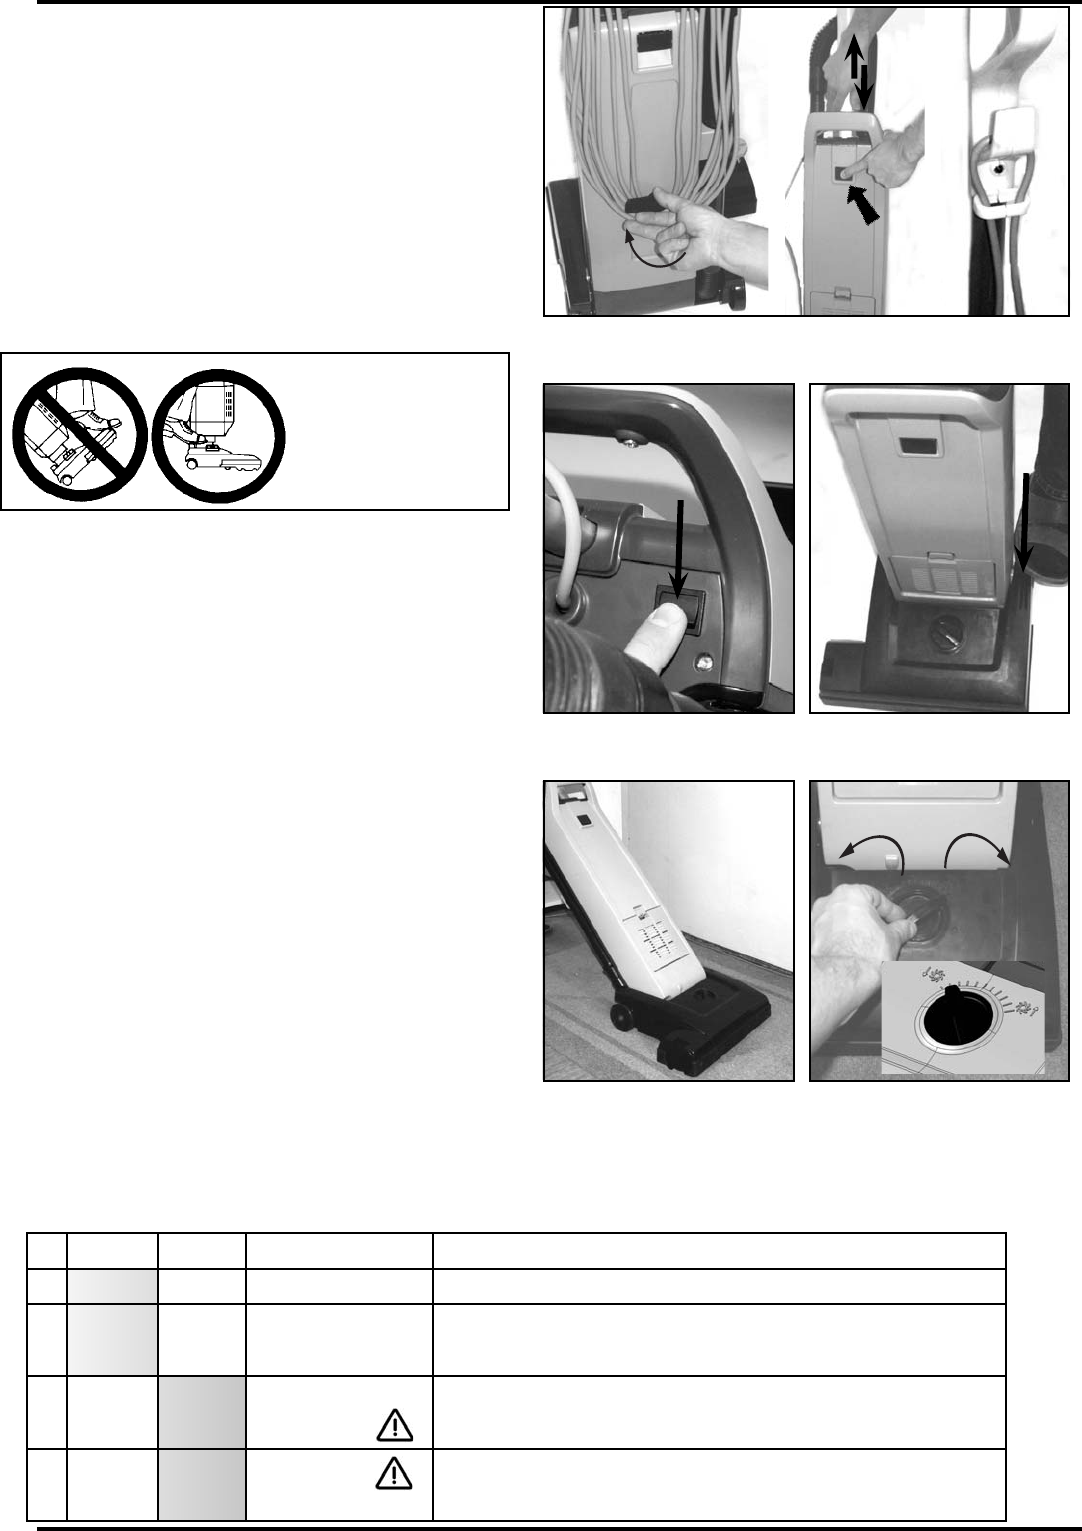
1. Release the power cord from the cord hooks (2) at the backside of
the vacuum cleaner. Turn the lower hook so that the cord is released.
Unwind the whole power cord .
2. Adjust the height of the handle, by pushing at the handle lock button
(4) and then pull or push at handle to make it comfortable to use.
3. Add the cord to the hook of the handle in order to make an anti strain
function. Then plug-in the power cord into a electrical outlet.
4. Turn the Main Power Switch (17) ON. “l” is ON and “O” is OFF. Now
the vacuum motor will start.
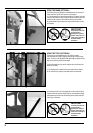
5. Step on the Pedal (11) and then tilt the cleaner backwards. Now the
brush motor will start (Dual-versions only). At Dual-versions the green
light (7) at the brush housing (9) will come on to indicate that the brush
motor is running.
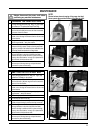
6. Turn the Height Adjustment Knob (10) to adjust the height that the
brush will operate in - depending on the material at the surface to be
vacuumed. For carpets with short textiles the brush should in the lower
position. Turn the knob to the left (when you are placed in front of the
machine) to lower the brush. For carpets with longer textiles the brush
should in a higher position.Turn the knob to the right (when you are
placed in front of the machine) to set the brush at a higher level. If the
red light comes on, slowly turn the knob in the opposite direction until
the light goes off.
If the red light (8) stays on continuously, there may be debris wrapped
around the brush, during operation. At a double motor units this can
cause the overload protector for the brush motor to trip. If this occurs,
turn the Main Switch (17) OFF and unplug the power cord. Remove any
debris from the brush and plug in the power cord, turn the Main Switch
(17) back ON. This will automatically reset the overload protector. If the
overload protector trips repeatedly contact your dealer for service. For
more information of the light indicators at the Dual-versions - see the
table below.
NOTE! Always disconnect the power cord before performing any
machine maintenance.
Change the bag whenever the “Bag Full” Light (15) comes on.
For details of dust bag replacement see separate instruction in this
manual. If the light comes on before the bag is full, the inside of the bag
may be coated with very fi ne dust (change the bag), or debris may be
built up somewhere between the brush and the bag.
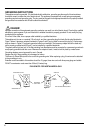
IMPORTANT !
Foot pedal must be used to
release base to
operating/non operation
position. Failure to do so
could result in damage to the
handle release mechanism.
Lower
Lower
Higher
Higher
On - Off
On - Off
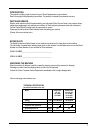
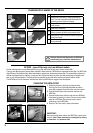
LIGHT INDICATION AND FUNCTION FOR THE BRUSH MOTOR
- 212, 215, 218 - Double Motor Units only!
45
56
GREEN RED CONDITION FUNCTION
1.
ON OFF
Normal operation In normal operation, the green light is constantly illuminated.
2.
ON -
BLINKING
OFF
Brush position too high
(low loading)
1. Green light will blink if the brush is not in contact with the carpet.
2. Green light will be constantly illuminated once the brush is in contact with the
carpet or the user adjusts the brush height adjustment to a lower position.
3.
OFF ON -
BLINKING
Brush position too low
(heavy loading)
1. If the condition 3, red light blinking, continues for 10 seconds or more, the control
module will cut out the power supply to the brush motor.
2. The red light will still be illuminated until you turn off the switch or unplug the cord.
4.
OFF ON Brush stalled
1. The red light will be constantly illuminated and the control module will instantly cut
the power supply to the brush motor, if the brush was stalled accidentally.
2. The red light will still be illuminated until you turn off the switch or unplug the cord.
Release
Release
base
base
1
2
1
3