


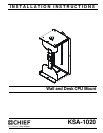


Installation Instructions KSA-1020
5
ASSEMBLY AND INSTALLATION
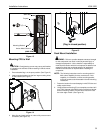
Installation of Protective Rubber Edging
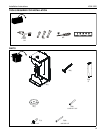
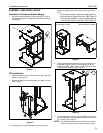
1. Place four strips of protective rubber edging (C) over the
sharp edges located on the top and bottom of the mount (A).
(See Figure 1)
Figure 1
CPU Installation
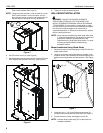
1. Release bracket from mount by moving the flag to the open
position. (See Figure 2)
2. Remove bracket from mounting buttons on back of mount.
(See Figure 2)
Figure 2
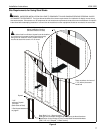
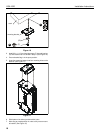
3. If hanging mount underneath desk, remove mounting
buttons to reinstall them in the holes in which they will be
used.
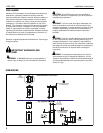
• If mounting vertically, move mounting buttons in
the four holes on top of the mount. (See Figure 3)
• If mounting horizontally, move mounting buttons
in the top four holes on the back. (See Figure 3)
Figure 3
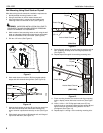
4. Loosen adjustment knob at the back of the mounting unit
and adjust height of mount to a height greater than the
height of the CPU to be installed. Loosen strap at the front
of the mount if necessary. (See Figure 4)
Figure 4
5. Loosen adjustment knobs on top and bottom of the mount
and slide flanges in order to allow for the CPU to be inserted
for mounting. (See Figure 5)
NOTE:
Top and bottom knobs can be removed and inserted
into the front square holes in order to allow for large
1
(C) x 4
(A)
1
2
Vertical button location
Horizontal button location
4