


Model: FSR Series Installation Instructions
4
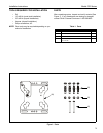
INSTALLATION
The FSR may be installed on either a single wood stud,
or drywall (1/2" minimum thickness).
INSTALL MOUNT TO SINGLE WOOD STUD
1. Determine approximate mounting location, keeping in
mind the display size.
2. Use a stud sensor to locate applicable wood stud.
Mark location with a pencil.
3. Level plate (10) at desired height and, using plate (10)
as a template, mark the location of upper and lower
pilot holes. Ensure marks are in the center of wood
stud.
NOTE: Mount can provide ±1/2" of lateral shift by using
mount holes on either side of vertical centerline.
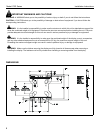
WARNING: ELECTRICAL SHOCK HAZARD! Drilling
into electrical wires or cables can cause DEATH or
SERIOUS PERSONAL INJURY! ALWAYS make
certain area behind mounting surfaces is free of
electrical wires and cables before drilling or installing
mount fasteners.
4. Drill pilot holes using a 1/8" drill bit. Ensure pilot holes
are straight.
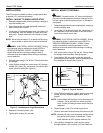
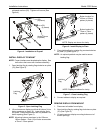
5. Using Phillips screwdriver, insert screw (40) through
washer (30), plate (10), and drywall (not shown) and
install into pilot holes (See Figure 2).
Figure 2: Installation to Single Wood Stud
6. Repeat for remaining screw (40).
7. Tighten both screws (40) securely.
INSTALL MOUNT TO DRYWALL
WARNING: Drywall must be 1/2" minimum thickness.
Failure to provide adequate structural strength for this
unit can result in serious personal injury or damage to
equipment!
1. Determine approximate mounting location, keeping in
mind the display size.
2. Level plate (10) at desired height and, using plate (10)
as a template, mark the location of the four anchor
holes (one in each corner slot).
WARNING: ELECTRICAL SHOCK HAZARD! Drilling
into electrical wires or cables can cause DEATH or
SERIOUS PERSONAL INJURY! ALWAYS make
certain area behind mounting surfaces is free of
electrical wires and cables before drilling or installing
mount fasteners.
3. Drill anchor holes using a 3/8" drill bit. Ensure holes
are straight and completely through drywall.
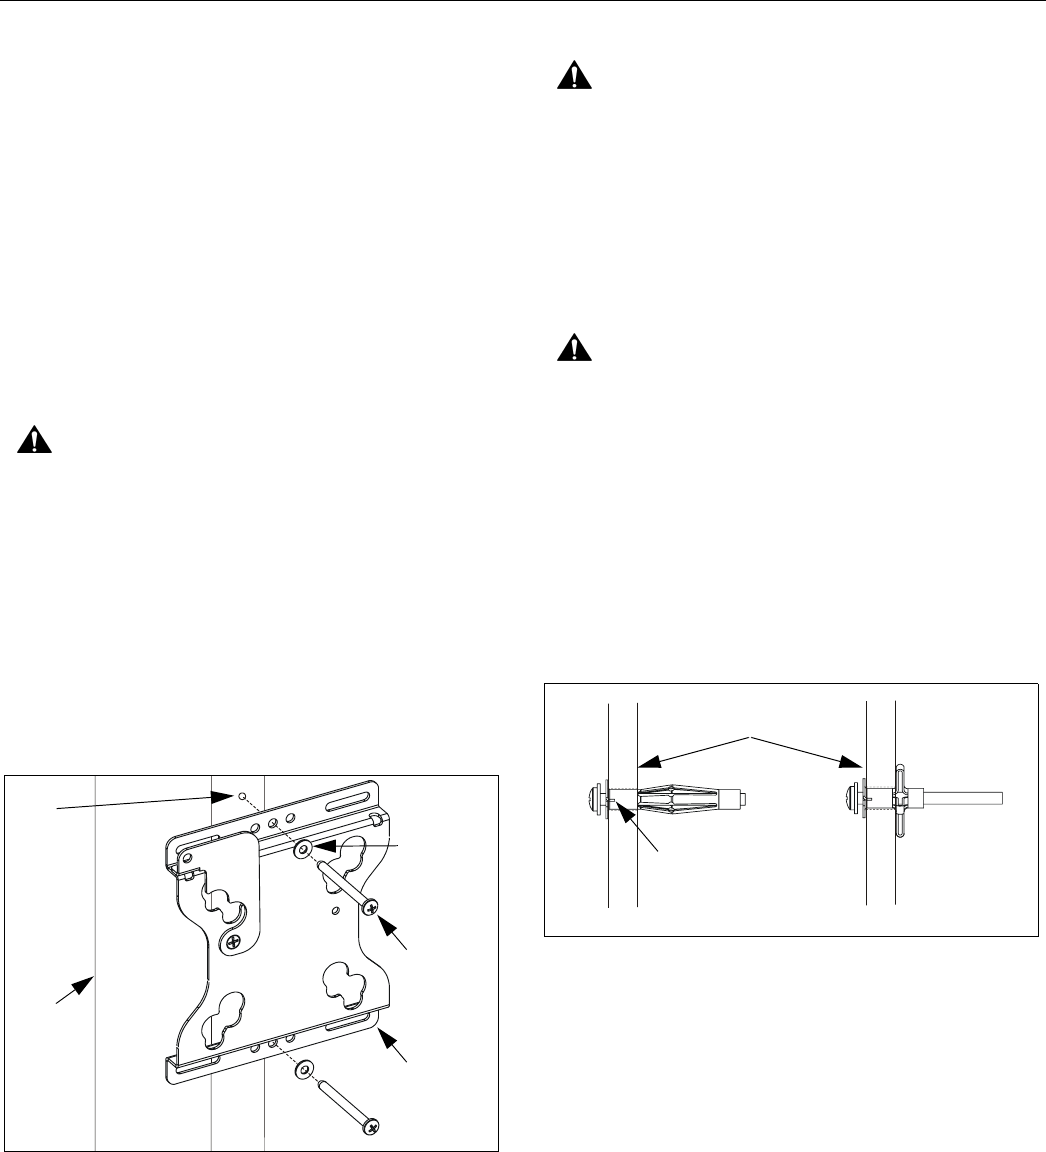
4. Insert anchor (20) into anchor hole and seat with
gentle tapping from hammer. Anchor barbs should be
fully engaged in drywall (See Figure 3).
Figure 3: Drywall Anchor
5. Using Phillips screwdriver, tighten anchor screw until
anchor has fully collapsed against back side of
drywall.
NOTE: Anchor screw will feel tight until anchor begins to
collapse. Screw will then turn easier for many
turns. Screw will feel tight when anchor has fully
collapsed.
6. Repeat steps 4. and 5. for remaining anchors.
7. Remove and retain anchor screws from anchors (20).
NOTE: Anchors (20) may come with small washers which
may be left on the screw or discarded. These
small washers do NOT replace washers (30).
8. Using Phillips screwdriver, insert anchor screws
through washers (30) and plate (10) and install into
(40)
(30)
Wood
Stud
(2 places)
(2 places)
(10)
Pilot
(2 places)
Holes
Drywall
Not collapsed
Collapsed
Anchor barb