


6405/4410 Install
PAGE 3
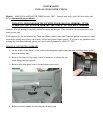
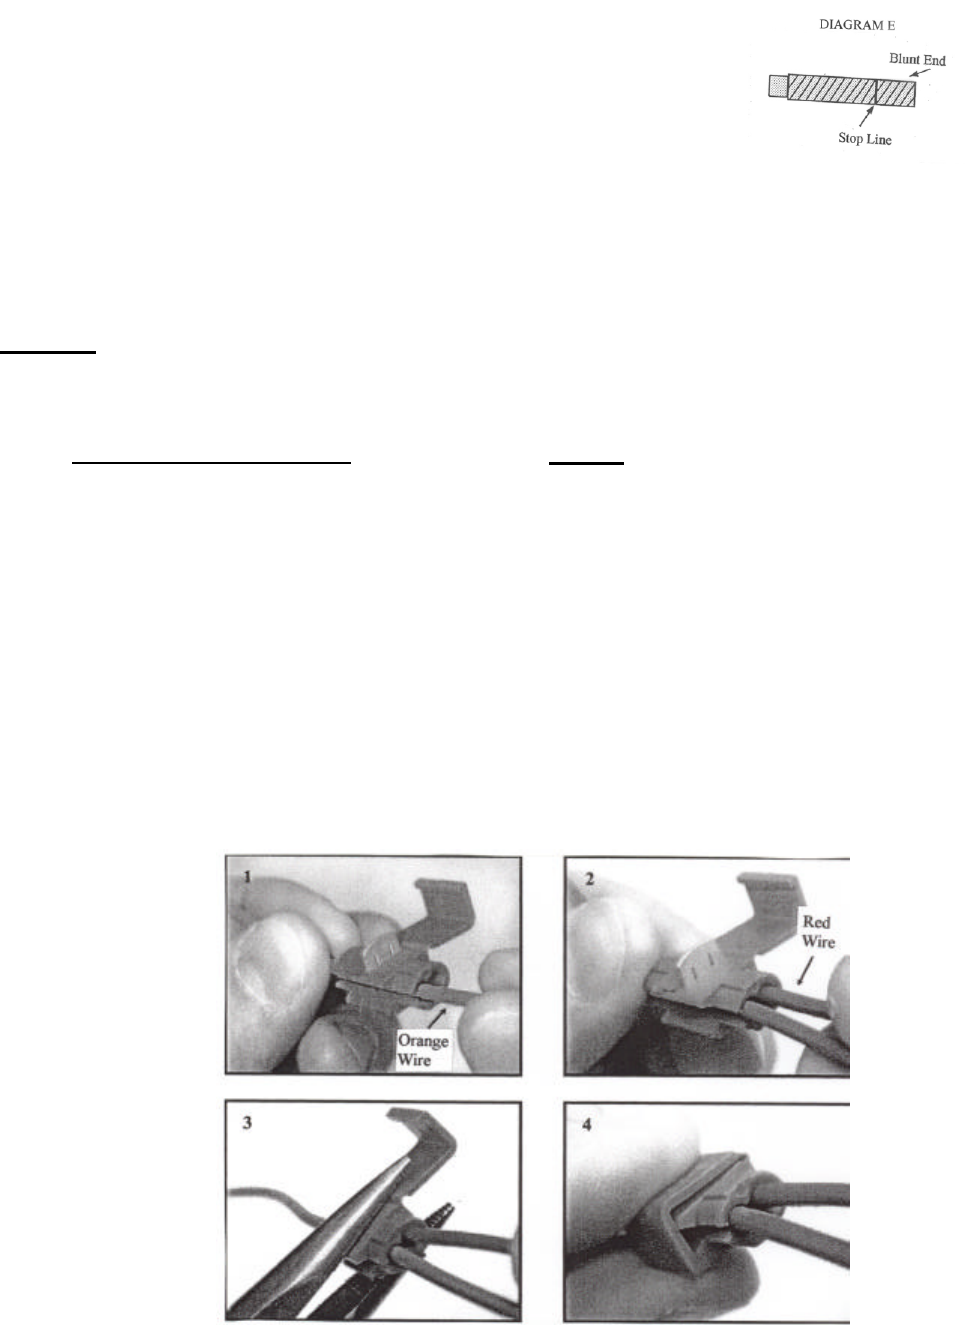
4. Insert the studs provided (3 for each side) with the tapered end out
(see diagram E). They should screw into the mount up to the stop
line – approx. 1cm or 3/8 of an inch. Next, line up the mount with
the stock gasket and apply the mount to the door. While supporting
the mirror add the stock nuts. Tighten the stock nuts to 70 inch
pounds. This gasket is necessary for sealing against moisture and
wind noise and to keep from metal to metal contact. (Hint, taping
the outer gasket to the edge of the mount, if necessary, will assist holding it in place.) After the mirror
has been mounted simply cut the tape and peel it off of the mount.
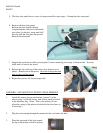
5. Repeat this process for the passenger side.
WIRING
IF YOU HAVE POWER STOCK MIRRORS THE WRONG SET HAS BEEN ORDERED.
TURN SIGNAL WIRING: If you ordered a kit without the turn signal (TK) option, skip to the
“mirror wiring” section below. We recommend removing the air bag fuse during installation.
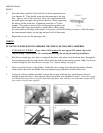
1. Run the two strand grey wire that is coming off the driver side mirror from inside the door, through the
boot connecting to the cab, and into the cab to under the dash by the steering column. (Hint: if you have
trouble running the wire into the cab, see steps 2 of “mirror wiring” on page 4).
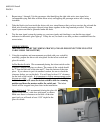
2. Turn on your left (driver’s side) blinker. Probe the wires coming from the steering column, identify
which wire is the active left blinker wire (recommend trying light blue w/white tracer wire).
3. Using one of the scotchloks provided, connect the red wire inside the two-strand harness that you
brought in from the driver’s side mirror to the active blinker wire identified in step 2. (Note-the orange
wire labeled in the picture is used for illustration purposes only and does not mean that orange will be
your active color for turn signals).