6
ASSEMBLY
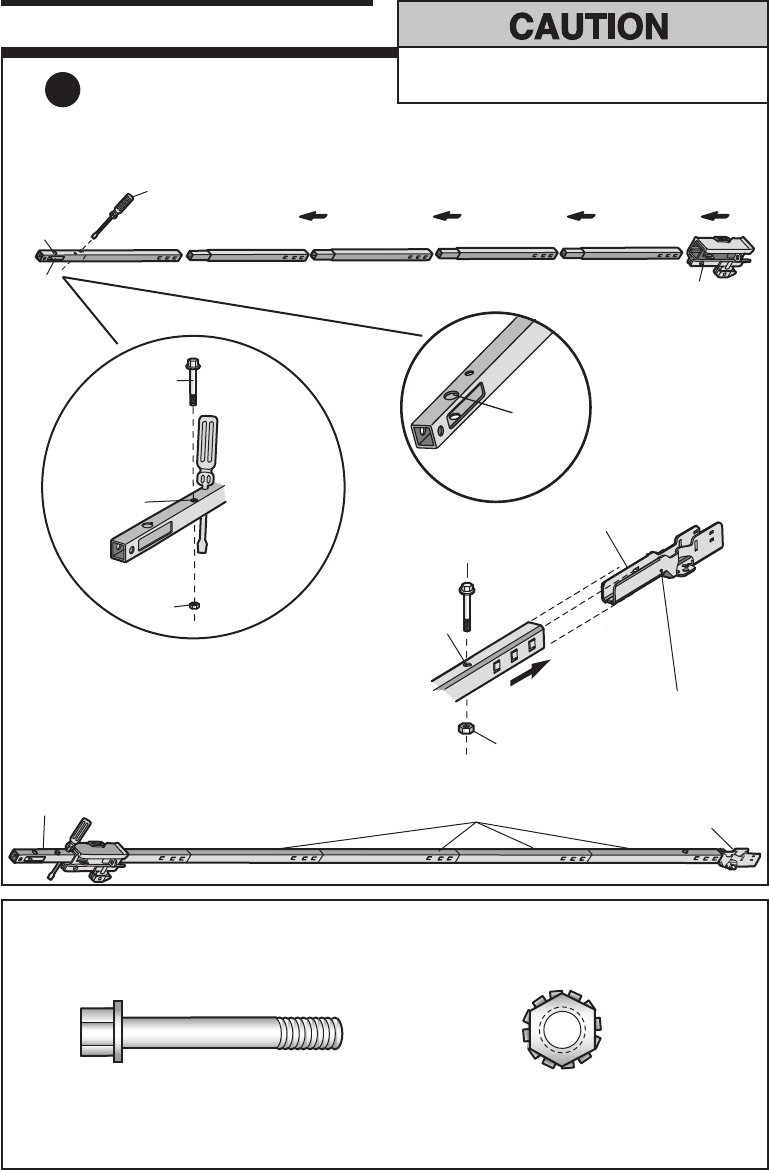
Assemble the Rail
IMPORTANT NOTE: Remove the straight door
arm and hanging brackets packaged inside the front rail
To prevent INJURY from pinching, keep hands and
fi ngers away from the joints while assembling the rail.
ALL HARDWARE SHOWN ACTUAL SIZE
1
A8 A7
B6
B6
B6
B3
B3
B3
A11
A11
A7 A7 A7
A13
Idler
Pulley
Hole
Window
Cut-Out
As a temporary trolley stop,
insert a screwdriver into the
hole 10" (25 cm) away from
the front of the rail, as shown.
“U” Bracket
Bolt
Bolt
Bolt
Lock Nut
Lock Nut
Lock Nut
Cover
Protection
Bolt Hole
SLIDE RAIL TO STOPS
ON TOP AND SIDES
OF BRACKET
TO MOTOR UNIT
KEEP
LARGER
HOLE
ON TOP
FRONT
RAIL (TOP)
FRONT
RAIL
KEEP SMALL HOLES ALONG
OPPOSITE EDGE OF RAILS
Trolley
Stop Hole
Front Rail
(TO DOOR)
Back Rails
(TO MOTOR UNIT)
“U” Bracket
A8


