


11
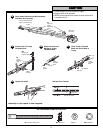
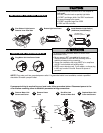
Garage
Door
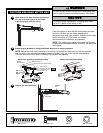
A14 Header Bracket
A14
Header
Bracket
Mounting
Hole
Existing
Header Bracket
C2
Spacer
Mounting
Hole
Existing
Clevis Pin
Option with
some pre-existing
installations
C11
Clevis Pin
C6
Ring Fastener
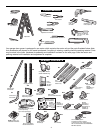
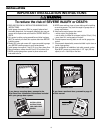
Opener Carton
Ceiling Mount
A14
Header
Bracket
Mounting
Hole
C11
Clevis Pin
C6
Ring Fastener
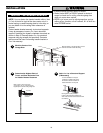
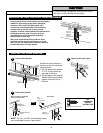
NOTE: If the door spring
is in the way, you’ll need
help. Have someone hold
the opener securely on a
temporary support to allow
the rail to clear the spring.
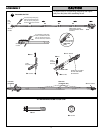
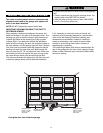
Attach Rail to the Header Bracket
UP
Center bracket on the “center
of garage door” line and the
horizontal line made in Step 2.
Highest Point
of Travel
A14
Bracket
Mark the top
and bottom
bracket holes
Horizontal Line
Center of
Garage Door
Drill two 3/16"
pilot holes
UP
Secure bracket
with lag screws
C18
Lag Screw
Mark Bracket Holes Drill Holes
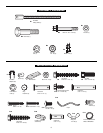
C
ALL HARDWARE
SHOWN
ACTUAL SIZE
Attach Bracket
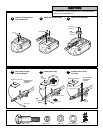
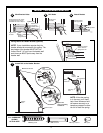
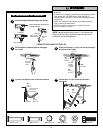
MOUNT THE HEADER BRACKET
NOTE: If your installation requires that the
header bracket be mounted to the ceiling. The
back edge of the bracket MUST NOT be
further than 6" (15 cm) from the header wall
and the arrow MUST point away from the
header wall.
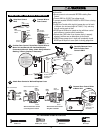
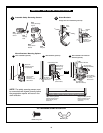
Ceiling Mount the Header Bracket (Optional)
C6 Ring Fastener
C2 Spacer
C11 Clevis Pin
C18 Lag Screw
Center the bracket
on the “center of
garage door” line
UP
A14
Bracket
Use holes on
left and right side
to secure bracket
4
5
6
7