


10
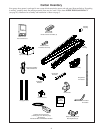
ASSEMBLY STEP 2
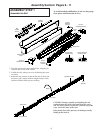
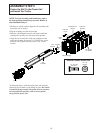
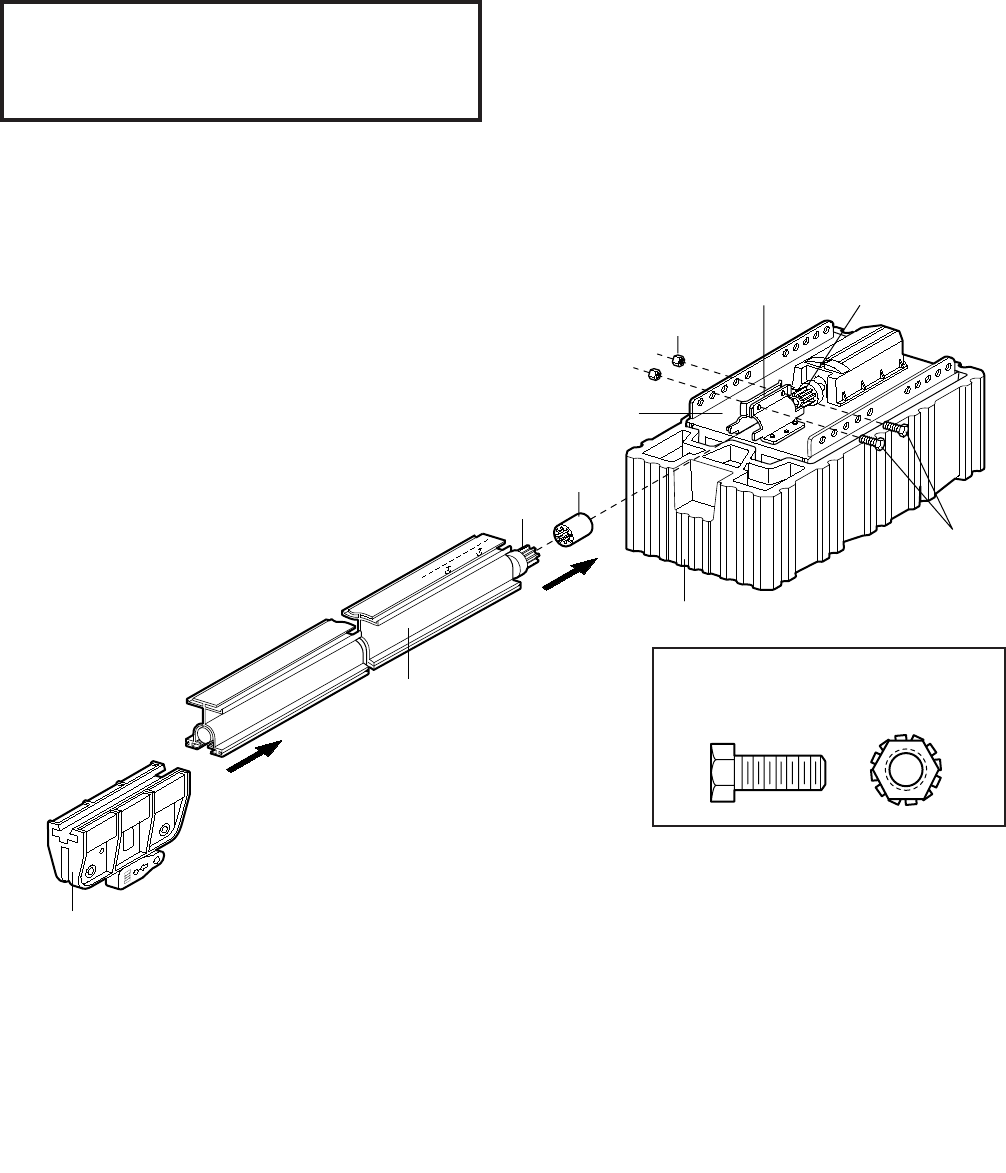
Fasten the Rail To the Power Unit
and Install the Trolley
/7/94
Rail
Sprocket
Rail
Assembly
Trolley
Coupling
Rail/Power Unit
Bracket
Lock Nuts
1/4"-20
Power Unit
Sprocket
Power
Unit
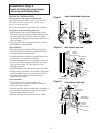
Foam Packaging
Hex Screws
1/4"-20x5/8"
1/4" - 20
Lock Nut
1/4" - 20 x 5/8"
Hex Screw
Hardware Shown Actual Size
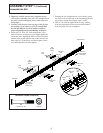
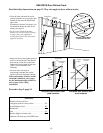
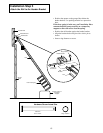
As illustrated above, slide the trolley onto and along the
bottom of the rail until it snaps firmly in place.
Be certain
to install it facing correctly: the trolley release arm must
be horizontal (lock position), with its arrow pointed
away from the power unit.
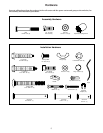
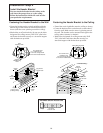
• Working on a level surface, align the rail assembly with
the power unit, as shown.
• Slip the coupling over the rail sprocket.
• Slide the rail through the power unit bracket until the
coupling fits securely over the power unit sprocket.
• Align the two screw holes in the rail with those in the
power unit bracket. Insert two 1/4"-20x5/8" hex screws
and lock nuts. Tighten securely with a 7/16" socket
wrench.
NOTE: To aid in assembly and installation, replace
the foam packing around the power unit. Remove it
after Installation Step 5.