


10
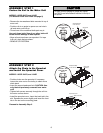
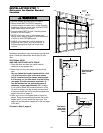
ASSEMBLY STEP 2
Attach the Chain Spreader
and Re-install the Chain
MODELS 1256R AND 1246R ONLY
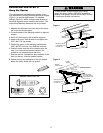
• Line up the holes in the chain spreader with the
holes in the motor unit as shown. The slot in the
chain spreader must fit over the Rail flange
(Figure 1).
• Securely fasten the chain spreader with the
hardware provided.
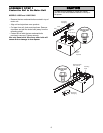
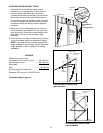
• Remove the trolley threaded shaft from the trolley
by loosening the inner nut and lock washer
(Figure 2).
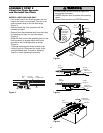
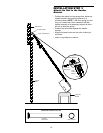
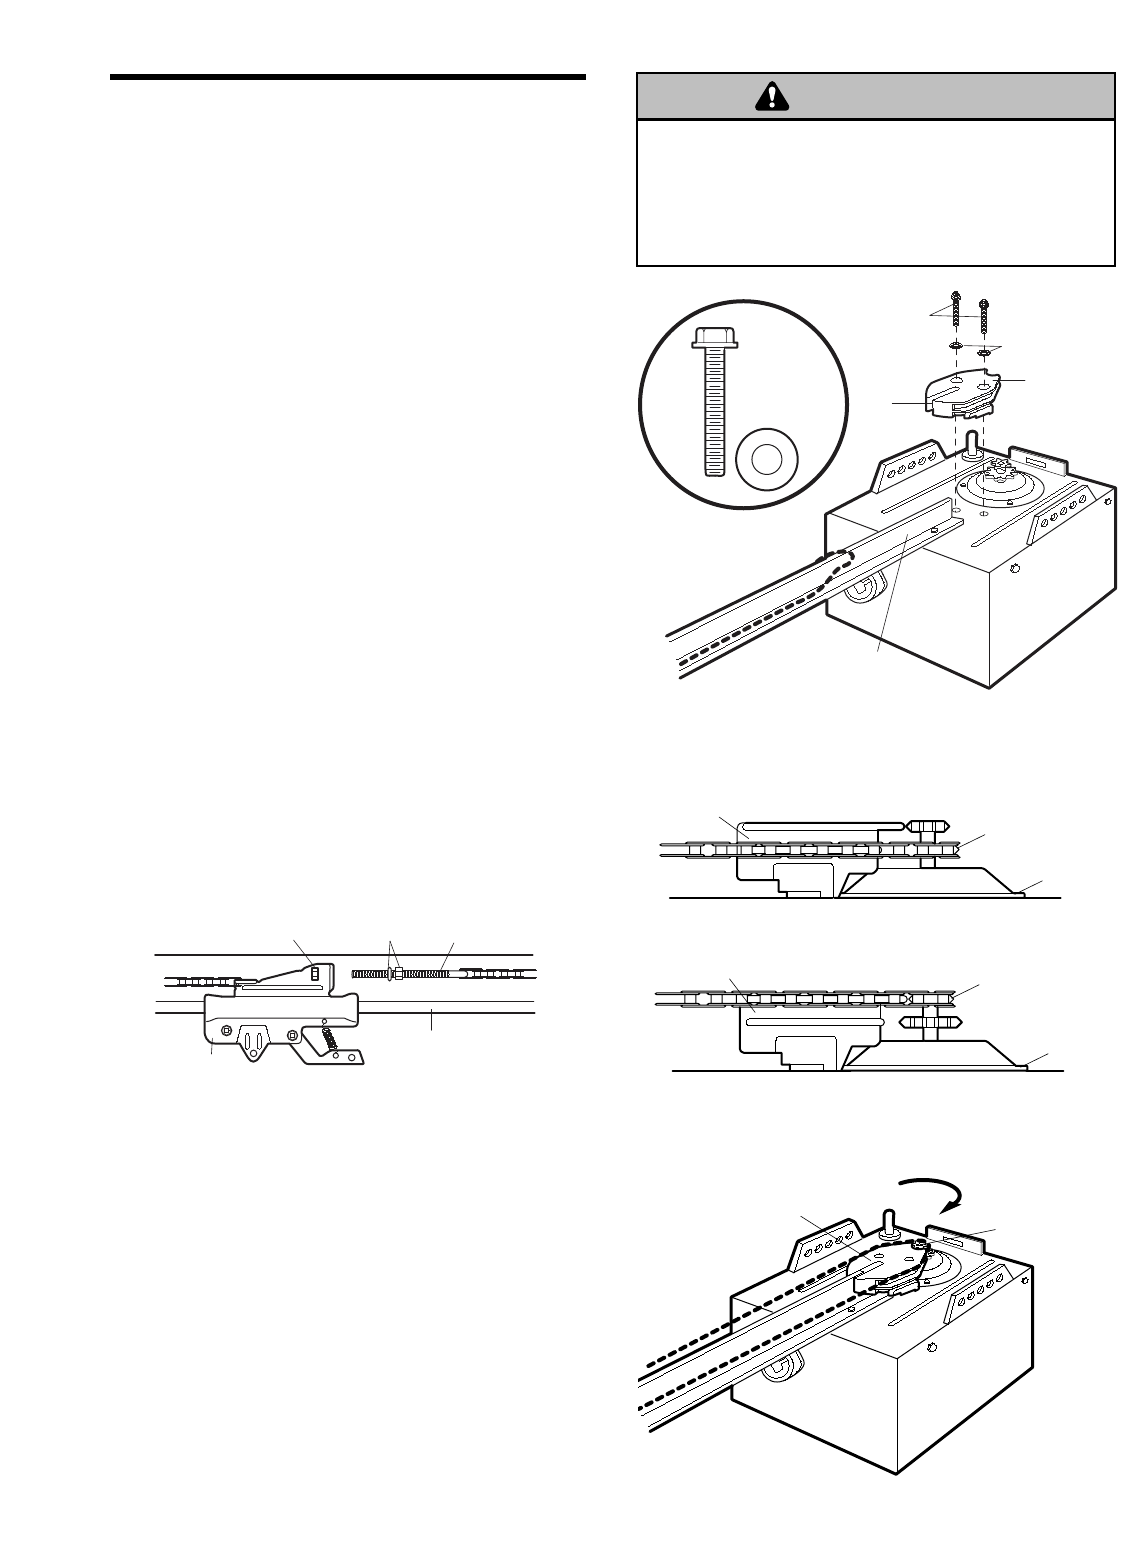
• Guide the chain around the selected groove in the
chain spreader (to engage either the 8-tooth
sprocket or the 6-tooth sprocket) as shown
(Figure 3).
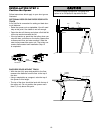
• Continue dispensing the chain forward to the
trolley (Figure 4). Reconnect the trolley to the
trolley threaded shaft. Proceed to Assembly
Step 3 for chain tightening instructions.
Trolley
Trolley
Threaded Shaft
Outer
Nut
Rail
Inner Nut
and Washer
Chain
Spreader
#8x1"
Hex Screw
USE ONLY
THIS TYPE
AND SIZE
SCREW
Rail
Flange
Slot
Washers
Sprocket
Install Chain
In This Direction
Chain
Spreader
Figure 1
Figure 2 Figure 3
Figure 4
8-Tooth
Sprocket
6-Tooth
Sprocket
Chain
Spreader
Motor Unit
Mounting Plate
Motor Unit
Mounting Plate
Chain
Spreader
To avoid possible SERIOUS INJURY to fingers from
moving garage door opener:
• ALWAYS keep hand clear of sprocket while operating
opener.
• Securely attach sprocket cover BEFORE operating.
WARNING
CAUTION
WARNING
WARNING