


10
CR Series Woodburning Fireplaces
20001316
Installing the Chimney System
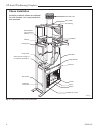
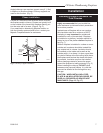
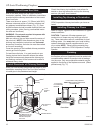
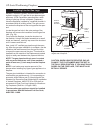
Start by attaching the first chimney section to the collar
on top of the fireplace.
Install the pipe as pictured in Figure 13. When you
get a good lock, you will hear the pipe clearly snap
together. Once sections are snap-locked in place, it is
extremely difficult to get them apart. Make sure the
pipe is firmly snapped and locked together as each
pipe section is mounted.
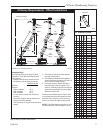
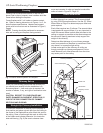
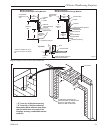
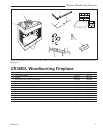
When installing elbows, only outer pipe will snap-
lock. Middle pipes simply slide into position. Be sure
to always attach straps on upper elbow to a structural
framing member. (Fig. 14)
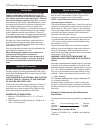
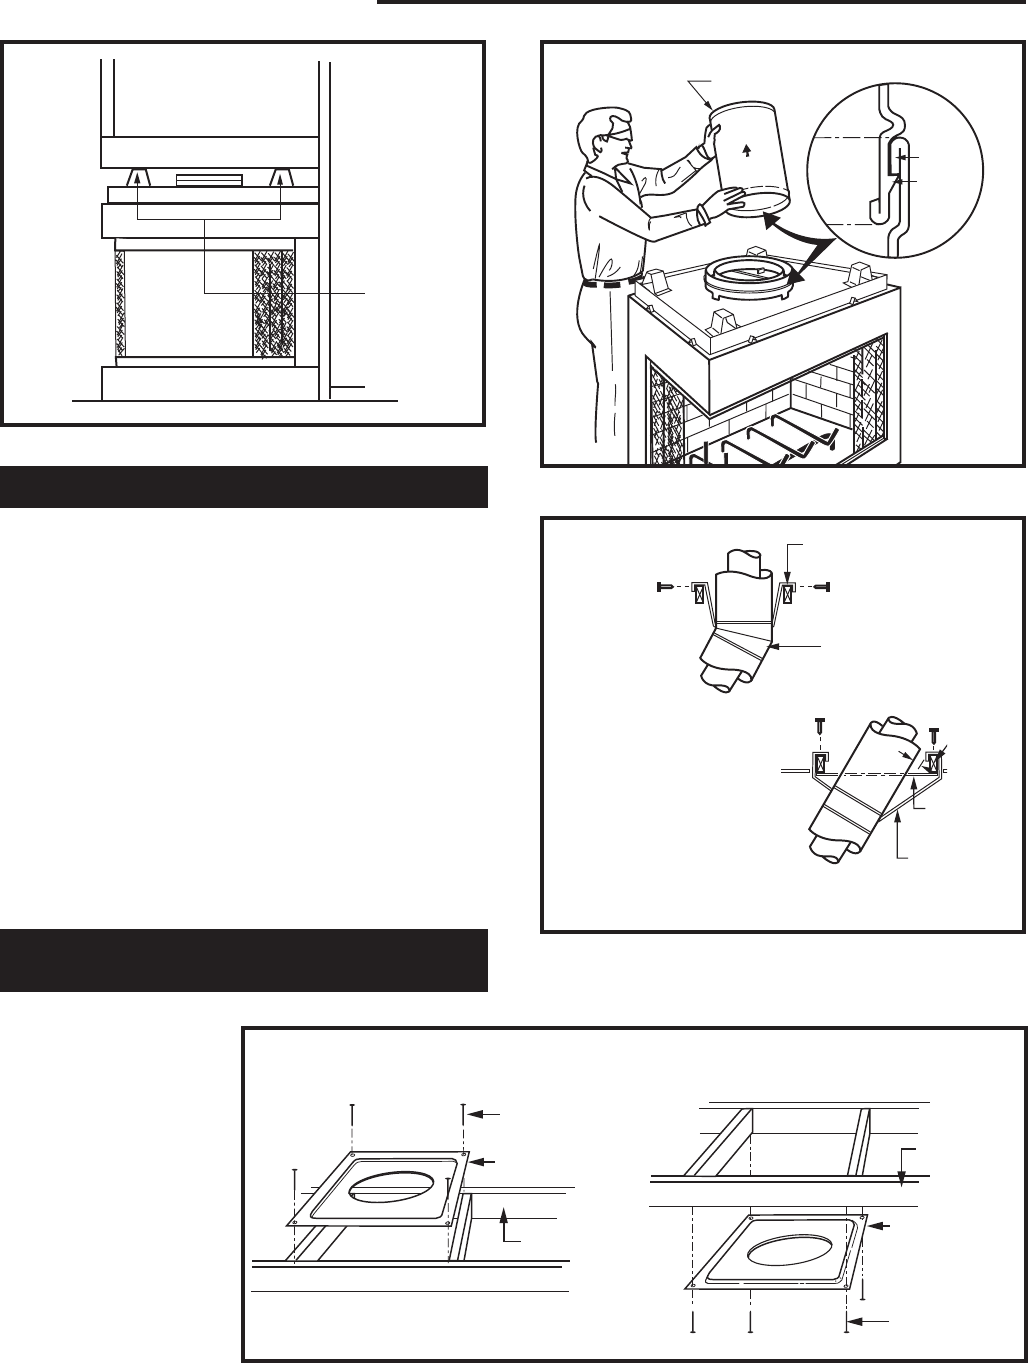
Continue installing the pipe as required until pipe is
installed up through the ceiling. At this point, you must
install a firestop spacer. Refer to Figure 15 for appro-
priate spacer orientation.
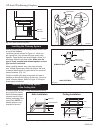
Installing the Firestop Spacer
in the Ceiling Hole
A firestop spacer is used to keep pipe spaced properly
and required for safety.
Nail the firestop spacer
(at each corner) to the
framing members of the
ceiling hole. NOTE: A
firestop spacer is not
required at the roof.
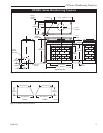
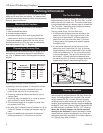
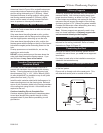
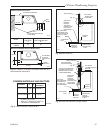
Fig. 12 Fasten fireplace in position.
STR100
standoffs, corner
2/18/99 djt
Nail Top
Standoffs
STR100
Fig. 13 Install pipe, listening for the snap-lock to fasten.
FP558CR
CR Series
Snap lock fasteners
2/22/99 djt
Pipe Section
UP
Pipe Rim
Pipe
Rim
Hem
Lance
FP558CR
ELBOW STRAP
ANGLED STRAP
Fig. 14 Attach straps to a structural framing member.
FP270/271
FP270/271
CR Series
2/19/99 djt
Support Structure
Elbow Strap
(must be tight)
Angle Firestop
Ceiling
Hole
Framing
Chimney Sup-
port Strap
(must be tight)
Attic Installation
Ceiling Installation
Fig. 15 Installing firestop spacer.
FP285
FP285
Firestop
4/27/99 djt
Nails (4)
Firestop Spacer
Joist
Joist
Firestop Spacer
Nails (4)