


13
UVS27 Vent-Free Gas Heater
20007068
LG224
UVS27
logs in place
1/30/02 djt
LG224
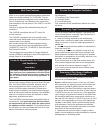
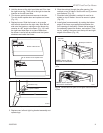
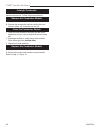
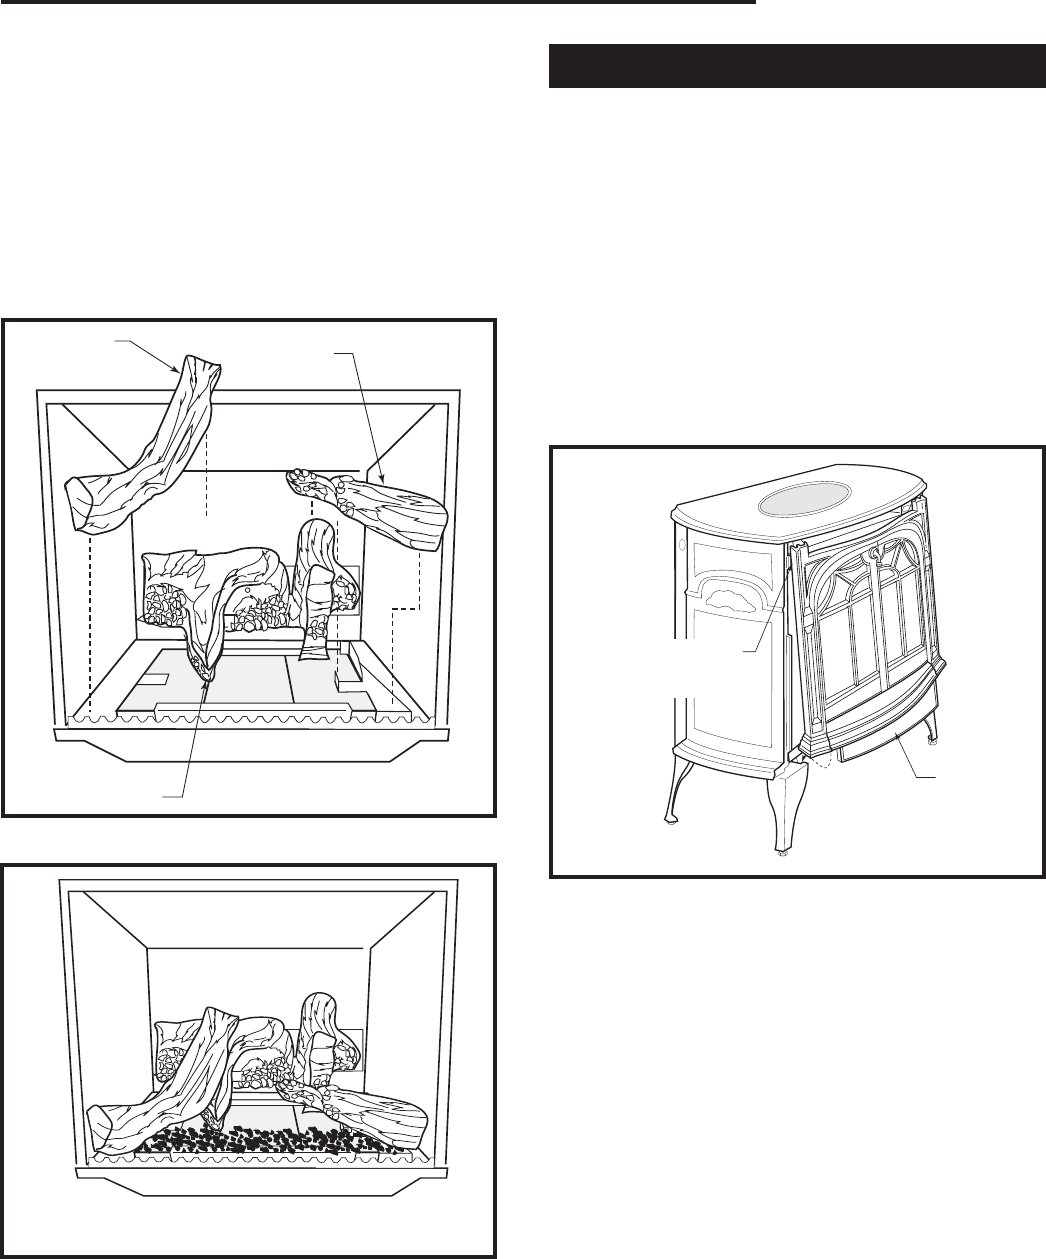
Fig. 18 UVS27 logs in place.
LG223
UVS27
log placement
1/30/02 djt
LG223
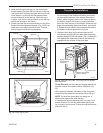
Fig. 17 Install rear, left and right logs.
Left Log
Right Log
Rear Log
4. Install the left log by placing it on the sheet metal
bracket behind the grate with the left end of the log,
“the thicker end” touching the grate and the left end
of the firebox. Lay the log into the recessed area
on the left branch of the rear log. When the log is
in place, it will rest on the left branch of the rear log
toward the left side of the branch.
5. Loosely sprinkle the lava rocks directly on top of the
burner just behind decorative grate. (Fig. 18) Do not
place lava rocks toward back of burner. The lava
rock is shipped inside the bag assembly.
Complete the Installation
1. Install the screen frame by sliding the hooks over the
top front edge of the firebox and resting the bottom
on the support brackets. If the catalyst has been in-
stalled, place the glass front on the stove by resting
the bottom edge of the frame on support brackets
below the front opening of the firebox. Rotate the top
edge of the assembly toward the firebox, and center
it. Rotate the right and left cams towards the back of
the firebox to secure glass frame in place.
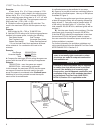
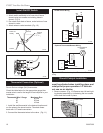
2. Grasp the front plate by the window bars and lift
into position engaging the two steel tabs behind the
adjacent bosses in the side plates. (Fig. 19) Seat the
front against the sides so the tabs at the bottom lip
engage with the notches in the stove legs.
On the Pinnacle, the front tabs will engage behind the
notched cutouts in the base of either side plate. (Fig.
20)
When properly installed, the bottom of the front plate
cannot be pulled away form the sides without lifting it.
NOTE: Be sure the control door can swing out. It
should close against the steel tab stop.
If installing the optional warming shelf, you may find it
easiest to attach it to the top plate before placing the
top in position on the stove. Follow the instructions sup-
plied with the kit.
ST112a
front plate install
fully assembled
1/04
Engage steel tabs
behind the cast
iron bosses
Control Door
Bottom Tabs engage
notch in the leg.
ST112b
Fig. 19 Install the Front Plate. Your Front may look different
from that shown.