6
9. Laying the Logs
Opening the hinged door on the appliance, which is secured by a 10mm nut, gains access to the coals. On no
account should the appliance be operated whilst the door is open except for brief periods during
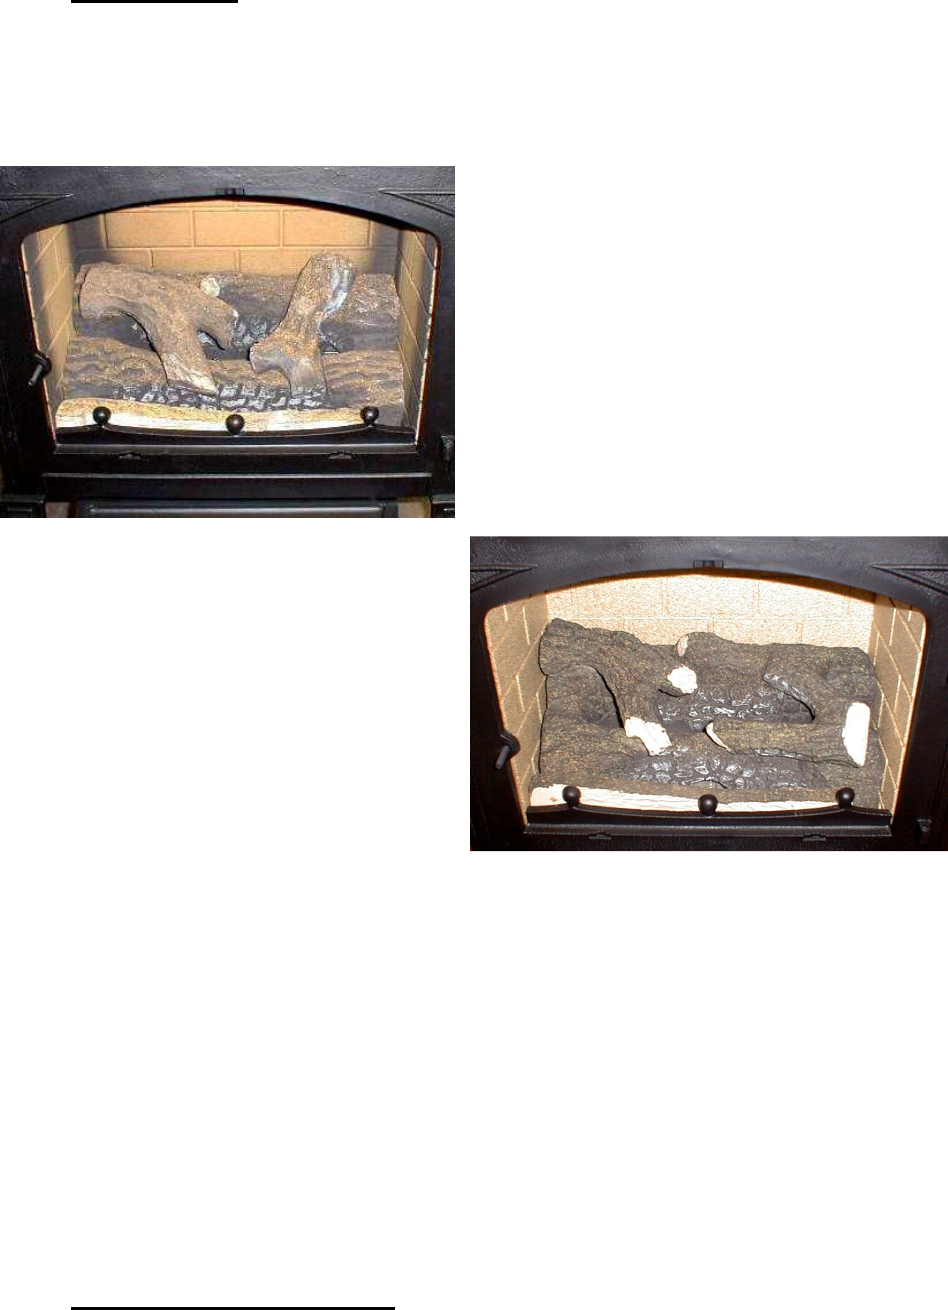
maintenance. Do not lay the log in any way other than that shown.
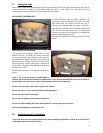
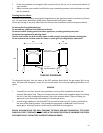
LOG LAYOUT (NATURAL GAS)
The base and front logs are fixed in position and
should only need removing for servicing. The base
log locates onto the burner and the front log is
pushed to the extreme left hand side. Take the 2
loose logs* and position them as shown onto the cut
outs on the base log, taking care to locate them
correctly to ensure clean combustion. No additional
logs should be added to the fire.
Note the pilot position on the right hand side of the
burner.
LOG LAYOUT (LPG PROPANE)
The base and front logs are fitted similar to the
Natural Gas fire. The base log locates onto the
burner and the front log is pushed to the extreme
left hand side as shown. Take the 2 loose logs* and
position them as shown onto the cut outs on the
base log, taking care to locate them correctly to
ensure clean combustion. No additional logs should
be added to the fire.
Note the pilot position on the right hand side of the
burner.
*Note – The 2 top logs may be supplied glued in
position and should not be removed or repositioned. If they become detached then they can be fitted as
per the diagram but must on no account be discarded or fitted in any other way.
Always secure the door closed after laying the fuel effects.
Do not attempt to use any unit with broken or damaged glass.
Do not use the fire with broken logs.
Do not add any additional fuel elements to the fire.
Do not use similar looking parts from other appliances, use only genuine spare parts.
Do not use the appliance for burning waste.
10. Commissioning the Appliance
If the pipes have not been purged of debris do it before lighting the appliance. Failure to do so will result
in blockages within the burner and pilot.


