9
SERVICE
This section provides procedures for testing and
replacing various major components used in this dis-
penser should service become necessary. Refer to
Troubleshooting for assistance in determining the cause
of any problem.
Component Access
WARNING – Disconnect the dispenser from the power
source before the removal of any panel or the replace-
ment of any component.
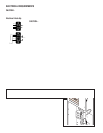
The limit thermostat, liquid level probe, tank heater,
and temperature sensor are located at the top of the
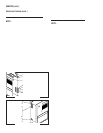
dispenser. Access is gained by removing the top lid,
attached with three 4-40 slotted-head screws.
The triac assembly is located beneath the tank. Access
is gained by removing four feet and the bottom panel
attached with seven 8-32 slotted-head screws.
NOTE - Completely drain the tank before tipping the
dispenser.
WARNING – Inspection, testing, and repair of electrical
equipment should be performed only by qualified ser-
vice personnel. Disconnect the dispenser from the
power source when servicing, except when electrical
tests are required and the test procedure specifically
states to connect the dispenser to the power source.
Electronic Controls ............................................. 10
Limit Thermostat ................................................ 16
Safety Overflow Switch ....................................... 17
Solenoid Valve .................................................... 18
Tank Heater ........................................................ 19
Electronic Control Assembly Troubleshooting:
Check these items first
• Is circuit board popped-out of bracket?
• Is circuit board wet due to misaligned overflow
tube?
• Is water in overflow cup activating float switch?
• Is overflow cup not making good contact with tank?
• Is dispenser being operated with panels removed?


