


8
At the time of air purifier cartridge replacement, if a
powdery
residue is noticed on the tips of the points in the
ionization
array, proceed to clean them by completing the
following
steps:
Step 1 —Turn the heating and cooling system power off.
ELECTRICAL SHOCK AND HIGH VOLTAGE
HAZARD
Failure to follow this w arning could r esult in personal injury
or death.
Before installing o r servicing system, always turn off main
power to system. There may be more than one (1) disconnect
switch.
!
WARNING
Step 2 —Turn the Perfect Airt Air Purifier switch to the off
position.
Step 3 —Remove the Perfect Airt Air Purifier door.
Step 4 —Unplug the power cord and flow sensor cable (if
connected) from the enhancement module 9 ( See Fig. 7 and 8)
Step 5 —Slide out the enhancement module assembly and safety
screen.
CUT HAZARD
Failure to follow this caution may result in personal injury.
Sheet metal parts may have sharp edges or burrs. Use care
and wear appropriate protective clothing and gloves when
handling parts.
!
WARNING
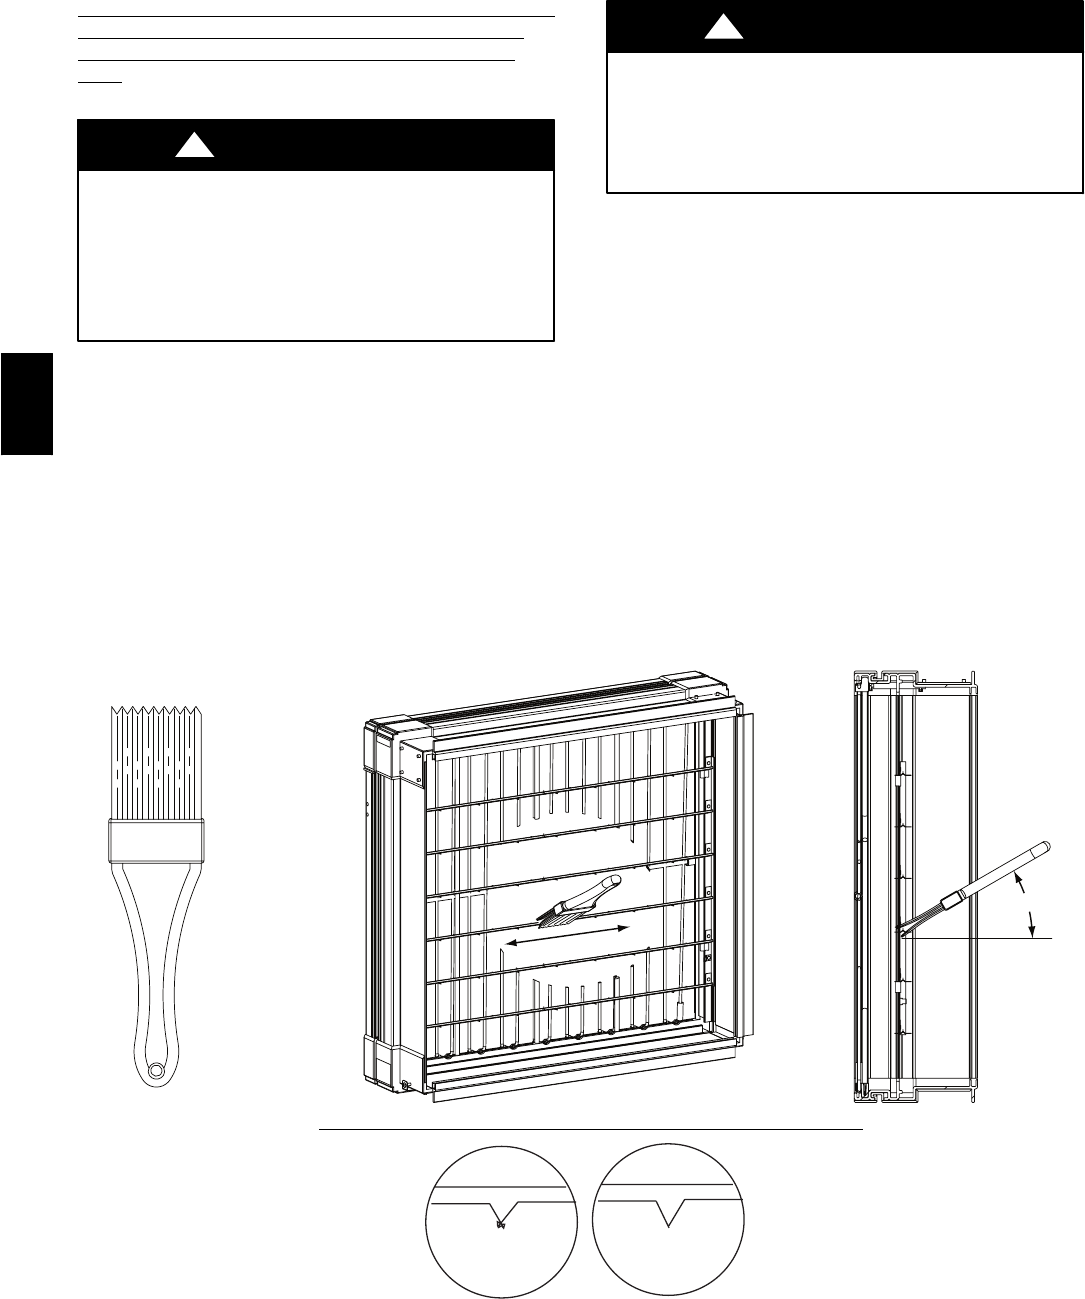
Step 6 —Slide out the Safety Screen and set aside.
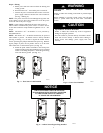
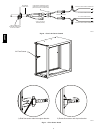
NOTE: Best cleaning tools: 5 inch handle paint brush with 2
inch width (or greater) brush point (synthetic or natural bristle)
(See Fig. 14) or vacuum cleaner with brush attachment.
Step 7 —Gently stroke the ionization pins on the top plane of
each bar with enough brush depth to hit front and back tips of the
points in the ionization array. Use a gentle back and forth
brushing motion to clean any small accumulations from the tips
of the points. If desired, use vacuum cleaner with brush
attachment to gently vacuum the frame and components of
enhancement module.
Step 8 —Reinstall the Safety Screen.
Step 9 —Slide in enhancement module.
Step 10 —Reconnect the power cord and flow sensor cable.
Step 11 — Replace the Perfect Airt Air Purifier Door
Step 12 —Turn the Perfect Airt Air Purifier switch to the on
position.
Step 13 —Turn heating and cooling system power on.
30°
POINTS ARE SHARP! BE VERY CAREFUL DURING CLEANING.
Tip of point with residue
Tip of point after cleaning
A06671
Fig. 14 --- Removal of Deposits from Ionization Pins
GAPAB