


10
11
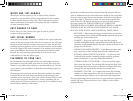
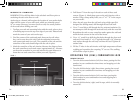
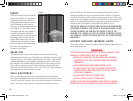
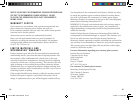
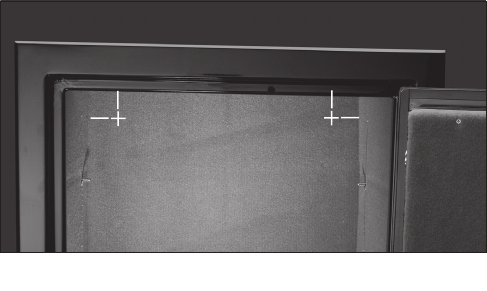
1 Measure 2" from the top and each side of the safe’s top interior
corners. Mark these spots on the safe’s interior with a marker
(Figure 3).
2 Using a sharp utility knife cut a 2" x 2" “X” in the carpet where you
marked. Tape the carpet flaps open using masking tape. Use a 2"
wood bit to drill though the fire-resistant insulation. Do not attempt
to drill through the steel safe body with the wood bit.
3 Use a ½" high-speed bit designed for drilling metal to drill through
the steel safe wall. Once you have drilled though the fire-resistant
material and safe body, mark the center of your holes on the wall.
4 Remove the safe and use a
3
/8" masonry bit to drill the anchor holes.
Reposition the safe over the holes and install the expansion anchors
and washers through the safe interior. Use a minimum of
3
/8" x 4"
expansion-type anchor bolts and 1¾" steel washers inside the safe
body to reinforce the safe wall at the anchor position.
5 Fill the holes in the safe interior with high-temperature silicone
caulking and reposition the carpeting “X” cut out. The caulking will
hold the carpet in place.
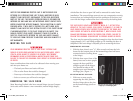
IMPORTANT: Pre-drill wall anchor holes in the safe prior to
anchoring the safe to the floor or wall. See “Anchoring Your
Safe to a Wall” on page 10.
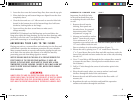
9 Fill the 2" openings in the fire-resistant material with high
temperature silicone caulking. The caulking will seal the opening
and prevent hot gases from entering the safe during a fire. (Not
required on models that are not fire-resistant.)
10 Replace the floor panel, elevation brace and interior shelving.
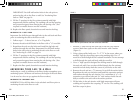
ANCHORING TO A JOIST FLOOR
Important: Pre-drill the pass-through holes in the safe back and floor
prior to anchoring the safe to the floor or wall.
1 Follow steps 1 – 5 above, but use
3
/8" x 4" lag bolts.
2 Remove the safe and drill holes in the floor with a
5
/16" wood bit.
3 Reposition the safe over the holes and install the lag bolts and
washers through the safe floor. Important: Pre-drill wall anchor
holes in the safe prior to anchoring the safe to the floor or wall.
See “Anchoring to a Wall” on page 10.
4 Fill the 2" openings in the fire-resistant material with high
temperature silicone caulking. The caulking will seal the opening
and prevent hot gases from entering the safe during a fire. (Not
required on models that are not fire-resistant.)
5 Replace the floor panel, elevation brace and interior shelving.
ANCHORING YOUR SAFE TO A WALL
Anchoring to a wall, in addition to the floor, further strengthens your
anchoring system. (Without wall anchors, the height of the safe allows
it to be used as a lever to pry against the floor anchors.)
ANCHORING TO A MASONRY WALL
IMPORTANT: Pre-drill the holes in the safe back and floor prior to
anchoring the safe to the floor or wall.
figure 3
Mark 2" from the top and each side of the safe wall to locate anchor holes.
2"
2" 2"
2"
07-137-BSF_Safe OM.indd 10-11 7/21/08 11:13:08 AM