4039
Monogramming and
Embroidering
Pattern Stitch Length Foot Other
3, 4 or 5 Any None Darning plate
PREPARING FOR MONOGRAMMING AND EM-
BROIDERING
1. Place the darning plate on the needle plate.
2. Set the Pattern Selection Dial to the appropriate
Zigzag Stitch setting.
3. Draw the lettering (for monogramming) or design
(for embroidering) on the surface of the fabric.
4. Stretch the fabric between embroidery hoops as
firmly as possible with the underside of the fabric
on the bottom of the inside hoop.
5. Place the work under the needle and lower the
presser bar with the foot removed.
6. Pull the lower thread up through the work at the
starting position by turning the balance wheel and
make a few holding stitches.
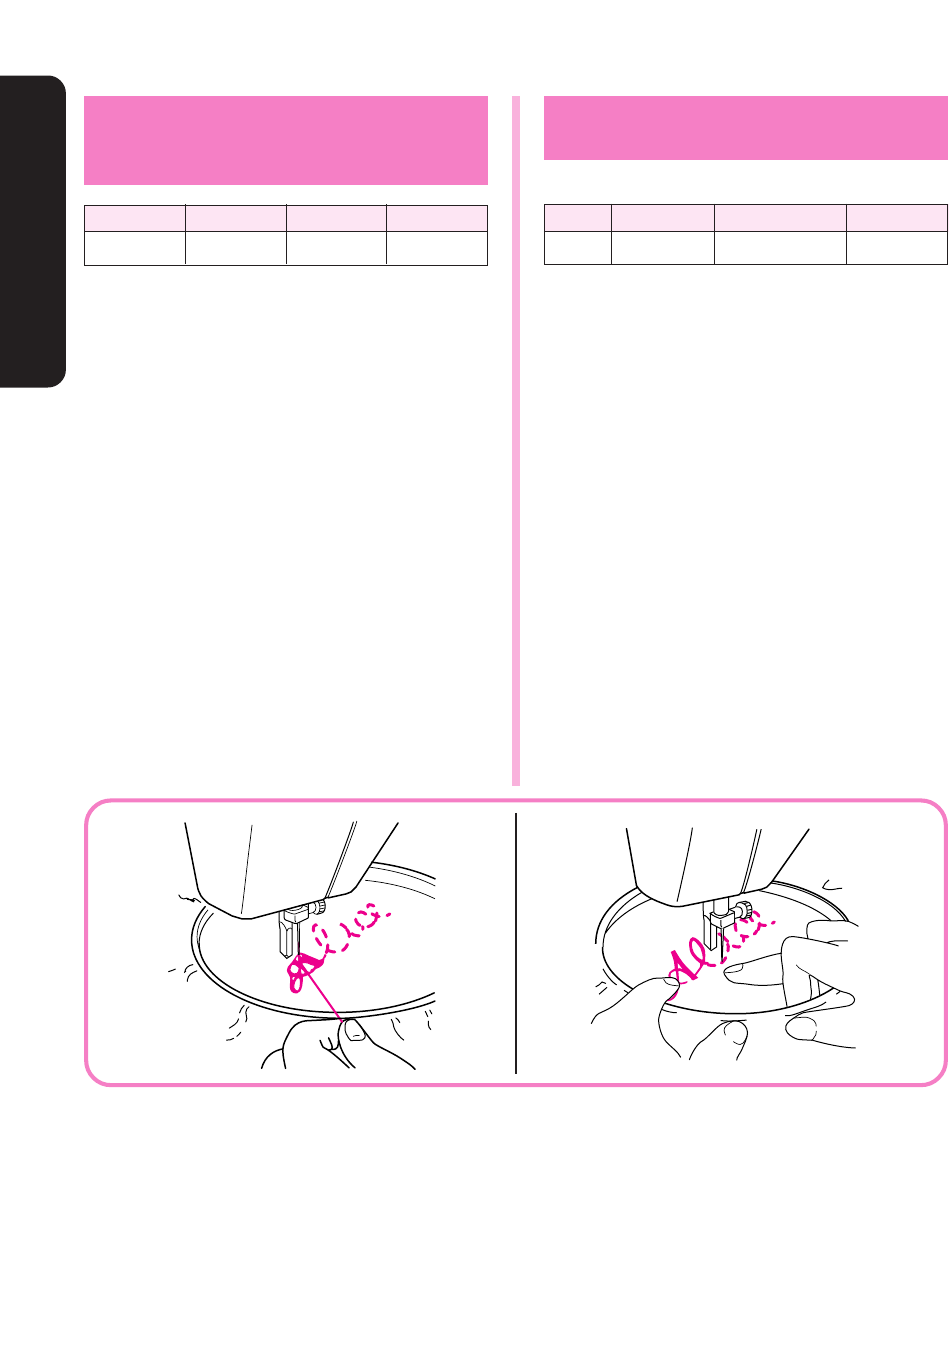
7. Grip the hoop with the thumb and forefingers of
both hands while pressing the fabric with the
middle and third fingers and supporting the out-
side of the hoop with your smaller fingers.
Monogramas y bordados
Puntada
Largo de puntada
prensatelas Otros
3, 4 ó 5 Cualquiera
Quitarlo, sin prensatelas
Placa de zurcir
Preparación para monogramas y bordados
1. Instale la placa de zurcir sobre la placa de agujas.
2. Ponga el selector de puntadas en la puntada
zigzag apropiada.
3. Dibuje las letras (para monogramas) o el diseño
(para bordados) en el derecho del tejido.
4. Estire el tejido en el bastidor tanto como pueda y
si es posible con el revés abajo del círculo interior.
5. Coloque la tela debajo de la aguja y baje la barra
del prensatelas, aunque no haya ningún
prensatelas puesto.
6. Girando la ruedecilla, pase el hilo inferior por el
trabajo y cosa unas cuantas puntadas para
asegurarlo.
7. Sujete el bastidor con el pulgar e índice de cada
mano, presione el tejido con los dedos medios y
anulares y aguante los exteriores del bastidor con
los meñiques.
USING ATTACHMENTS AND APPLICATIONS
USO DE ACCESORIOS Y APLICACIONES


