32
31
Making a Buttonhole
Pattern Stitch Length Foot
a bc d F-1.5 Buttonhole foot
NOTE:
1. It is recommended to practice making a button-
hole on a scrap piece of fabric before attempting
it on the actual garment.
2. When making buttonholes on soft fabrics, place
stabilizer material on the underside of the fabric.
Buttonhole-making is a simple process that pro-
vides reliable results.
MAKING A BUTTONHOLE
1. Using tailor’s chalk, mark the position and length
of the buttonhole on the fabric.
2. Attach the buttonhole foot and push the silver
frame back until it stops with the plastic insert in
the front of the metal frame.
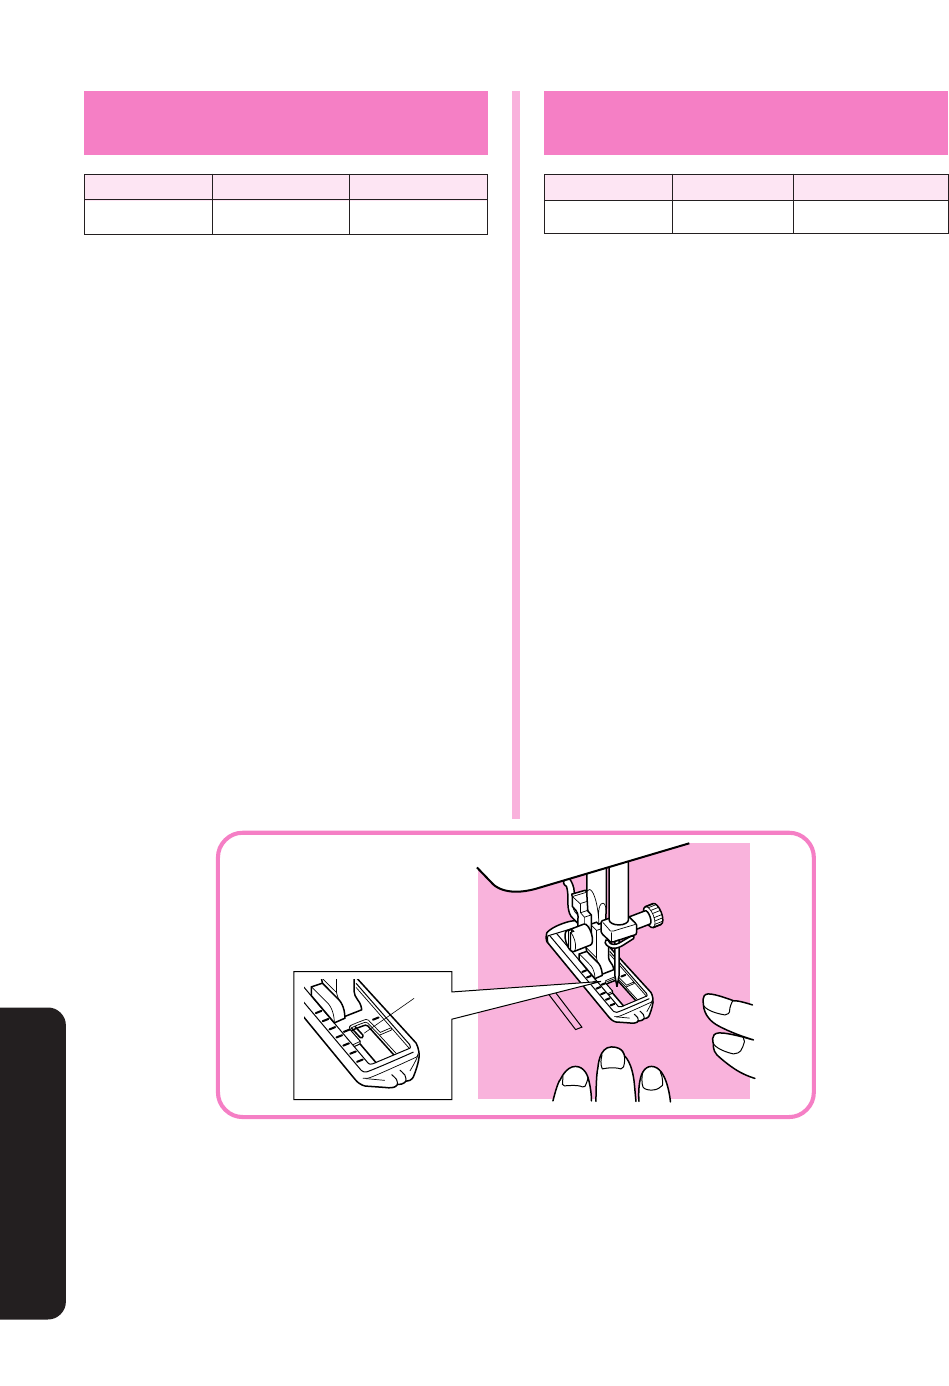
3. The front bar tack will be sewn first. Place the
fabric under the presser foot so that the center of
the front bar tack mark is directly under the center
of the presser foot and aligned with the two red
lines as shown below.
1 Front of chalk mark
Para coser ojales
Número de puntada Largo de puntada Prensatelas
a bc d F-1,5
Prensatelas para ojales
NOTA:
1. Se recomienda practicar la costura de ojales en
un pedazo de tejido antes de hacerlo realmente
en las prendas.
2. Para hacer ojales en materiales muy finos, coloque
un material estabilizador debajo del tejido.
La función que le permite coser ojales es un
proceso simple que ofrece increíbles resultados.
COSIDO DEL OJAL
1. Con jaboncillo, marque la posición y el largo del
ojal en el tejido.
2. Instale el prensatelas para ojales y vuelva a
empujar el marco plateado hasta que se pare y
que la inserción plástica se encuentre delante del
marco metálico.
3. Primero, se cose el remate de la parte delantera
del ojal. Coloque el tejido debajo del prensatelas
de tal manera que la marca del centro de la barra
caiga directamente debajo del centro del
prensatelas y quede alineada con las dos líneas
rojas, tal como ilustra do.
1
Parte delantera de la marca con jaboncillo.
1
BUTTONHOLE AND BUTTON SEWING
OJALES Y COSTURA DE BOTONES


