


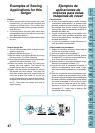
43
TABLE OF
CONTENTS
Chapter
1
Chapter
2
Chapter
3
Chapter
4
Chapter
5
Chapter
6
Chapter
7
Chapter
8
Chapter
9
Chapter
10
Chapter
11
Chapter
12
Chapter
13
Chapter
14
Chapter
15
Chapter
16
Chapter
17
Chapter
18
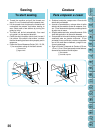
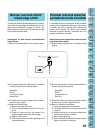
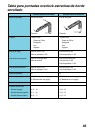
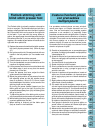
6 Press the stitch finger release lever to remove
the stitch finger.
7 Storage for the stitch finger is provided on the
inside of the front cover illustrated.
NOTE:
Make sure to install stitch finger when sewing regular
overlock stitches.
1Upperlooper
2Stitch finger
3Stitch finger release lever
4Front cover
5Stitch finger holder
6Stitch finger
6
Apriete la palanca de liberación de la uñeta de
puntadas para retirar la uñeta.
7
El alojamiento de la uñeta de puntada se
encuentra en el interior de la tapa delantera
ilustrada.
NOTA:
Asegúrese siempre de instalar la uñeta de puntadas
antes de coser con puntadas overlock normales.
1
Ancora superior
2
Uñeta de puntadas
3
Palance de la uñeta de puntadas
4
Tapad elantera
5
Soporte para uñeta de puntada
6
Uñeta de puntadas
B
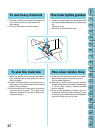
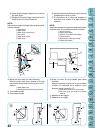
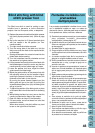
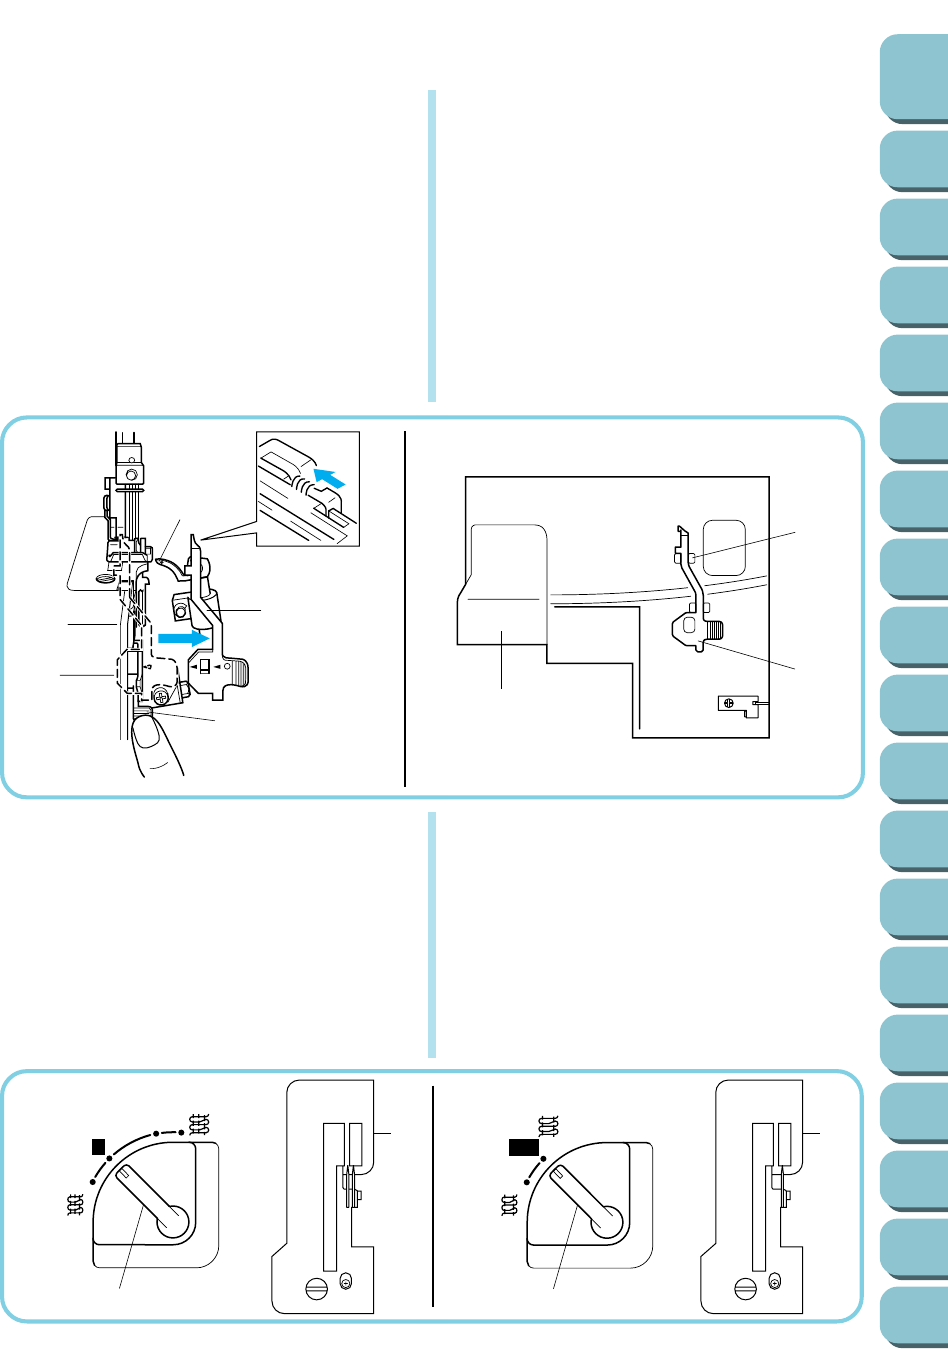
(5)Adjust the stitch width for rolled hemming.
Move the stitch width lever (located on the left
side of the machine toward the front) up to the “R”
position.
7Stitch width lever
8Needle plate with stitch finger removed
A Two-needle models
B One-needle models
(5)Ajuste el ancho de las puntadas para borde
enrollado.
Mueva la palanca de anchura de las puntadas
(situada a la izquierda de la máquina, hacia
adelante) hacia la posición “R”.
7
Palanca de anchura de las puntadas
8
Placa de aguja con uñeta de puntadas
extraída
A
Modelos de dos agujas
B
Modelos de una aguja
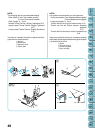
A
2
3
1
8
7
R
7
6
5
8
R
3.5
7
5
6
4