


55
BUTTONHOLE AND BUTTON SEWING
OJALES Y COSTURA DE BOTONES
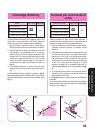
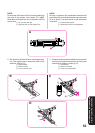
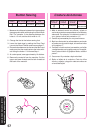
1 Right row
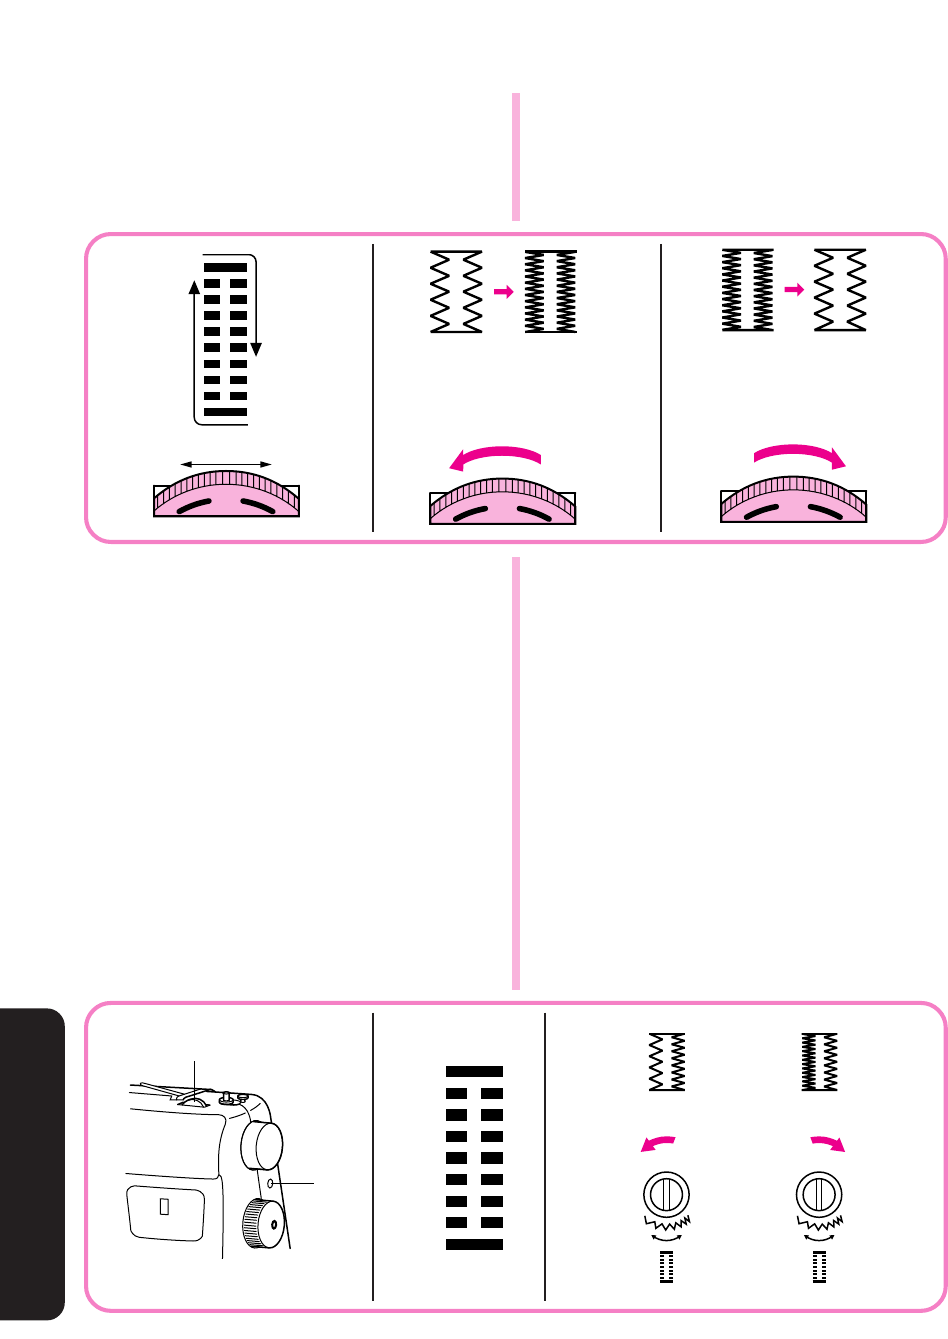
2 STITCH LENGTH
3 Shorter
4 Longer
5 Adjusted stitch
1
Lado derecho
2
Largo de puntada
3
Más corto
4
Más largo
5
En caso que
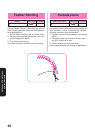
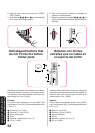
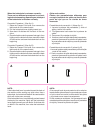
3. After obtaining a satisfactory feeding on the right
side, stitch the left side of the buttonhole and
observe the feeding.
4. If the left side is too coarse or fine compared to the
right side, adjust the buttonhole fine adjustment
screw as described below.
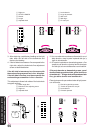
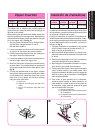
If the left side is too coarse, turn the screw with
the enclosed large screwdriver in the – direction.
If the left side is too fine, turn the screw with the
enclosed large screwdriver in the + direction.
This adjustment allows both sides of the buttonhole
to appear uniform.
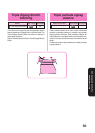
6 Stitch length dial
7 Buttonhole fine adjusting screw
8 Right row
9 Adjusted stitch
3. Una vez obtenida una buena alimentación en el
lado derecho, cosa la parte izquierda del ojal y
vigile la alimentación.
4. Si la parte izquierda es demasiado gruesa o fina
respecto a la derecha, ajuste el tornillo de ajuste
fino del ojal, tal como se describe a continuación.
Si la parte derecha es demasiada gruesa, con el
destornillador grande incluido, gire el tornillo en
el sentido del –. Si la parte derecha es demasiada
fina, gire dicho tornillo en el sentido del +.
Este ajuste permite que ambos lados del ojal parez-
can uniformes.
6
Dial de longitud de puntada
7
Tornillo de ajuste fino de ojal
8
Lado derecho
9
Puntada ajustada
2
34
F
1
F
5
F
5
7
6
8
+ – + –
99