


35
Button Sewing
1. Measure the distance between the buttonholes and set the
pattern selection dial to the Zigzag Stitch (2, 3 or 4) with the
desired width.
2. Attach the button sewing foot.
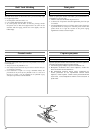
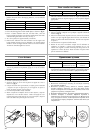
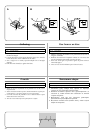
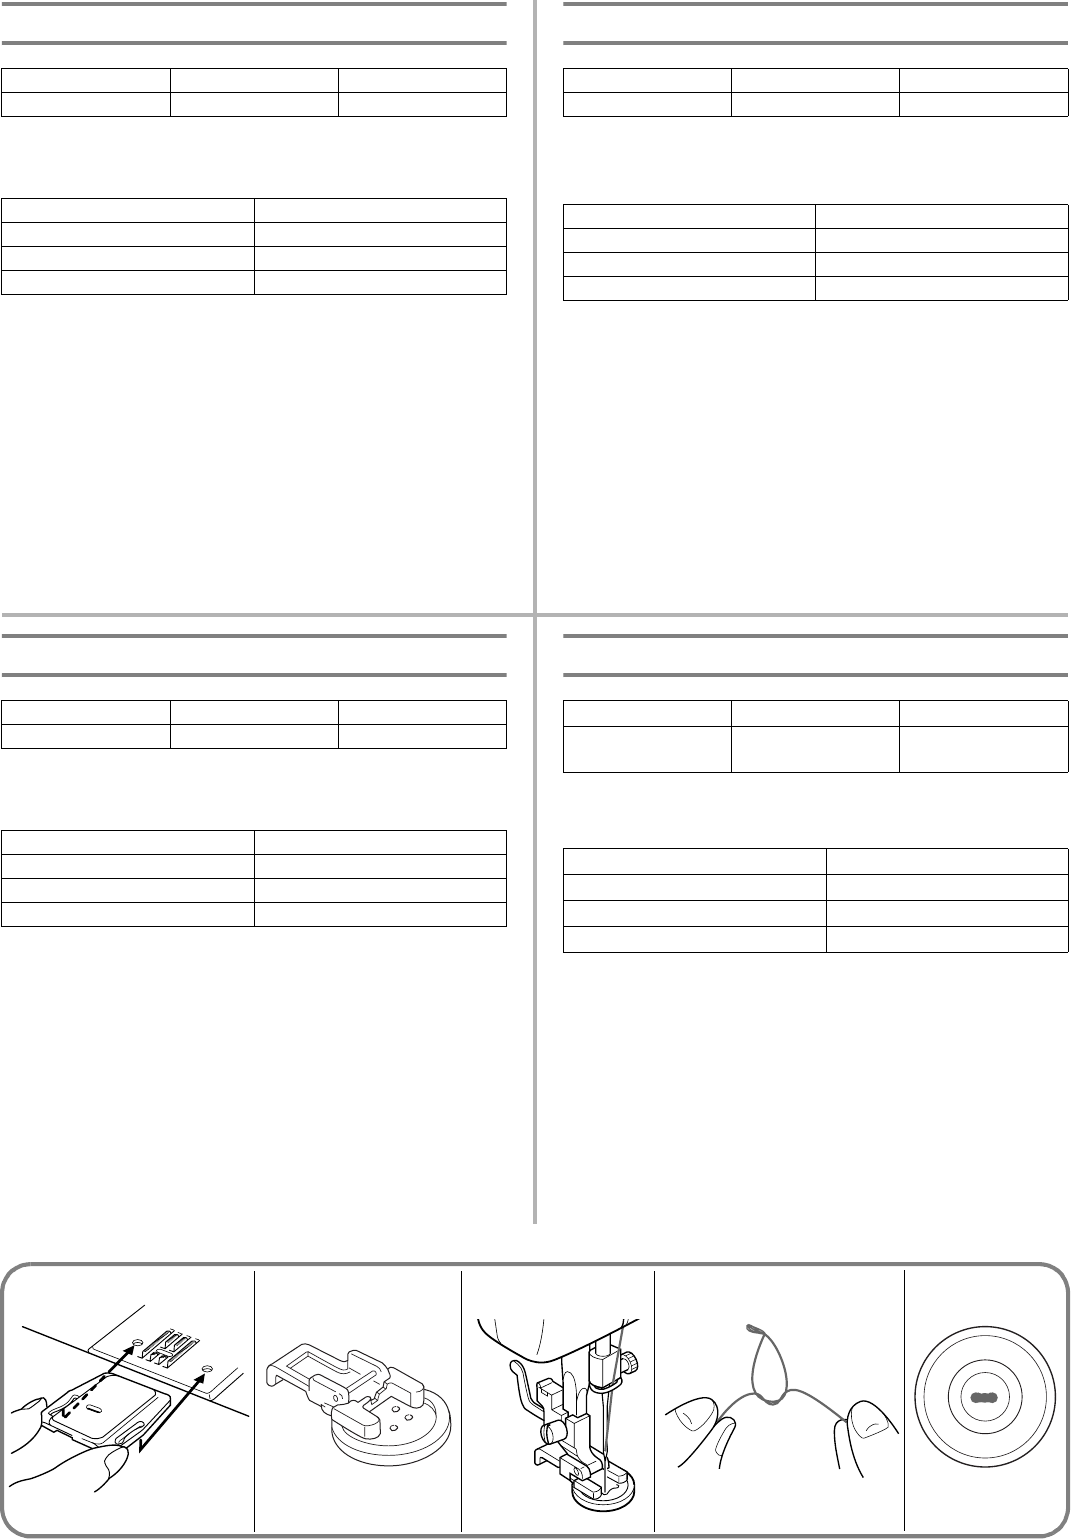
3. Place the darning plate on the needle plate as shown in fig. A.
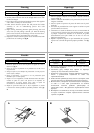
4. Place a button between the foot and the fabric, turn the
balance wheel and make sure that the needle enters the holes
without hitting the button. If it hits, see step 1.
5. At a slow speed, sew approximately 10 stitches.
6. Remove the material from the machine. Cut the upper and
lower threads leaving 15cm (6") lengthes. Use a hand-sewing
needle to draw the upper thread to the back of the material.
Tie the two threads together to secure.
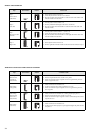
Pattern Foot Other
2, 3 or 4 Button Sewing Foot Darning Plate
Distance between holes Pattern
1.6mm (1/16") 2
3.2 mm (1/8") 3
4.8 mm (3/16") 4
Pour coudre un bouton
1. Mesurer la distance entre les orifices et régler le sélecteur de
modèle de point sur le point zigzag (2,3 ou 4) ayant la largeur
appropriée.
2. Fixer le pied pour boutons.
3. Placer la plaque à repriser sur la plaque à aiguille comme le
montre la fig. A.
4. Placer un bouton entre le pied et le tissu, tourner le volant et
veiller à ce que l’aiguille pique dans les trous sans heurter le
bouton. Si jamais elle heurte le bouton, veuillez vous reporter
au point 1.
5. Coudre environ 10 points à faible vitesse.
6. Retirer le tissu de la machine. Couper les fils inférieur et
supérieur en laissant à chacun une longueur de 15 cm.
Utiliser une aiguille à coudre normale pour faire passer le fil
supérieur à l’envers du tissu. Nouer les deux fils pour éviter
que la couture ne se défasse.
Modèle Pied-de-biche Autre
2, 3 ou 4 Pied pour boutons Plaque à repriser
Distance entre les orifices Modèle
1,6 mm 2
3,2 mm 3
4,8 mm 4
Coser botones
1. Mida la distancia entre los distintos agujeros del botón y ponga el
selector de puntadas en la puntada zigzag (2, 3 ó 4) con el ancho
deseado.
2. Instalar el prensatelas para botones.
3. Instale la placa de zurcir sobre la placa de agujas tal como se
ilustra en la fig. A.
4. Coloque un botón entre el prensatelas y el tejido, gire la ruedecilla
y asegúrese de que la aguja pase por los agujeros sin picar el
botón. Si golpea el botón, véase el punto 1.
5. Cosa unas 10 puntadas a baja velocidad.
6. Retire el tejido de la máquina. Corte los hilos inferior y superior
dejando unos 15 cm de hilos sueltos. Utilice una aguja de coser
normal para pasar el hilo superior en el revés del tejido y haga un
nudo con ambos hilos para asegurar la costura.
Número de puntada Prensatelas Otros
2, 3 ó 4
Prensatelas para botones
Placa de zurcir
Distancia entre los agujeros Número de puntada
1,6mm 2
3,2 mm 3
4,8 mm 4
Пришивание пуговиц
1. И
змерьте расстояние между отверстиями пуговицы и
установите ручку выбора вида строчки в положение Строчка
«зигзаг» (2, 3 или 4) в соответствии с требуемой шириной.
2. Установите лапку для пришивания пуговиц.
3. Поместите штопальную пластину на игольную пластину
как показано на рис. A.
4. Положите пуговицу между лапкой и тканью; вращая
маховик машины, убедитесь, что игла при шитье точно
входит в отверстия и не попадает по пуговице. Если игла
ударяет по пуговице, повторите шаг 1.
5. Прошейте приблизительно 10 стежков на небольшой скорости.
6. Снимите материал с машины. Обрежьте верхнюю и
нижнюю нити, оставляя концы длиной 15 см. Используйте
иглу для ручного шитья, чтобы протащить верхнюю нить
на изнаночную сторону материала. Свяжите обе нитки для
закрепления.
Вид строчки Лапка Прочее
2, 3 или 4 Лапка для
пришивания пуговиц
Штопальная
пластина
Расстояние между отверстиями Вид строчки
1,6 мм 2
3,2 мм 3
4,8 мм 4